

Nothing beats pillowy marshmallows on sticks dipped in smooth semi-sweet chocolate and finished with crunchy sprinkles for a playful, bite-sized treat. Chocolate Dipped Marshmallows are a beginner-friendly dessert that's as playful as it is delicious – perfect for parties, gift giveaways, or an anytime sweet pick-me-up. In this article, I’ll walk you through each step for whipping up these crowd-pleasing treats that set in minutes, plus share tips to make them uniquely yours. Let’s dip in!
Key Ingredients
Before you start, gather these simple ingredients that give you the perfect fluffy center, glossy chocolate shell, and optional crunch.
- 1 bag (10 oz) of large marshmallows: Soft, airy base that holds the chocolate coating for a fluffy, sweet bite.
- 1 cup of semi-sweet chocolate chips: Rich melting chocolate that forms a shiny, flavorful shell.
- 2 tablespoons of coconut oil or vegetable shortening: Adds a silky texture and sheen to the melted chocolate.
- 1 cup of chocolate sprinkles or finely chopped nuts (optional): Provides a fun, crunchy finish and extra flavor contrast.
- Lollipop sticks or wooden skewers (for serving): Makes dipping easy and transforms each marshmallow into a fun pop treat.
- Parchment paper (for cooling): Prevents sticking and keeps your treats looking clean as the chocolate sets.
How To Make Chocolate Dipped Marshmallows
Ready to transform simple marshmallows into delightful chocolate pops? This step-by-step guide will help you set up your station, melt chocolate to the perfect consistency, and master the dip-and-decorate technique so every marshmallow pop looks like a little work of art.
1. Prepare your workspace: Gather all ingredients and tools—microwave-safe bowl, heatproof spatula, and a baking sheet lined with parchment paper—to keep everything organized and within reach.
2. Skewer the marshmallows: Insert a lollipop stick or wooden skewer into each marshmallow about halfway to ensure stability during dipping.
3. Combine chocolate and oil: Place semi-sweet chocolate chips and coconut oil (or vegetable shortening) in the microwave-safe bowl; the oil creates a smoother, glossier chocolate.
4. Melt in intervals: Microwave for 30-second intervals, stirring thoroughly between each, until the chocolate is completely melted and velvety. Avoid overheating to prevent burning.
5. Dip the marshmallows: Hold each skewer and immerse the marshmallow into the chocolate, turning and tapping gently to remove excess coating.
6. Add toppings: While the chocolate is still wet, sprinkle on chocolate sprinkles or chopped nuts to your liking.
7. Transfer to sheet: Place each dipped pop on the prepared parchment paper, spacing them out to avoid sticking.
8. Let the chocolate set: Allow pops to rest at room temperature until firm, or chill in the refrigerator for 10–15 minutes for faster setting.
9. Serve or gift: Once the chocolate is fully set, enjoy your marshmallow pops or package them in cute bags for sharing.
Serving Suggestions
Chocolate Dipped Marshmallows aren’t just delicious—they’re the life of the party. Whether you’re hosting a casual game night or decking out holiday celebrations, these pops add a playful touch to any spread. They look beautiful on dessert tables, pair well with beverages, and even make thoughtful DIY gifts. Here are some ideas to serve them in style and impress your guests every time.
- Dessert platter centerpiece: Arrange pops upright in a decorated mug or vase filled with dried beans or candies to create a festive display.
- Hot chocolate stirrers: Serve pops alongside steaming mugs of cocoa so guests can swirl them in for an extra chocolate kick.
- Party favor bundles: Package 3–4 pops in cellophane bags tied with a ribbon, turning these treats into delightful take-home gifts.
- Ice cream toppers: Stick a chocolate-dipped marshmallow on scoops of vanilla or chocolate ice cream for a whimsical garnish.
Tips For Perfect Chocolate Dipped Marshmallows
These marshmallow pops are forgiving and fun, but a few simple tweaks can turn them into showstoppers. Make sure your marshmallows are at room temperature so the chocolate adheres smoothly without cracking. Stir the melted chocolate gently to keep it glossy, and work in small batches to prevent it from cooling too quickly. Hold pops by the skewer to avoid fingerprints, and allow each coat to fully set before adding another layer or stacking. With these tips, every bite will be as perfect as it looks.
- For a fun twist, try using white chocolate or milk chocolate instead of semi-sweet chocolate.
- Experiment with different toppings like crushed candy canes or shredded coconut for alternative flavors and textures.
- These marshmallows can be stored in an airtight container for up to a week, keeping each pop fresh and fluffy.
- This recipe is perfect for parties, special occasions, or just a delightful treat anytime—customize colors and sprinkles for themed events.
How To Store It
Keeping these chocolate-dipped marshmallows fresh is a breeze when you store them properly. Whether you’re prepping in advance for a celebration or saving extras, the right container and conditions will preserve that glossy chocolate shell and soft center.
- Store in a single layer inside an airtight container to prevent pops from sticking together.
- Place parchment paper between layers if you need to stack pops, ensuring the coating stays pristine.
- Keep at room temperature away from direct sunlight or heat sources to preserve the chocolate’s glossy sheen.
- For a firmer bite, chill in the refrigerator, then bring back to room temperature before serving for the best texture.
Frequently Asked Questions
Got questions? Here are answers to the most common queries about making and storing these chocolate-dipped marshmallow pops.
- How long does it take to prepare and set the chocolate dipped marshmallows?
A: From start to finish, it takes about 20 to 30 minutes. This includes about 5 minutes to insert sticks and melt the chocolate, 10 to 15 minutes to dip and decorate each marshmallow, and another 10 to 15 minutes for the chocolate to harden at room temperature (or a shorter 10-minute chill in the refrigerator).
- What can I do if my melted chocolate becomes too thick or starts to seize?
A: If the chocolate thickens or seizes, gently stir in an extra ½ teaspoon of coconut oil or vegetable shortening at a time until the mixture loosens. Warm it briefly in 10-second microwave bursts, stirring in between. Avoid overheating by keeping intervals short and stirring thoroughly.
- Can I melt the chocolate using a double boiler instead of a microwave?
A: Yes. Fill a saucepan with about an inch of water, bring it to a gentle simmer, then place a heatproof bowl on top without touching the water. Add the chocolate chips and oil, stirring constantly until fully melted and smooth. This method offers more control and reduces the risk of overheating.
- What are some creative variations on toppings and chocolate types?
A: Swap semi-sweet for white or milk chocolate, or try colored candy melts for festive occasions. After dipping, roll the marshmallows in crushed candy canes, shredded coconut, chopped nuts, rainbow sprinkles, or even mini cookie crumbs. Work quickly so the toppings adhere before the chocolate sets.
- How should I store leftover chocolate dipped marshmallows?
A: Once the chocolate is fully hardened, arrange the marshmallows in a single layer in an airtight container. Keep them at room temperature away from direct heat or sunlight. They will remain fresh for up to one week. If you prefer a firmer bite, store them in the refrigerator, but bring them back to room temperature before serving for best texture.
- Can I prepare these marshmallows in advance for a party or event?
A: Absolutely. Dip and decorate the marshmallows up to 24 hours before your event. Store them in an airtight container between layers of parchment paper to prevent sticking. For the freshest taste and appearance, add any extra delicate toppings like crushed peppermint right before serving.
- Why is coconut oil or vegetable shortening added to the chocolate, and can I omit it?
A: The oil helps thin the melted chocolate for smoother, glossier coatings and easier dipping. Omitting it may result in a thicker, more brittle chocolate shell that can crack. If you prefer not to use oil, try reducing the chocolate chips slightly and stirring gently but be prepared for a firmer finish.
What Makes This Special
There’s a reason these Chocolate Dipped Marshmallows steal the show: the irresistibly soft center meets a shiny, crisp chocolate shell in a perfectly bite-sized pop. The recipe stays simple—great for beginners—yet it feels like gourmet fun when you hand them out or gift them. Feel free to print this page, tuck it into your recipe box, and revisit whenever you need a quick crowd-pleaser. I’d love to hear how yours turn out, so drop a comment or question below if you give this sweet project a spin.
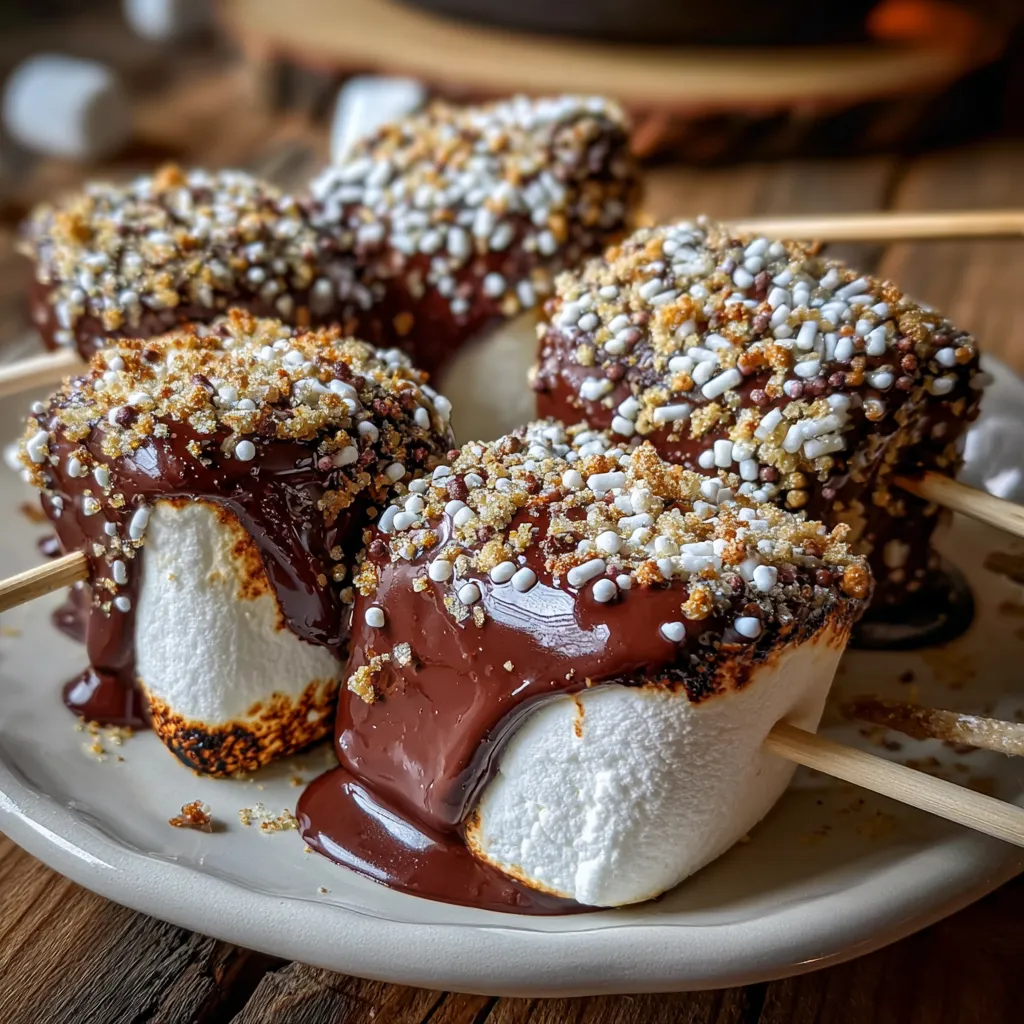

Chocolate Dipped Marshmallows
Description
Soft marshmallows are threaded onto sticks, dipped in smooth, melted semi-sweet chocolate, then rolled in sprinkles or nuts. They set quickly for a fun, crowd-pleasing dessert or DIY gift.
Ingredients
Instructions
-
Begin by preparing your workspace. Gather all the ingredients and tools you will need, including a microwave-safe bowl, a heatproof spatula, and a baking sheet lined with parchment paper.
-
Insert a lollipop stick or wooden skewer into each marshmallow. Ensure it goes in about halfway for better stability during dipping.
-
In a microwave-safe bowl, add the semi-sweet chocolate chips and coconut oil (or vegetable shortening). The oil helps to give the chocolate a smoother consistency.
-
Microwave the chocolate mixture in 30-second intervals, stirring between each interval. Continue this until the chocolate is fully melted and smooth. Be careful not to overheat, as burnt chocolate can become unusable.
-
Once melted, take each marshmallow and dip it into the melted chocolate, making sure to coat it completely. You can swirl it and tap gently to remove any excess chocolate.
-
If desired, immediately sprinkle chocolate sprinkles or chopped nuts onto the chocolate-coated marshmallow while it is still wet.
-
Place the dipped marshmallow onto the prepared baking sheet lined with parchment paper. Repeat this process with the remaining marshmallows.
-
After dipping all the marshmallows, let them sit at room temperature until the chocolate hardens. You can also place them in the refrigerator for about 10-15 minutes to speed up the hardening process.
-
Once the chocolate is set, your chocolate dipped marshmallows are ready to enjoy! Serve them as is or package them in cute bags for gifts.
Note
- For a fun twist, try using white chocolate or milk chocolate instead of semi-sweet chocolate.
- Experiment with different toppings like crushed candy canes or shredded coconut for alternative flavors.
- These marshmallows can be stored in an airtight container for up to a week.
- This recipe is perfect for parties, special occasions, or just a delightful treat anytime.

