

There’s something about chicken chimichangas that feels like wrapping up all your favorite flavors in one satisfying, crispy package. These aren’t your run-of-the-mill tortillas—no way! We’re talking about Crispy Chicken Chimichangas That Will Ignite Your Taste Buds! Each bite is a delightful dance of tender, seasoned chicken, smooth refried beans, and melty cheese, all hugged by a golden, crunch-tastic shell. Whether you’re whipping these up for a cozy weeknight dinner or a festive weekend gathering, you’re in for a treat. With an intermediate difficulty level, you’ll spend around 20 minutes prepping your ingredients, 30 minutes frying and baking (if you choose that route), and a 10-minute rest to let all those juices settle. Clocking in at roughly 550 calories per serving, these chimichangas make for a hearty lunch or dinner that hits the comfort-food sweet spot every time.
As a passionate home cook, I love how this recipe turns simple pantry staples—like flour tortillas, refried beans, and shredded cheese—into a swoon-worthy meal that feels extra special. Savor the bold flavors of seasoned chicken, creamy refried beans, and gooey cheese all wrapped in a crispy tortilla: it’s no wonder these chimichangas earn a permanent spot in my recipe rotation. From the first sizzle of the chicken in the pan to the triumphant unveiling of freshly fried pockets, the journey is half the fun. Plus, they’re ridiculously shareable, so round up your favorite people, pile on the salsa and guacamole, and let the feasting begin. Whether you’re a seasoned Mexican-food fanatic or a curious newcomer, these chimichangas promise a fiesta of flavor that’s well worth the journey.
KEY INGREDIENTS IN CHICKEN CHIMICHANGAS
Before we dive into the frying pan fun, let’s get acquainted with the star players of this recipe. Every ingredient plays its part in building layers of flavor, texture, and that irresistible mouthfeel that makes chimichangas so unforgettable.
- Chicken breasts: Provides lean, juicy protein as the hearty base for each chimichanga, shredding into tender strands that soak up spices.
- Olive oil: The cooking medium that helps brown the chicken and soften aromatics, adding a fruity depth to every bite.
- Onion: Offers natural sweetness and a subtle crunch when sautéed, balancing the bold spice blend.
- Garlic: Delivers an aromatic punch that complements the earthy flavors of cumin and chili powder.
- Ground cumin: Brings warm, smoky undertones that define the essence of Mexican-inspired seasoning.
- Chili powder: Infuses a gentle heat and rich color, elevating the overall flavor profile.
- Paprika: Adds a mild smokiness and vibrant hue, making each chimichanga look as good as it tastes.
- Salt: Essential for enhancing all the individual flavors and drawing out moisture from the chicken.
- Black pepper: Introduces a subtle piquancy that keeps the palate intrigued.
- Chicken broth: Provides a simmering liquid that tenderizes the shredded chicken and intensifies the spice coating.
- Shredded cheese: Melts into creamy, gooey ribbons that bind the filling together and create that luscious pull.
- Refried beans: Serve as a creamy, protein-rich layer that helps the chicken mixture adhere to the tortilla.
- Sour cream: Adds a cool, tangy contrast that cuts through the richness of the fried shell.
- Large flour tortillas: The vessel that wraps all the delicious components into neat packages, turning soft tortilla into a crispy surprise.
- Vegetable oil: Used for deep frying, it achieves that hallmark golden-brown exterior without overpowering the fillings.
- Optional toppings: Salsa, guacamole, lettuce, diced tomatoes, and chopped cilantro grant fresh bursts of color, flavor, and texture to finish your chimichangas with flair.
HOW TO MAKE CHICKEN CHIMICHANGAS
Roll up your sleeves and get ready for some hands-on fun. This guide will walk you through each step, guaranteeing perfectly cooked chicken, a robust spice blend, and a tender-crispy tortilla shell.
1. In a medium pan, heat the olive oil over medium heat. Add the chicken breasts and cook for about 6–7 minutes on each side until they are fully cooked with an internal temperature of 165°F (74°C). Remove the chicken from the pan and set it aside on a plate to cool.
2. Using the same pan, add the chopped onion and sauté for approximately 3 minutes until it becomes soft and translucent. Stir in the minced garlic and continue cooking for an additional 30 seconds, just until the garlic turns fragrant and lightly golden.
3. Once the chicken has cooled enough to handle, shred it using two forks (or your clean hands) into bite-sized pieces. Return the succulent shreds to the pan, mixing them through the aromatic onions and garlic.
4. Sprinkle in the ground cumin, chili powder, paprika, salt, and black pepper. Stir thoroughly so the shredded chicken is evenly coated with the spice mixture. Pour in the chicken broth, bring to a gentle simmer, and let it cook for about 5 minutes until the liquid reduces by half, concentrating those flavors.
5. While the chicken simmers, warm each flour tortilla in a dry skillet over low heat or microwave for a few seconds to make them pliable and resistant to tearing.
6. Lay a warmed tortilla flat and spread a thin layer of refried beans down the center. Spoon a generous portion of the seasoned chicken mixture on top, then finish with a sprinkle of shredded cheese for that ooey-gooey magic.
7. Fold the tortilla’s sides inward, then roll it up tightly, tucking in the edges to secure the filling inside a neat, compact roll.
8. In a deep frying pan, heat enough vegetable oil over medium-high heat so the chimichangas can float slightly. Carefully place them seam-side down and fry for 3–4 minutes on each side, or until they achieve a golden brown, extra-crispy crust.
9. Remove the chimichangas with tongs and transfer them to a plate lined with paper towels to drain excess oil, ensuring a perfect crunch without greasiness.
10. Serve your chimichangas hot, topped with your favorite optional toppings—salsa, guacamole, sour cream, lettuce, diced tomatoes, and chopped cilantro—to add freshness, color, and extra zing.
SERVING SUGGESTIONS FOR CHICKEN CHIMICHANGAS
When it comes to serving these golden delights, presentation and accompaniments elevate your meal from delicious to downright spectacular. Here are four creative ways to plate and share your homemade chimichangas.
- Classic Tex-Mex Platter: Arrange chimichangas on a large serving tray alongside small bowls of salsa, guacamole, and sour cream. Garnish with chopped cilantro and lime wedges for slicing. Your guests can customize each bite, making it interactive and fun.
- Loaded Nacho Style: Slice chimichangas into bite-sized pieces and spread them over a bed of tortilla chips. Drizzle with melted cheese, scatter diced tomatoes, jalapeño slices, and a dollop of sour cream to transform your chimichangas into a shareable snack.
- Fresh Fiesta Bowl: Create a vibrant bowl with Spanish rice or cilantro-lime rice as the foundation. Top with one sliced chimichanga, a scoop of refried beans, and fresh pico de gallo for a balanced, all-in-one meal bursting with color.
- Party-Ready Appetizers: Halve chimichangas diagonally and secure each piece with a decorative toothpick. Serve them on a beautiful platter garnished with fresh cilantro and a side of creamy chipotle dipping sauce for an upscale appetizer spread.
HOW TO STORE CHICKEN CHIMICHANGAS
Preserving that golden crunch and flavorful interior is key when you want to enjoy chimichangas later. Whether you’re meal-prepping or saving leftovers, proper storage ensures each bite stays delicious.
- Refrigeration: Allow chimichangas to cool completely, then place them in an airtight container or wrap individually in foil. Store in the fridge for up to 3 days to maintain moisture without making them soggy.
- Freezing: For longer storage, wrap each chimichanga tightly in plastic wrap followed by a layer of foil. Place them in a freezer-safe bag and freeze for up to 2 months. This double layer prevents freezer burn and locks in flavor.
- Reheating in the Oven: Preheat your oven to 350°F (175°C). Remove any plastic wrap, place chimichangas on a baking sheet, and cover loosely with foil for the first 5 minutes. Then remove the foil and bake for another 5–7 minutes to restore crispiness.
- Avoid Microwaving Excessively: While a quick zap in the microwave is tempting, it can turn the tortilla chewy. If you must microwave, cover with a damp paper towel for no more than 1 minute, then crisp up in a hot skillet for a minute per side.
CONCLUSION
This recipe for Chicken Chimichangas brings the vibrancy of Mexican-inspired flavors right into your kitchen with minimal fuss and maximum payoff. From the juicy, spice-kissed chicken to the creamy beans and cheese sealed inside a golden, crispy tortilla, every element works in harmony. You’ll find the intermediate difficulty rewarding, and those prep, cook, and rest times (20, 30, and 10 minutes, respectively) fit smoothly into most schedules. With roughly 550 calories per chimichanga, they make for a comforting and satisfying lunch or dinner that’s equally impressive for casual family nights or small gatherings. Don’t forget to experiment with optional toppings like salsa, guacamole, or fresh cilantro to add your own signature touch.
Feel free to print this article and tuck it into your recipe binder for easy access whenever the craving strikes. You can also save it digitally or bookmark it on your device, so you’re always ready to recreate this crispy chicken feast. Below, you’ll find a handy FAQ to address any questions you might have about tweaks, substitutions, or troubleshooting. If you give this recipe a whirl, I’d love to hear how it turns out! Drop a comment, share your favorite topping combos, or let me know if you need any extra tips. Happy cooking, and here’s to many more flavor-packed meals!
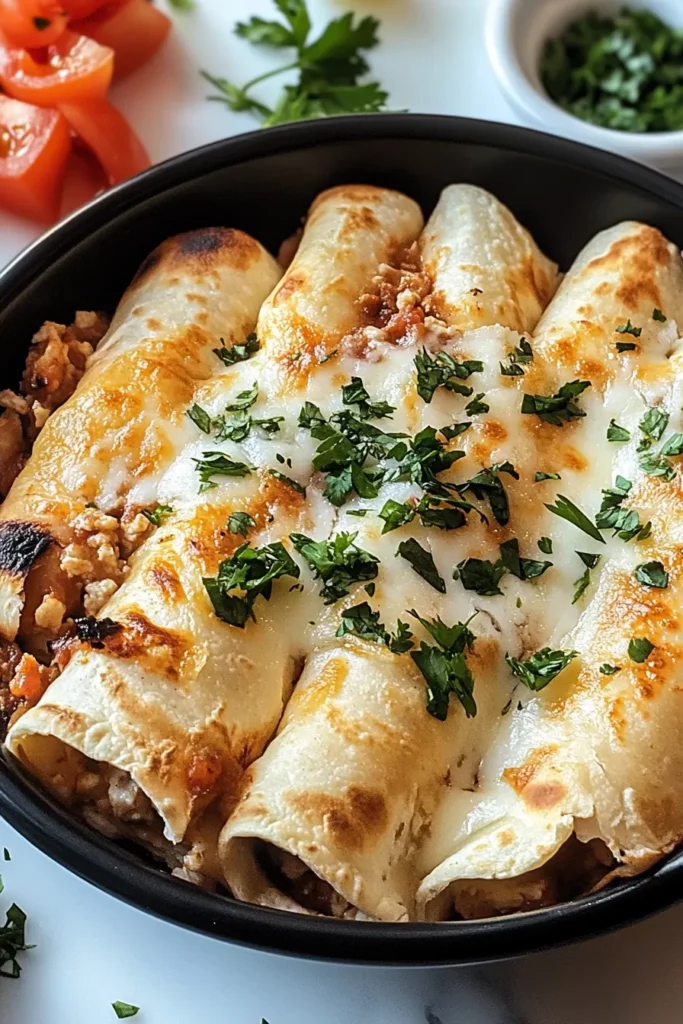

Chicken Chimichangas
Description
Savor the bold flavors of seasoned chicken, creamy refried beans, and gooey cheese all wrapped in a crispy tortilla. Perfect for lunch or dinner!
Ingredients
Instructions
-
In a medium pan, heat the olive oil over medium heat. Add the chicken breasts and cook for about 6-7 minutes on each side until fully cooked. Remove from the pan and set aside to cool.
-
In the same pan, add the chopped onion and cook for about 3 minutes until softened. Add the minced garlic and cook for another 30 seconds.
-
Shred the cooled chicken using two forks or your hands. Add the shredded chicken back to the pan with the onions and garlic.
-
Sprinkle in the cumin, chili powder, paprika, salt, and black pepper. Stir to coat the chicken and spices. Pour in the chicken broth and let it simmer for about 5 minutes until the liquid reduces by half.
-
While the chicken mixture is simmering, warm the flour tortillas in a dry skillet or microwave for a few seconds to make them pliable.
-
To assemble the chimichangas, spread a thin layer of refried beans on each tortilla. Add a generous amount of the seasoned chicken mixture on top, followed by a sprinkle of shredded cheese.
-
Carefully fold in the sides of the tortilla and then roll it up tightly, securing the filling inside.
-
Heat vegetable oil in a deep frying pan over medium-high heat. Once the oil is hot, carefully place the chimichangas seam-side down in the pan and fry for 3-4 minutes on each side, or until golden brown and crispy.
-
Remove from the oil and place the chimichangas on a paper towel-lined plate to drain excess oil.
-
Serve hot with your choice of toppings like salsa, guacamole, sour cream, lettuce, and chopped cilantro.
Note
- If you prefer to bake the chimichangas instead of frying, preheat the oven to 400°F (200°C), place the assembled chimichangas on a baking sheet, and bake for 15-20 minutes or until golden and crispy.
- For a spicier kick, add diced jalapenos or hot sauce to the chicken mixture.

