

There’s something undeniably magical about sinking your fork into a slice of Cherry Pistachio Cheesecake. Each mouthful delivers a silky-smooth cream cheese filling that feels like a decadent cloud, while the buttery graham cracker crust provides just the right amount of crisp contrast. The gentle sweetness of the cheesecake is balanced by little bursts of nutty pistachios folded right into the batter, creating a playful crunch that keeps you coming back for more. And don’t get me started on that vibrant cherry topping—whether it’s homemade with fresh, ripe cherries or a perfectly spoonable store-bought pie filling, it offers a jewel-like jewel of juicy flavor that crowns every slice. This is the kind of dessert you’ll find yourself daydreaming about after the very first bite.
Beyond its irresistible taste, this Cherry Pistachio Cheesecake is an experience worth savoring from start to finish. It’s rated at an intermediate difficulty level, so you’ll hone your baking skills without feeling overwhelmed. The timeline is perfectly paced: about 30 minutes of active preparation, roughly an hour of baking, and a five-hour or overnight rest to ensure that creamy texture sets just right. In the end, you’ll have twelve glorious servings—each slice boasting roughly 450 calories of pure bliss. Whether you’re celebrating a special occasion, hosting a cozy gathering, or simply treating yourself, this cheesecake is destined to become a star on your dessert table. So roll up your sleeves, gather your ingredients, and let’s dive into the world of creamy, dreamy cheesecake perfection!
KEY INGREDIENTS IN CHERRY PISTACHIO CHEESECAKE
Every memorable cheesecake starts with a thoughtfully selected lineup of ingredients that work together to build layers of flavor and texture. In this section, we’ll introduce you to the key players that transform simple pantry staples into a show-stopping dessert.
- Graham Cracker Crumbs
These finely crushed crackers form the base of the crust, providing a crunchy foundation that holds its shape. Their slight honeyed flavor pairs beautifully with the rich cream cheese filling.
- Unsalted Butter
Melted and mixed into the crumbs, butter binds the crust ingredients together and adds a lush, buttery depth without overwhelming sweetness.
- Granulated Sugar
Used both in the crust and the filling, sugar brings just enough sweetness to highlight the tang of the cream cheese and the fruitiness of the cherries without becoming cloying.
- Cream Cheese
The star of the show, softened cream cheese creates that signature creamy texture and tangy richness for which cheesecakes are famous.
- Vanilla Extract
A hint of natural vanilla elevates the overall flavor, rounding out the tangy cream cheese with warm, aromatic notes.
- Eggs
These provide structure and help the filling set properly. Added one at a time, eggs ensure a smooth, velvety batter without curdling.
- Sour Cream
Folding in sour cream enriches the cheesecake’s texture, adding moisture and a subtle tang that balances the sweetness.
- Chopped Pistachios
Stirred directly into the batter, pistachios lend a pleasant crunch and a toasty, nutty flavor that complements the sweet cherry topping.
- Cherry Pie Filling
Whether homemade or store-bought, this juicy topping adds vibrant color and fruity sweetness. It’s the crowning glory of the cheesecake.
- Additional Chopped Pistachios for Garnish
Sprinkled on top of the cherry layer, extra nuts create visual appeal and an added textural contrast.
HOW TO MAKE CHERRY PISTACHIO CHEESECAKE
Before you dive into each detailed step, take a moment to gather your tools: a 9-inch springform pan, electric mixer, spatula, and mixing bowls. We’ll guide you through building a flawless crust, whipping up a luscious filling, and achieving that picture-perfect bake.
1. Preheat your oven to 325°F (160°C). Prepare a 9-inch springform pan by lightly greasing the sides or lining the bottom with parchment paper to ensure easy release.
2. In a mixing bowl, combine the graham cracker crumbs, melted butter, and 1/4 cup granulated sugar. Use a whisk or spoon to stir until the mixture resembles wet sand, indicating even butter distribution.
3. Press the graham cracker mixture evenly into the bottom of the prepared springform pan to form a firm crust. Use the bottom of a measuring cup or glass to compact it tightly. Bake for 10 minutes and then remove from the oven, allowing the crust to cool while you prepare the filling.
4. In a large mixing bowl, beat the softened cream cheese using an electric mixer on medium speed until it’s smooth and creamy, approximately 2–3 minutes.
5. Gradually add in 1 cup of granulated sugar and the vanilla extract. Continue to beat until the mixture is well combined and silky in texture.
6. Add the eggs one at a time, mixing on low speed after each addition until just blended. Be careful to avoid over-mixing to prevent cracks.
7. Gently fold in the sour cream and chopped pistachios with a spatula until they are evenly distributed throughout the batter.
8. Pour the cheesecake filling over the cooled graham cracker crust in the springform pan. Use a spatula to smooth the top into an even layer.
9. Bake in the preheated oven for 50–60 minutes, or until the edges begin to set and the center still jiggles slightly when gently shaken. The cheesecake will firm up as it cools.
10. Once done, turn off the oven and crack the oven door. Let the cheesecake cool in the oven for about 1 hour to minimize cracking.
11. Remove the cheesecake and allow it to cool completely at room temperature. Then, refrigerate for at least 4 hours or overnight for the creamiest texture.
12. When ready to serve, spread the cherry pie filling evenly over the cheesecake’s surface. Garnish with additional chopped pistachios before slicing and serving.
SERVING SUGGESTIONS FOR CHERRY PISTACHIO CHEESECAKE
After all that careful baking and chilling, serving your Cherry Pistachio Cheesecake is where the magic truly shines. A little presentation flair goes a long way, and these suggestions will help you showcase every luscious layer and contrasting texture. Whether you’re hosting a dinner party or simply enjoying a quiet moment with a cup of coffee, these ideas will ensure each slice looks as gorgeous as it tastes.
- Plate with Precision
Use a warm, sharp knife dipped in hot water and wiped dry between cuts to create clean, neat slices. This simple trick prevents crumbs from clinging and keeps each piece pristine.
- Add Dollops of Whipped Cream
Pipe or spoon freshly whipped cream around the edges of each slice. The cloud-like cream adds lightness and a creamy contrast to the rich cheesecake.
- Drizzle Extra Cherry Sauce
Warm a small portion of the cherry pie filling and drizzle it artistically over the top or plate rim. The glossy fruit sauce adds visual drama and an extra burst of sweetness.
- Garnish with Fresh Mint and Nuts
Place a single mint leaf atop each slice, and sprinkle a few extra pistachio pieces on the plate. The bright green and nutty accents elevate both color and flavor.
HOW TO STORE CHERRY PISTACHIO CHEESECAKE
Proper storage is key to maintaining the creamy texture and bright flavors of your cheesecake. Whether you’re planning to enjoy leftovers over the next few days or want to prepare slices ahead for a gathering, these storage tips will keep your dessert in peak condition.
- Refrigerate in an Airtight Container
After slicing, place the cheesecake in a cake box or airtight container. Seal tightly to prevent the cake from absorbing other fridge odors and to preserve moisture.
- Wrap for Freezing
For longer storage, wrap individual slices in plastic wrap followed by a layer of aluminum foil. Label with the date and freeze for up to one month. Thaw overnight in the refrigerator before serving.
- Use Fresh Garnishes Later
If you’ve pre-applied cherries and pistachios, consider adding a fresh sprinkle of pistachios or a drizzle of sauce right before serving. This keeps toppings vibrant and crisp.
- Bring to Room Temperature Before Serving
Remove the cheesecake from the fridge about 30 minutes before enjoying. Allowing it to come to room temperature unlocks the full spectrum of aromas and flavors.
CONCLUSION
Throughout this article, we’ve explored the rich tapestry of flavors and textures that make Cherry Pistachio Cheesecake a standout dessert for any occasion. From the crisp, buttery graham cracker crust to the velvety cream cheese filling studded with crunchy pistachios, and finally crowned with jewel-like cherries, this cheesecake is a celebration of contrasts and harmony. You’ve learned how to prepare each component with care—preheating the oven to 325°F, mastering the wet-sand crust technique, whipping the filling to perfection, and gently baking and cooling to avoid cracks. We’ve also covered thoughtful serving tips, from precision slicing with a warmed knife to artful garnishes of whipped cream and fresh mint, ensuring your presentation wows every guest.
Feel free to print this article and tuck it into your recipe binder for easy reference, or save it digitally to revisit whenever the craving strikes. You’ll also find a FAQ section below to address any lingering questions about techniques, substitutions, or troubleshooting. If you decide to give this cheesecake a whirl, please share your results! Your comments, questions, and feedback are so valuable—they help our home cooking community grow and refine each recipe. Whether you need guidance on achieving the perfect jiggle, want to substitute ingredients, or simply want to tell us how it turned out, we’d love to hear from you. Happy baking, and here’s to many joyful moments spent slicing into creamy, dreamy Cherry Pistachio Cheesecake!
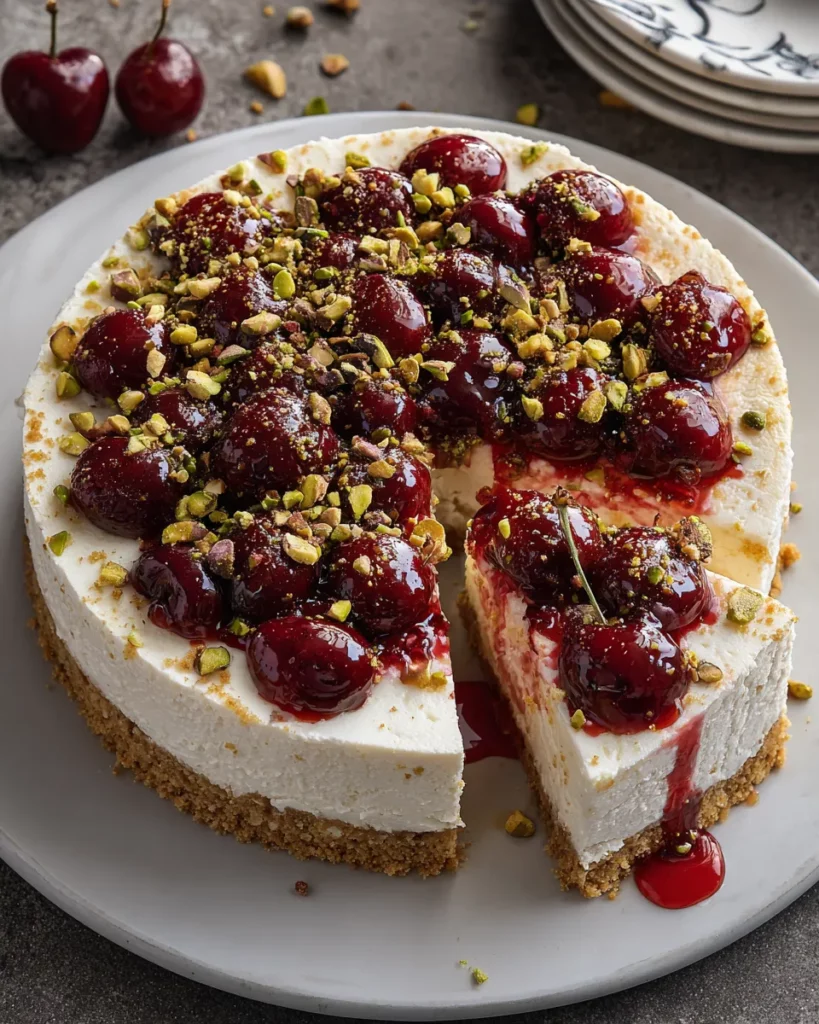

Cherry Pistachio Cheesecake
Description
This Cherry Pistachio Cheesecake bursts with rich cream cheese flavor, crunchy pistachios, and sweet cherry topping, making every slice a delightful treat.
Ingredients
Instructions
-
Preheat your oven to 325°F (160°C). Prepare a 9-inch springform pan by lightly greasing it or lining the bottom with parchment paper.
-
In a mixing bowl, combine the graham cracker crumbs, melted butter, and 1/4 cup granulated sugar. Stir until the mixture resembles wet sand.
-
Press the graham cracker mixture evenly into the bottom of the prepared springform pan to form the crust. Use the bottom of a measuring cup to compact the crust firmly. Bake for 10 minutes and remove from the oven to cool while you prepare the filling.
-
In a large mixing bowl, beat the softened cream cheese using an electric mixer on medium speed until smooth and creamy, about 2-3 minutes.
-
Gradually add in 1 cup of granulated sugar and the vanilla extract. Continue to beat until well combined.
-
Add the eggs one at a time, mixing on low speed after each addition until just blended. Avoid over-mixing.
-
Gently fold in the sour cream and chopped pistachios until evenly distributed in the batter.
-
Pour the cheesecake filling over the cooled graham cracker crust in the springform pan. Smooth the top with a spatula.
-
Bake in the preheated oven for 50-60 minutes, or until the edges start to set and the center is slightly jiggly. The cheesecake will firm up as it cools.
-
Once done, turn off the oven and crack the oven door. Let the cheesecake cool in the oven for about 1 hour to prevent cracking.
-
Remove the cheesecake from the oven and allow it to cool completely at room temperature. Then, refrigerate for at least 4 hours or overnight for best results.
-
When ready to serve, spread the cherry pie filling evenly on top of the cheesecake. Garnish with additional chopped pistachios before slicing and serving.
Note
- This cheesecake can be made up to three days in advance; just keep it covered in the refrigerator.
- For a unique twist, try using almond extract in place of vanilla.
- Feel free to experiment with fresh cherries if they are in season for a more vibrant topping.
- Serve with whipped cream for an extra touch of indulgence.

