

There’s something incredibly satisfying about taking a forkful of buttery crust that gives way to a burst of juicy, ruby-red cherries. These Cherry Pie Bars are the best of both worlds: the ease of a bar cookie combined with the timeless flavors of a classic pie. Every bite offers a tender shortbread-like base that cradles a sweet-and-tart cherry filling, all topped off with a silky glaze that melts on your tongue. Whether you’re in the mood for an indulgent afternoon treat or need a show-stopping dessert for a gathering, these bars deliver on flavor and nostalgia with minimal fuss.
From the very first moment you cut into these easy cherry pie bars, you’ll appreciate how they capture the essence of summer and timeless baking tradition. As a beginner-friendly recipe, it guides you step by step through creaming, mixing, and baking to ensure success—and plenty of compliments. With just a handful of pantry staples and two cans of cherry pie filling, you’ll have a crowd-pleasing dessert in about an hour from start to finish. Each bar clocks in at around 300 calories and is versatile enough to experiment with other fruit fillings like blueberry or apple. Whether you plate them for a casual coffee chat or serve them at a potluck, these cherry pie bars promise to become your next go-to sweet treat.
KEY INGREDIENTS IN CHERRY PIE BARS
Before you dive in, let’s talk about the stars of this simple yet delightful dessert. Each ingredient works in harmony to create that perfect balance of buttery richness, gentle sweetness, and vibrant cherry notes. No fancy gadgets or obscure pantry items here—just straightforward baking essentials you probably already have on hand.
- Unsalted Butter
Provides the tender, flaky texture of the crust and adds a rich, creamy backbone to both the bar base and the drizzle. Softened at room temperature, it creams smoothly with sugar to trap air for a light crumb.
- Granulated Sugar
Sweetens the dough and helps achieve a moist, tender bar. When creamed with butter, it creates small air pockets that give structure and lift.
- Salt
Enhances flavor by balancing the sweetness and rounding out the buttery notes. It also strengthens the dough’s texture.
- Large Eggs
Act as a binding agent, bringing structure and moisture. Beating them in one at a time ensures a smooth, uniform batter.
- Vanilla Extract
Adds warm, aromatic depth that complements the cherries and elevates the overall flavor profile.
- Almond Extract
Introduces a subtle, nutty essence that harmonizes beautifully with cherry and enhances the fruity notes.
- All-Purpose Flour
Forms the foundation of the bar base. It’s the building block that, when combined with butter and sugar, creates that perfect shortbread-like crust.
- Cherry Pie Filling
Delivers the signature sweet-and-tart cherry layer. Using canned filling ensures consistent flavor and texture—no need to pit or sweeten fresh cherries.
- Powdered Sugar
Forms the basis of the glaze, offering a smooth, melt-in-your-mouth finish that perfectly balances the tartness of the cherries.
- Milk
Adjusts the consistency of the glaze, making it pourable so it drapes beautifully over the cooled bars.
HOW TO MAKE CHERRY PIE BARS
These cherry pie bars come together easily with a few simple steps. From creaming to glazing, each phase is designed for beginner bakers to achieve a perfectly tender crust, a luscious cherry layer, and a glossy finish that winks at every slice.
1. Preheat the oven to 350°F (175°C). Lightly grease a 15×10-inch jelly roll pan or line it with parchment paper for easy removal and clean edges.
2. In a large bowl, use an electric mixer to cream together the softened butter, granulated sugar, and salt. Continue mixing until the mixture is light and fluffy, about 3–4 minutes on medium speed, ensuring air is incorporated for a tender crust.
3. Beat in the eggs one at a time, scraping down the sides of the bowl between additions. This ensures each egg is fully blended before the next goes in. Add the vanilla and almond extracts, then mix on low speed until just combined.
4. Gradually add the flour to the wet ingredients, mixing on low until the dough is just combined. Be careful not to overmix, which can develop gluten and lead to a tougher texture.
5. Reserve about one-third of the dough, then spread the remaining two-thirds evenly into the prepared pan. Use a spatula or your fingers to press down and smooth the surface, creating an even layer.
6. Spoon the cherry pie filling over the dough layer, spreading it into an even, uniform layer that reaches all corners.
7. Drop the reserved dough by spoonfuls over the cherry layer. The dough will spread slightly, leaving charming pockets of cherry visible.
8. Bake for 30–35 minutes, or until the top is golden brown and the filling is bubbly at the edges. Remove from the oven and let the bars cool completely in the pan.
9. While the bars are cooling, whisk together the powdered sugar, vanilla extract, almond extract, and milk until you have a smooth, pourable glaze.
10. Once the bars have cooled, drizzle the glaze evenly over the top, letting it settle into the nooks and crannies.
11. Cut into squares and serve—each slice is a delightful balance of buttery, tart, and sweet.
SERVING SUGGESTIONS FOR CHERRY PIE BARS
Turning these cherry pie bars into a memorable dessert experience is all about presentation and pairing. Whether you’re setting out a sweet treat at a backyard barbecue or adding a little pizzazz to your afternoon coffee break, these serving tips will make your bars shine.
- Serve slightly warm with a scoop of vanilla ice cream
The contrast of a cold, creamy scoop melting into the warm, tender bars creates a luxurious mouthfeel and highlights the cherry filling’s tang.
- Garnish with fresh mint leaves and a dusting of powdered sugar
The bright green mint adds a pop of color and a refreshing aroma, while a light dusting of sugar gives a delicate, snow-like finish.
- Plate on a decorative cake stand for a special occasion
Lifting the bars onto a pedestal makes them the centerpiece of your dessert table, elevating a casual recipe to café-chic dessert status.
- Pair with a hot beverage like coffee or tea
The robust flavors of coffee or the floral notes of a black tea complement the sweet and tangy cherries, making this an ideal afternoon indulgence.
HOW TO STORE CHERRY PIE BARS
Keeping these cherry pie bars fresh and delicious is simple. Whether you need to prep ahead for an event or stash away leftovers, proper storage helps maintain that tender crust and juicy cherry layer.
- Store at room temperature in an airtight container up to 2 days
Place parchment paper between layers to prevent sticking, and seal tightly to retain moisture without sogginess.
- Refrigerate for up to 5 days for a firmer texture
Wrap the pan or individual bars in plastic wrap before placing in an airtight container. Chill to enjoy a cooler, denser bite—perfect for warmer days.
- Freeze single bars for up to 2 months
Individually wrap each square in plastic wrap, then place them in a freezer-safe bag or container. Thaw overnight in the refrigerator or at room temperature before serving.
- Refresh in a preheated oven if stored baked
Warm the bars at 300°F (150°C) for 5–7 minutes to revive a just-baked taste and texture. Let them cool briefly before enjoying.
CONCLUSION
This recipe for Easy Cherry Pie Bars: A Sweet Slice of Summer in Every Bite! brings the essence of a classic cherry pie together with the effortless joy of bar cookies. From the initial steps of creaming butter and sugar to the moment you drizzle on that final glaze, every stage is designed for simplicity and crowd-pleasing flavor. Whether you’re a beginner baker or someone looking for a quick and tasty dessert, these bars offer a buttery crust, a vibrant cherry layer, and a glossy finish that shines on any dessert table. With a total time commitment of just over an hour—including 20 minutes of prep, 35 minutes of baking, and 30 minutes to cool—this is the ideal recipe for busy bakers who crave homemade, sweet treats without fuss. Each serving clocks in at around 300 calories, making it easy to enjoy a slice or two as a delightful afternoon treat or a celebratory finale to any meal.
Feel free to print this article or save it for later so you can revisit the ingredients, tips, and step-by-step guide whenever the craving for cherry pie bars strikes. Below, you’ll find a handy FAQ section to address any lingering questions you might have—everything from ingredient swaps to troubleshooting tips. If you give this recipe a whirl, I’d love to hear how it turned out! Please leave your comments, questions, or feedback, whether it’s about achieving the perfect golden crust, customizing the filling, or pairing these bars with your favorite accompaniments. Happy baking!
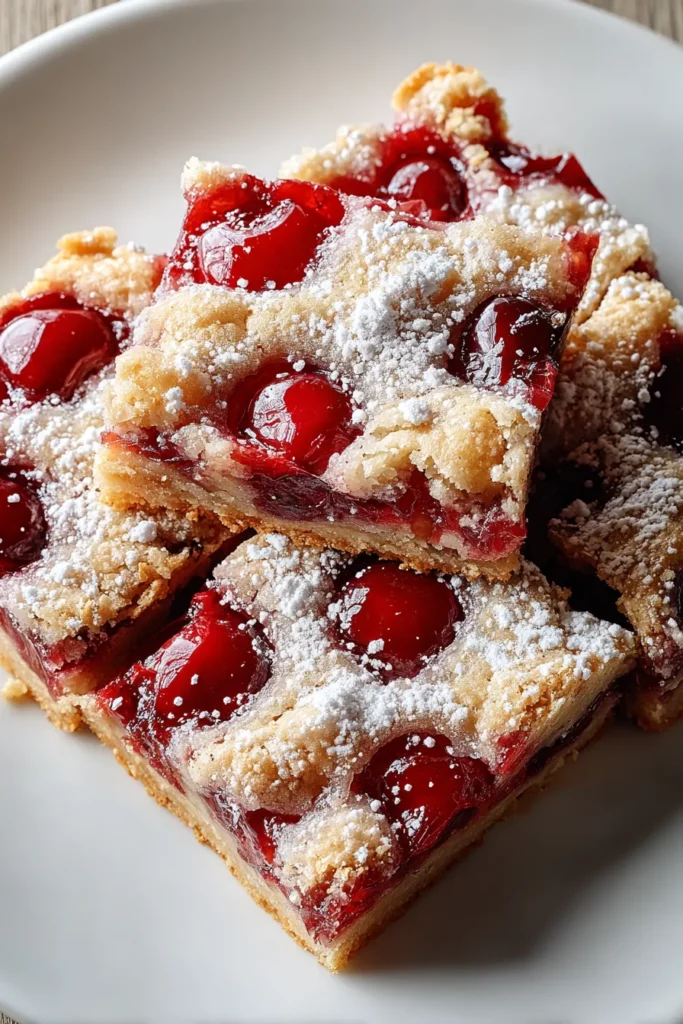

Cherry Pie Bars
Description
These Cherry Pie Bars combine a buttery, soft crust with sweet, tart cherry filling, topped with a delightful glaze. Perfect for any occasion or as a sweet treat!
Ingredients
Instructions
-
Preheat the oven to 350°F (175°C). Lightly grease a 15x10-inch jelly roll pan or line with parchment paper.
-
In a large bowl, using an electric mixer, cream the butter, granulated sugar, and salt together until light and fluffy.
-
Beat in the eggs one at a time, ensuring each is fully incorporated before adding the next. Add the vanilla and almond extracts, continuing to mix until combined.
-
Gradually add the flour to the wet ingredients, mixing until just combined. Be careful not to overmix the batter.
-
Spread about 2/3 of the dough evenly into the prepared pan. Use a spatula or your fingers to press down and smooth the surface.
-
Spoon the cherry pie filling over the dough layer, spreading it evenly across the surface.
-
Drop spoonfuls of the remaining dough over the cherry layer. The dough will spread slightly, but pockets of cherry filling will remain visible.
-
Bake in the preheated oven for 30-35 minutes, or until the top is golden brown and cooked through. Remove from the oven and allow to cool.
-
While the bars are cooling, prepare the glaze by whisking together the powdered sugar, vanilla extract, almond extract, and milk until smooth and pourable.
-
Once the bars are cooled, drizzle the glaze evenly over the top.
-
Cut into squares and serve.
Note
- These cherry pie bars make a delightful dessert for gatherings or potlucks.
- Experiment with other fruit fillings like blueberry or apple to customize your dessert.
- This recipe can be easily halved to fit an 8x8-inch or 9x9-inch baking dish.
- The almond extract adds a unique flavor dimension; however, you can omit it if preferred.

