

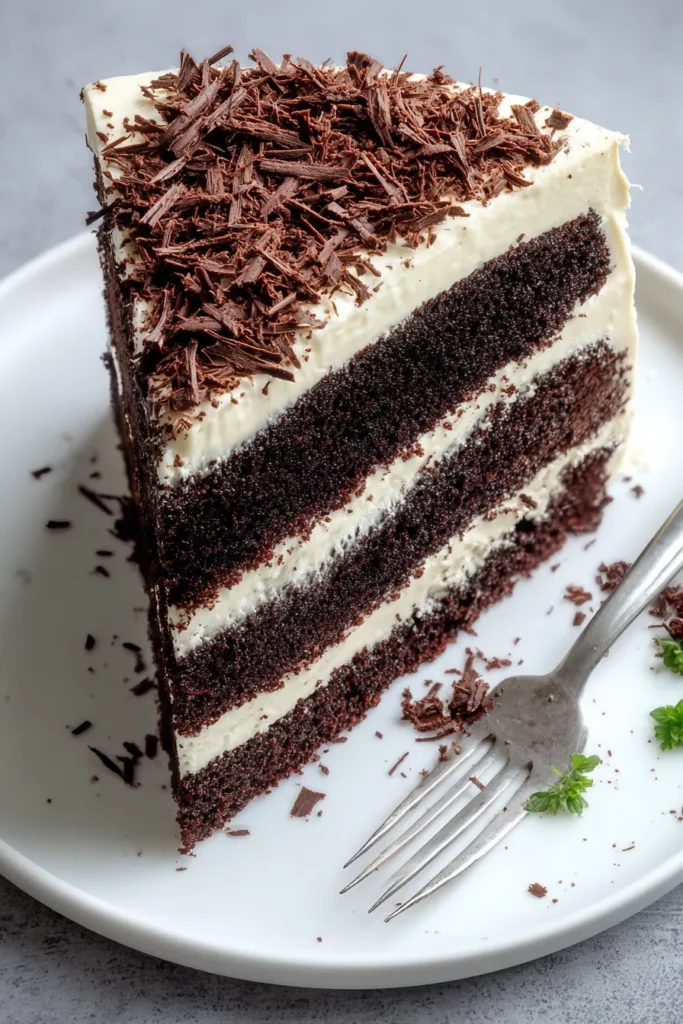
If you’re on the hunt for a dessert that embodies deep, indulgent chocolate flavor while still maintaining a tender, almost ethereal crumb, this Black Velvet Cake is going to be your new baking obsession. From the first spoonful of batter, you can taste the promise of that signature dark hue—rich cocoa mingling with a hint of tangy buttermilk and sour cream. I still remember the first time I whisked together the dry ingredients and watched the stunning jet-black mixture take shape, wondering if a cake could really bake up this dark and decadent. Sure enough, as it rose in the oven, that thin, glossy batter transformed into two perfectly domed layers of moist, velvety perfection. This intermediate-level dessert may look like it belongs on a patisserie display, but with just a little patience and a few trusty mixing bowls, you’ll have a show-stopping centerpiece that tastes even better than it looks.
No celebration feels quite complete without a dessert that steals the spotlight, and this cake fits the bill. Topped with a tangy cream cheese frosting that’s been given a playful twist of white vinegar, plus a snowy crown of dark chocolate shavings—or even a dusting of edible gold leaf if you’re feeling extra fancy—each slice feels like an event in itself. I love serving mine on a simple cake stand, letting the intense black contrast with bright berries or a light drizzle of salted caramel. With about 15 minutes of prep time, a 35-minute bake, and a brief 10-minute rest, you’ll pull this together faster than you think. And at roughly 400 calories per slice, you’re getting a decadent treat without sending your dessert tally into the stratosphere. Whether you call it a chocolate cake, a velvety wonder, or just your next favorite recipe, get ready: once you taste that deep cocoa richness and moist texture, you’ll be reaching for the mixer again in no time.
KEY INGREDIENTS IN BLACK VELVET CAKE
Before we dive into the step-by-step instructions, let’s talk about the stars of this recipe. Each ingredient plays its part in creating that signature texture, color, and flavor that makes the Black Velvet Cake so unforgettable. From the backbone of all-purpose flour to the surprising tang from white vinegar, every element brings something special to the party.
- All-purpose flour
Provides the structure and body of the cake. It helps trap the air created by leaveners, resulting in a soft, tender crumb.
- Granulated sugar
Sweetens the batter and contributes to moistness by retaining liquid. It also helps achieve a fine crumb and enhances the cake’s velvet texture.
- Unsweetened cocoa powder
Delivers the deep, dark chocolate flavor and the signature black hue. Choose Dutch-processed for an even richer color and smoother taste.
- Baking soda
Acts as a primary leavening agent, reacting with acidic ingredients like buttermilk and sour cream to give the cake its rise and airy texture.
- Baking powder
Provides additional lift and helps balance the leavening action, ensuring your cake is fluffy and not overly dense.
- Salt
Enhances all the sweet and chocolate flavors, rounding out the overall taste and balancing the richness.
- Large eggs
Bind the ingredients together, add moisture, and contribute to the cake’s structure. They also help the cake rise and set properly.
- Buttermilk
Adds tangy flavor and reacts with baking soda for lift. It also keeps the cake moist and tender by breaking down gluten strands.
- Vegetable oil
Ensures a moist, tender crumb that stays soft even after a few days. It helps highlight the cake’s velvety texture.
- Vanilla extract
Brings warmth and depth, complementing the chocolate notes without overpowering them.
- Boiling water
Intensifies the chocolate flavor, making the cocoa bloom and creating a smoother, more pourable batter.
- Sour cream
Adds richness, moisture, and a subtle tang that counterbalances the deep chocolate taste.
- White vinegar
Provides a gentle tang when mixed with the frosting, giving it an extra pop of flavor and preventing it from being overly sweet.
- Dark chocolate shavings
Offer a perfect finishing touch with a contrasting texture and an elegant visual accent.
HOW TO MAKE BLACK VELVET CAKE
Now that you’ve gathered your ingredients and prepped your workspace, let’s walk through the process of transforming these elements into two layers of dreamy, black-hued cake. Each step is designed to build on the last, ensuring an even crumb, perfect rise, and unforgettable flavor.
1. Preheat your oven to 350°F (175°C). Grease and flour two 9-inch round cake pans, ensuring every inch of the interior surface is coated. Position the oven rack in the center for even heat distribution and avoid any hot spots.
2. In a large mixing bowl, sift together the flour, granulated sugar, cocoa powder, baking soda, baking powder, and salt. Use a fine-mesh sieve to remove lumps and create a light, airy mixture that bakes into a smooth, uniform crumb.
3. In a separate bowl, lightly beat the eggs until they’re well blended but still fluffy. Add the buttermilk, vegetable oil, and vanilla extract, whisking until the mixture is smooth and homogenous. This wet blend ensures moisture and flavor are evenly distributed.
4. Gradually incorporate the wet ingredients into the dry ingredients, stirring with a rubber spatula until just combined. Be careful not to overmix—stir only until you no longer see streaks of flour.
5. Carefully stir in the boiling water until the batter is completely smooth. The high heat will intensify the cocoa flavor and thin out the batter—don’t be alarmed if it looks more like a pourable liquid than traditional cake batter.
6. Add the sour cream and mix until evenly distributed throughout the batter. Use a gentle folding motion to maintain the air bubbles you’ve created.
7. Divide the batter evenly between the prepared cake pans. You can use a kitchen scale for precision or a simple ladle for roughly equal portions.
8. Bake for 30–35 minutes, rotating the pans halfway through if your oven has hot spots. The cakes are done when a toothpick inserted into the center comes out clean or with just a few moist crumbs.
9. Allow the cakes to cool in the pans for 10 minutes. Run a thin butter knife around the edges, then gently turn them out onto wire racks to cool completely before frosting.
10. Mix the white vinegar with the frosting of your choice—cream cheese or buttercream work beautifully—to give it a mild, pleasing tang that cuts through the sweetness.
11. Once the cakes are fully cooled, frost as desired with your prepared frosting. Use an offset spatula for smooth edges, then generously garnish with dark chocolate shavings for an elegant finish.
12. Slice, serve, and enjoy your decadent Black Velvet Cake with aesthetic flair. A sharp knife warmed under hot water helps create clean, even slices every time.
SERVING SUGGESTIONS FOR BLACK VELVET CAKE
Serving a Black Velvet Cake is more than just slicing—it’s about creating an experience that highlights its striking color and deep chocolate flavor. Whether you’re hosting a holiday gathering, celebrating a milestone birthday, or simply treating yourself, these ideas will help you present each slice like a piece of edible art.
- Offer a generous dollop of fresh whipped cream on the side, lightly sweetened with a hint of vanilla. The airy cream brightens each mouthful and balances the intense cocoa notes.
- Serve with a scattering of mixed berries—think raspberries, blackberries, or cherries—to introduce a burst of tangy freshness that cuts through the richness of the cake.
- Drizzle a thin ribbon of salted caramel sauce across each plate. The sweet-and-salty contrast complements the velvety texture and deep chocolate flavor beautifully.
- Pair each slice with a shot of espresso or a glass of dessert wine, like a tawny port. The bold coffee or rich fortified wine enhances the cake’s cocoa intensity and makes a memorable finish to any meal.
HOW TO STORE BLACK VELVET CAKE
Keeping your Black Velvet Cake as fresh as the moment it came out of the oven ensures every slice is just as sensational days later. Proper storage preserves moisture, maintains flavor, and protects those delicate chocolate shavings or frosting details. Here are some tips to help your cake stay picture-perfect and delicious.
- Room Temperature Storage
If you plan to enjoy your cake within 1–2 days, store it at room temperature in a cool, dry spot. Place it in an airtight cake carrier or cover it lightly with plastic wrap to prevent it from drying out.
- Refrigerator Storage
For longer freshness (up to 5 days), wrap individual slices or the whole cake in plastic wrap and place in an airtight container. Refrigeration keeps the cream cheese frosting stable but allow slices to come to room temperature for 20 minutes before serving.
- Freezer Storage
To preserve extra portions for up to 2 months, wrap layers or slices in two layers of plastic wrap, then in aluminum foil. Label with the date and freeze. Thaw overnight in the refrigerator before bringing to room temperature.
- Frosting Protection
If your cake is displayed before serving, use a cake dome to shield frosting from drying and from absorbing odors. For frosted slices in the fridge, tuck in a piece of parchment paper between layers to prevent sticking.
CONCLUSION
From the moment you gather your ingredients to that first sensational bite, this Black Velvet Cake is designed to delight every sense. The deep, decadent cocoa flavor, balanced by tangy buttermilk and a whisper of white vinegar in the frosting, delivers a dessert experience you and your guests won’t forget. With an intermediate difficulty level, this recipe invites home bakers to level up their skills—whether you’re mastering the art of sifting dry ingredients or perfecting the gentle fold of sour cream into thin batter. You’ve learned how to whip up an elegant two-layer cake in around an hour, including a brief resting period, and you’ve discovered tips for serving in style and storing for days of enjoyment. Keep this article printed or saved in your recipe binder so you can return to it whenever a special occasion calls for an unforgettable showstopper.
I can’t wait to hear how your own Black Velvet Cake turns out—feel free to leave a comment below sharing your tips, questions, or any creative twists you tried. Did you experiment with edible gold leaf or pair it with raspberry coulis? Maybe you swapped in Dutch-processed cocoa for an even darker hue. Either way, let’s keep the conversation going. If you hit a snag or need troubleshooting help, drop your baking questions here, and I’ll be happy to chime in. Happy baking, and here’s to many more moments of chocolatey bliss shared with friends and family!

Black Velvet Cake
Description
This luscious Black Velvet Cake features deep cocoa flavors and a moist, velvety texture, perfect for those special occasions. Topped with a tangy frosting and chocolate shavings, it's a true star dessert.
Ingredients
Instructions
-
Preheat your oven to 350°F (175°C). Grease and flour two 9-inch round cake pans.
-
In a large mixing bowl, sift together the flour, granulated sugar, cocoa powder, baking soda, baking powder, and salt.
-
In a separate bowl, lightly beat the eggs, then add buttermilk, vegetable oil, and vanilla extract. Mix well.
-
Gradually incorporate the wet ingredients into the dry ingredients, stirring until just combined.
-
Carefully stir in the boiling water until the mixture is smooth. The batter will be quite thin.
-
Add the sour cream and mix until evenly distributed throughout the batter.
-
Divide the batter evenly between the prepared cake pans.
-
Bake for 30-35 minutes or until a toothpick inserted into the center comes out clean.
-
Allow the cakes to cool in the pans for 10 minutes. Then, gently turn them out onto wire racks to cool completely.
-
Mix the white vinegar with the frosting of your choice to give it a mild tang.
-
Once cooled, frost as desired with your prepared frosting and garnish with dark chocolate shavings.
-
Slice, serve, and enjoy your decadent Black Velvet Cake with aesthetic flair.
Note
- Black Velvet Cake is often known for its deep, rich flavor and velvety texture.
- This cake pairs beautifully with cream cheese frosting for an extra layer of tanginess.
- To enhance the cocoa flavor, consider using Dutch-processed cocoa powder.
- For a more luxurious experience, garnish with a dusting of edible gold or silver leaf.
- Be patient during the cooling process to ensure easy frosting and layering.
- Perfect for special occasions where you want a show-stopping dessert.

