

If you’ve ever found yourself staring at the takeout menu at 6 p.m., craving that irresistible combination of fluffy rice, crisp veggies, and savory chicken, you’re in for a treat. This Better Than Takeout Fried Rice recipe is my go-to solution for turning a kitchen into a cozy weekend restaurant. It’s designed for beginners, ready in just 10 minutes of prep and 15 minutes of cooking, and serves up a luscious bowl of lunch or dinner that truly rivals anything you’d get delivered. The secret weapon? Day-old rice that’s been cooled to perfection for a delightfully non-sticky texture, along with a harmonious blend of soy and oyster sauces bolstered by a dash of hoisin for a hint of sweetness. Finish it with a drizzle of sesame oil and a shower of fresh green onions, and you’ve got a colorful plate that dances with layers of umami and crunch.
I still remember the first time I swapped my usual takeout order for a homemade version on a busy weeknight. I had a pile of leftover chicken, some frozen peas and carrots, and a desperate desire for something warm and comforting. Within 25 minutes, I was scooping generous portions from my own wok, amazed at how every grain was coated in that glossy, mouthwatering sauce. My family gathered around the kitchen island, forks in hand, cheering on each bite. No delivery fee, no soggy rice, and not a plastic container in sight—just pure, homemade goodness. This recipe yields about 1150 calories for the entire batch, perfect for sharing or portioning out into meal-prep containers for the week. Whether you’re cooking for one or feeding a crowd, this recipe proves that with a few simple ingredients and a dash of enthusiasm, you can create a fried rice masterpiece that’s light-years beyond takeout.
KEY INGREDIENTS IN BETTER THAN TAKEOUT FRIED RICE
Before you fire up the wok, let’s break down the star players that make this dish shine. Each ingredient brings its own magic to the pan, building layers of texture and flavor that keep every forkful exciting.
- Cooked white rice
Day-old rice is less sticky and more absorbent, letting each grain stay separate and soak up sauces without turning mushy. If you’re short on time, spreading freshly cooked rice on a baking sheet to cool works wonders too.
- Vegetable oil
A neutral oil with a high smoke point helps you stir-fry at medium-high heat without burning. Divided into two portions, it ensures eggs scramble smoothly and vegetables sizzle without sticking.
- Eggs
Beaten and quickly scrambled, eggs add a soft, custardy texture and a boost of protein. They also introduce tiny pockets of richness that balance the savory sauce.
- Onion
Finely chopped, onions soften into sweet, translucent morsels that form the aromatic base of the dish. They add subtle sweetness and body.
- Garlic
Minced garlic provides that signature punch of fragrance. Just a quick 30-second sauté wakes up your taste buds and infuses the oil with flavor.
- Peas and carrots
This classic frozen mix brings vibrant color and a satisfying crunch. Thawing them first ensures they warm through evenly without watering down the rice.
- Cooked chicken breast (optional)
Tender, diced chicken breast adds a lean protein element. Feel free to swap in shrimp, pork, or even tofu for a vegetarian twist.
- Soy sauce
The backbone of the sauce blend, it delivers umami and saltiness. Low-sodium soy sauce helps control salt levels while still packing depth.
- Oyster sauce
An optional luxury that contributes a richer, slightly sweet umami note. It deepens the overall flavor profile.
- Sesame oil
A finishing drizzle of this fragrant oil rounds out the dish with a toasty, nutty aroma.
- White pepper
A subtle heat alternative to black pepper, it enhances the savory notes without overpowering the other flavors.
- Green onions
Thinly sliced for garnish, they lend a fresh, crisp bite and a pop of color on top.
- Cilantro (optional)
Chopped cilantro sprinkles in a bright herbal accent that cuts through the richness.
- Hoisin sauce (optional)
A touch of hoisin brings in a sweet-savory layer, perfect if you like a hint of candy-like depth.
- Salt
Used sparingly to balance flavors and season to your taste.
HOW TO MAKE BETTER THAN TAKEOUT FRIED RICE
Ready to transform these ingredients into a restaurant-quality meal at home? Follow these detailed steps to build flavor from the ground up, achieving perfectly textured grains, crisp vegetables, and a savory sauce that ties everything together.
1. Prepare the rice by spreading freshly cooked grains on a baking sheet to cool and reduce moisture if you don’t have day-old rice. This step helps you achieve that signature non-sticky texture.
2. Heat 1 tablespoon of oil in a large skillet or wok over medium-high heat. Pour in the beaten eggs and scramble them gently, cooking until fully set but still soft. Remove the eggs and set them aside on a plate.
3. Add the remaining oil to the same skillet. Once it shimmers, add the chopped onion and sauté for 2–3 minutes until the pieces turn translucent and golden at the edges.
4. Add the garlic and stir for about 30 seconds, being careful not to let it brown too much—this keeps it sweet and fragrant.
5. Stir in the thawed peas and carrots and cook for an additional 2 minutes, allowing them to heat through and start to caramelize at the edges.
6. Add your protein (chicken, shrimp, pork, or tofu) and toss to combine with the vegetables, ensuring each piece warms up evenly.
7. Introduce the rice to the pan, breaking up any stubborn clumps with your spatula. Stir-fry for 3–4 minutes, tossing constantly so the grains pick up that light sear and become evenly heated.
8. Drizzle the soy sauce, oyster sauce (if using), sesame oil, and hoisin sauce (if using) over the rice. Continue to toss everything in the pan so the sauces coat every kernel.
9. Return the scrambled eggs to the skillet, gently breaking them up and folding them into the rice. Sprinkle in the white pepper and add salt to taste, adjusting as needed.
10. Garnish with the sliced green onions and chopped cilantro, scattering them on top to create vivid pops of green.
11. Serve immediately while piping hot and revel in the fact that you’ve just created a homemade fried rice that truly rivals any takeout order.
SERVING SUGGESTIONS FOR BETTER THAN TAKEOUT FRIED RICE
Enjoying this fried rice goes beyond just spooning it into a bowl. Here are a few fun ways to present and savor your creation:
- Family-style spread
Pile the fried rice onto a warm platter in the center of the table. Sprinkle extra green onions and cilantro on top. Let everyone serve themselves, passing around dipping sauces like chili crisp or extra soy sauce.
- Bento box lunch
Portion your fried rice into individual compartments alongside steamed edamame, sliced cucumber, and pickled ginger. The balanced presentation keeps flavors separate and visually appealing for a grab-and-go meal.
- Weeknight meal prep
Divide the rice into airtight containers for easy reheating. Pair with small containers of sriracha or chili garlic sauce, and top with a boiled egg or grilled protein when you reheat for extra flair.
- Asian-inspired brunch
Top a shallow bowl of fried rice with a soft-poached egg and drizzle with hot sesame oil or Sriracha mayo. Serve alongside kimchi or quick-pickled veggies for a satisfying midday feast.
HOW TO STORE BETTER THAN TAKEOUT FRIED RICE
If you make a big batch, proper storage will help retain that just-made taste and texture. Follow these tips to keep every serving as delicious as day one:
- Refrigeration
Allow leftover rice to cool slightly, then transfer to an airtight container. Store in the fridge for up to 3 days. When reheating, sprinkle a few drops of water over the rice and heat in a hot skillet or microwave to refresh the grains.
- Freezing
For longer storage, pack cooled rice into freezer-safe bags, pressing out excess air. Lay flat to freeze in portions. Thaw overnight in the fridge, then stir-fry quickly to revive texture.
- Individual portions
Divide your fried rice into single-serve meal prep containers. This makes it effortless to grab a pre-measured portion, reheat, and top with fresh garnishes like green onions or cilantro.
- Avoid sogginess
Never seal piping-hot rice in an airtight container. Let it cool at room temperature for about 10–15 minutes before storing. This prevents condensation from making your rice mushy.
CONCLUSION
Bringing this Better Than Takeout Fried Rice into your kitchen means mastering a dish that’s versatile, vibrant, and downright delicious. You’ve learned how to leverage day-old rice for ideal texture, balance savory soy and oyster sauces, and layer in crisp veggies, tender protein, and fluffy eggs. With just a handful of kitchen staples—onion, garlic, peas and carrots, and flavorful sauces—you can whip up a crowd-pleaser in under 30 minutes. This recipe is perfect for beginner cooks seeking an easy dinner option, meal-prep fans wanting satisfying lunches, or anyone who simply loves the bold flavors of Asian-inspired cooking. Whether you serve it family-style, pack it in bento boxes, or top it with a runny poached egg for brunch, you’ll find that homemade fried rice delivers both comfort and excitement bite after bite.
Feel free to print this article and save it in your recipe binder or digital cookbook so it’s always within reach on busy weeknights or lazy weekends. You can also scroll down to find a FAQ section addressing common questions about ingredient swaps, reheating tips, and variations—so you’ll never be left guessing. If you decide to try this recipe, I’d love to hear how it turns out! Drop a comment below with your feedback, any tweaks you made, or questions you ran into during the cooking process. Your experiences and suggestions help make this recipe even better for everyone in our foodie community. Happy cooking!
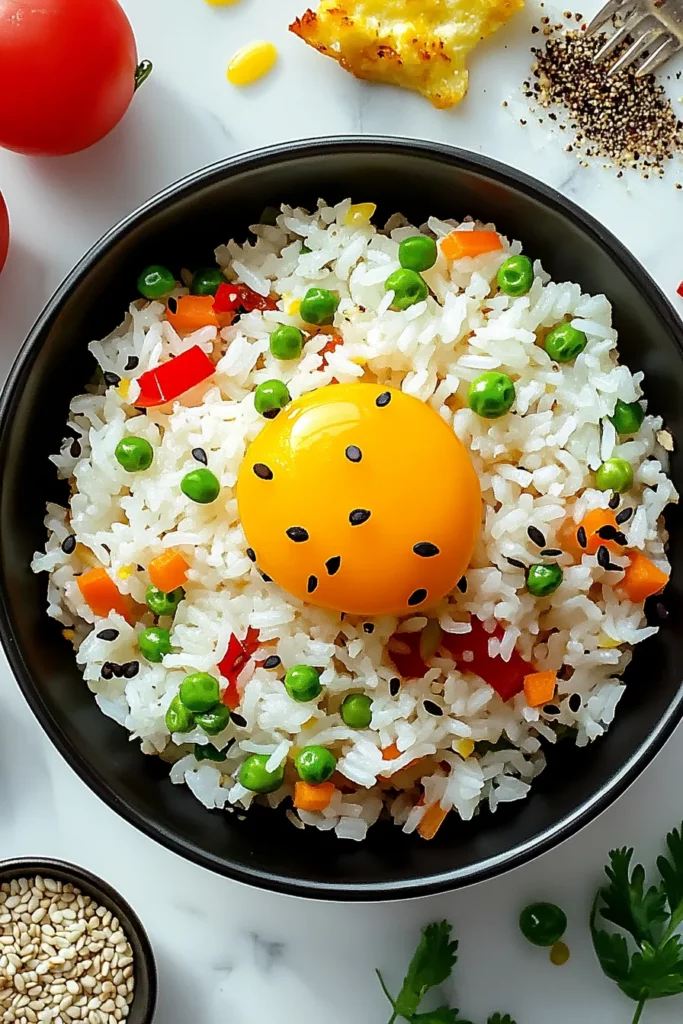

Better Than Takeout Fried Rice
Description
This vibrant fried rice uses day-old rice for perfect texture, tender chicken, peas, carrots, and a savory soy-oyster sauce blend, finished with sesame oil and fresh green onions.
Ingredients
Instructions
-
Start by preparing the rice. If you don't have day-old rice, spread fresh rice out on a baking sheet to cool it down and reduce moisture.
-
Heat 1 tablespoon of vegetable oil in a large skillet or wok over medium-high heat. Add the beaten eggs and cook, scrambling until fully cooked. Remove the eggs from the pan and set them aside.
-
In the same skillet, add the remaining 1 tablespoon of vegetable oil. Once the oil is hot, add the chopped onion and cook for 2-3 minutes, until softened.
-
Add the minced garlic to the pan and cook for another 30 seconds, until fragrant.
-
Stir in the thawed peas and carrots, and cook for another 2 minutes until heated through.
-
If you're adding chicken (or any other protein), add it now and stir to combine with the vegetables.
-
Add the rice to the pan and break up any clumps. Stir-fry the rice for 3-4 minutes, ensuring it's evenly heated.
-
Drizzle the soy sauce, oyster sauce (if using), sesame oil, and hoisin sauce (if using) over the rice. Stir to distribute the sauces evenly.
-
Return the scrambled eggs to the pan and mix them into the rice. Add the white pepper and salt, adjusting to taste.
-
Garnish the fried rice with sliced green onions and chopped cilantro, if desired.
-
Serve immediately and enjoy your homemade fried rice that's better than takeout!
Note
- Using day-old rice helps achieve a better texture because it’s drier and less sticky.
- Feel free to adjust the vegetables based on your preference (corn, bell peppers, or broccoli work well).
- You can easily customize the protein by using shrimp, pork, or beef instead of chicken.
- If you like a little heat, try adding a dash of chili sauce or crushed red pepper flakes to the sauce mixture.
- This dish is great for meal prep and can be stored in an airtight container in the refrigerator for up to 3 days.

