

If you’ve ever daydreamed about a homemade burrito that combines the heartiness of seasoned ground beef with the ooey-gooey bliss of melted cheddar and the bright punch of fresh salsa, you’re in for a treat. This Beefy Melt Burrito is the ultimate comfort food for lunch or dinner, whether you’re feeding a hungry crowd or simply craving something supremely satisfying on a weeknight. With beginner-friendly steps, just 25 minutes of prep, 25 minutes of cooking, and a brief 5-minute rest, it’s perfect for busy home cooks looking for an easy Mexican-inspired meal. Packed with protein, fluffy rice, and a symphony of spices like chili powder, cumin, and smoked paprika, each bite delivers that signature blend of warmth and depth. The tortillas are toasted to golden perfection, giving you a delightful crunch outside and a soft, melty core inside—exactly what you want in a cheese burrito.
Every element plays its part in creating an unforgettable dining experience. The ground beef delivers a savory backbone, while the sour cream and salsa introduce cool creaminess and tangy brightness. Shredded cheddar cheese melts over the beef and rice mixture, creating strings of cheesy goodness that stretch with every bite. A handful of chopped cilantro sprinkled on top adds an herbal lift, rounding out the flavors beautifully. Whether you’re meal-prepping for an Easy Mexican Dinner, enjoying a casual Homemade Burrito with friends, or simply sneaking a slice of toasted burrito goodness when no one’s watching, this recipe has you covered. So roll up your sleeves, warm up that skillet, and get ready to savor every juicy, cheesy, toasted moment with this Beefy Melt Burrito!
KEY INGREDIENTS IN BEEFY MELT BURRITO
Before we dive into the step-by-step process, let’s get acquainted with the stars of this Beefy Melt Burrito. Each ingredient brings its own unique flavor and texture, working together to create that perfect bite of comfort. From the richly seasoned beef to the refreshing cilantro garnish, here’s what you’ll need:
- Ground Beef
This is the savory cornerstone of our burrito. It provides a rich, meaty texture and soaks up the aromatic spices, creating a hearty filling that’s hard to resist.
- Olive Oil
Used to sauté the onions and garlic, olive oil adds a gentle fruitiness and helps to create a luscious base for the beef to cook in, ensuring nothing sticks to the skillet.
- Onion
Diced onions soften and turn slightly sweet when sautéed. They introduce a subtle sharpness that balances the rich beef and creamy components.
- Garlic
Minced garlic brings a warm, aromatic depth to the dish. When cooked until fragrant, it infuses every bite with an appetizing zing.
- Chili Powder
This spice blend offers a mild heat and earthy undertones, giving the beef filling that signature Mexican-inspired kick without overpowering the other flavors.
- Cumin
With its warm, slightly bitter edge, cumin deepens the meat’s flavor profile. It pairs beautifully with chili powder for an authentic taste.
- Smoked Paprika
Smoked paprika adds a subtle smokiness and vibrant color, making the filling look as good as it tastes.
- Salt and Pepper
Simple seasonings that bring all the flavors into harmony, ensuring the beef mixture is perfectly balanced.
- Cooked Rice
Fluffy rice stretches the filling, adding a soft texture and gentle nuttiness that complements the beef without overwhelming it.
- Cheddar Cheese
Shredded cheddar melts into creamy, gooey perfection. It binds the filling together and introduces that irresistible stringy cheese pull.
- Sour Cream
A cool, tangy element that cuts through the spiciness and richness, offering a velvety texture inside the tortilla.
- Salsa
Bright and zesty, salsa brings acidity and a hint of sweetness. It keeps each bite lively and fresh.
- Flour Tortillas
Large and pliable, these tortillas wrap everything up neatly and toast up to a golden-brown finish, providing a satisfying crunch on the outside and a soft interior.
- Cilantro
Chopped fresh cilantro sprinkled on top adds a burst of herbal brightness and a pop of green color, rounding out the flavor profile.
HOW TO MAKE BEEFY MELT BURRITO
Let’s roll up our sleeves and transform these wonderful ingredients into the ultimate cheese burrito experience. Follow each detailed step, and we’ll take you from raw components to golden-toasted perfection in no time.
1. In a large skillet, heat the olive oil over medium heat. Add the diced onion and sauté until it turns translucent, about 3 minutes. Stir in the minced garlic and cook for another minute until fragrant, taking care not to let it brown too quickly.
2. Add the ground beef to the skillet and cook until browned, breaking it apart with a spoon or spatula. This should take approximately 5–7 minutes. Once the meat has lost its pink hue, drain any excess fat to keep the burrito filling light and not greasy.
3. Season the beef mixture with chili powder, cumin, smoked paprika, salt, and pepper. Stir well to ensure the spices coat the meat evenly, unlocking a symphony of bold, smoky, and earthy flavors.
4. Add the cooked rice to the beef mixture and stir to combine thoroughly. Allow this mixture to cook over low heat for another 2–3 minutes, giving the flavors time to meld together into a cohesive filling.
5. Warm the flour tortillas on a dry skillet or in the microwave for a few seconds until they become pliable. This step prevents tearing and makes rolling much easier.
6. Begin assembling the burrito: Lay a tortilla flat and spread a generous spoonful of sour cream in the center. Add a portion of the beef and rice mixture, then top with a spoonful of salsa and a hearty sprinkle of shredded cheddar cheese.
7. Fold in the sides of the tortilla, then roll it tightly from the bottom up to form a snug burrito. Repeat this process with the remaining tortillas and filling for evenly packed burritos.
8. Heat a clean, dry skillet over medium heat. Place each rolled burrito seam-side down and toast for 1–2 minutes per side or until the exterior is golden brown and slightly crisp.
9. Serve the burritos hot, garnished generously with fresh cilantro. Pair with extra salsa or sour cream on the side for dipping, and savor every bite of that melty, beefy goodness.
SERVING SUGGESTIONS FOR BEEFY MELT BURRITO
When it’s time to dig into these Beefy Melt Burritos, presentation and accompaniments can elevate your meal from delicious to unforgettable. Whether you’re hosting friends or enjoying a cozy night in, these serving suggestions will help you get the most out of every cheesy, toasty bite.
- Family-Style Platter
Arrange your burritos on a large serving board or platter. Surround them with small bowls of salsa, sour cream, guacamole, and pickled jalapeños. This interactive spread invites everyone to customize their own bites, making it perfect for casual gatherings.
- Loaded Taco Bar
Chop a few additional ingredients—diced tomatoes, shredded lettuce, sliced black olives, and diced avocados. Set up a self-service station where guests can sprinkle on their favorites, creating a colorful and flavorful taco bar that caters to all tastes.
- Hearty Side Dishes
Pair the burritos with refried beans and Mexican street corn (elote) for a filling and authentic meal. The creaminess of the beans and the smoky, cheesy sweetness of elote complement the beefy filling, making every bite feel like a fiesta.
- Light & Fresh Salad
Serve alongside a crisp jicama and citrus salad or a simple green salad with lime vinaigrette. The refreshing crunch and tangy dressing will cut through the richness of the burrito, creating a well-balanced dining experience.
HOW TO STORE BEEFY MELT BURRITO
Meal prep enthusiasts and busy families will love how these Beefy Melt Burritos store beautifully for later. With straightforward techniques, you can preserve all that melty cheese, seasoned beef, and vibrant flavors—ready to reheat whenever hunger strikes.
Before storing, allow the burritos to cool completely at room temperature for about 10 minutes. This prevents condensation and sogginess in your storage container.
- Refrigeration
Wrap each burrito tightly in plastic wrap or aluminum foil and place them in an airtight container. Stored this way, they’ll stay fresh for up to 3–4 days. Reheat in a microwave or oven until warmed through and the cheese is melted again.
- Freezer-Friendly Meal Prep
For longer storage, wrap burritos individually in foil and slip them into a freezer-safe bag. Label with the date and freeze for up to 2 months. When you’re ready to enjoy, reheat directly from frozen: unwrap the foil and microwave for 2–3 minutes, then crisp in a hot skillet for that fresh-toasted finish.
- Sous Vide Reheat
If you have sous vide equipment, seal burritos in a vacuum bag and reheat at 140°F (60°C) for about 30 minutes. This method warms everything evenly without drying out the tortilla or meat.
- Preventing Sogginess
To maintain a crisp exterior, avoid stacking or overcrowding your storage containers. Place a sheet of parchment paper between burritos to absorb any moisture and keep them separated for easy retrieval.
CONCLUSION
This Beefy Melt Burrito recipe brings together tender, seasoned ground beef, fluffy rice, melty cheddar, and bright salsa all wrapped in a perfectly toasted flour tortilla. As you’ve seen, it’s an incredibly easy dish for beginners yet versatile enough to satisfy seasoned home cooks who crave that homemade Mexican flair. With just 25 minutes of prep and 25 minutes of cooking, plus a brief rest to settle, you’ll have a warm, comforting meal in under an hour. Whether you’re enjoying it for lunch or dinner, hosting a game-night feast, or stocking your freezer for busy days, these burritos deliver that ideal blend of gooey cheese, smoky spices, and fresh toppings. Don’t forget to sprinkle on chopped cilantro right before serving to add that finishing pop of color and flavor!
Feel free to print and save this article for future reference—you’ll find all the tips, serving suggestions, and storage methods laid out for easy meal planning. Scroll down for a helpful FAQ section to answer any lingering questions about substitutions, reheating, or ingredient swaps. And, of course, I’d love to hear from you: leave a comment below if you try this recipe, share your favorite variations, or ask for troubleshooting advice. Your feedback and stories make this recipe community truly special!
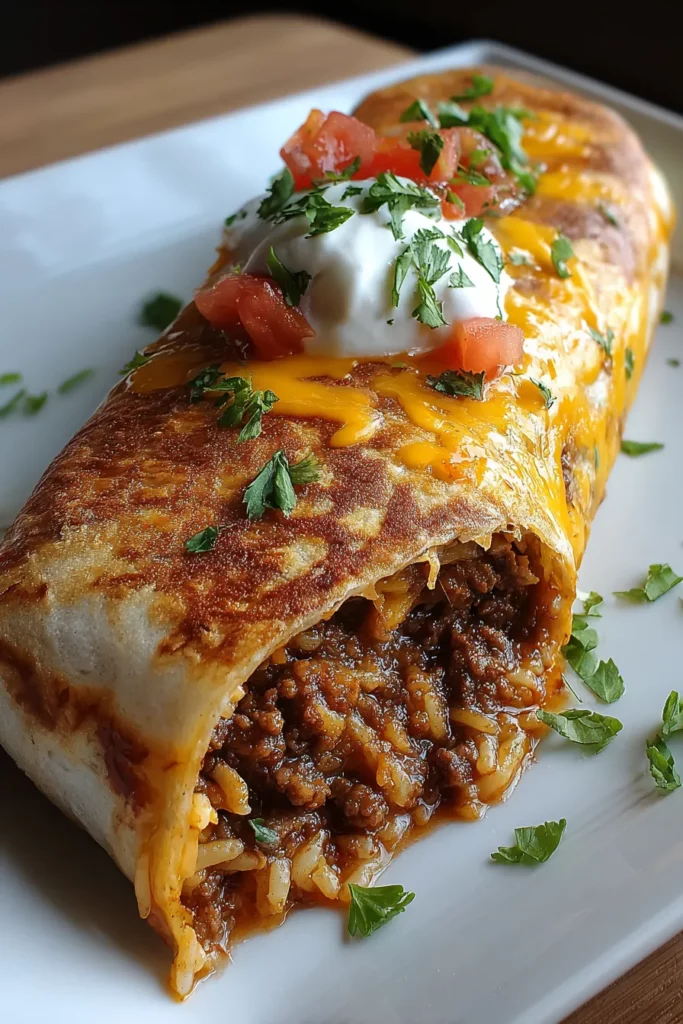

Beefy Melt Burrito
Description
Savor perfectly seasoned ground beef and fluffy rice, all smothered in melty cheddar cheese and wrapped in a warm, golden-toasted tortilla. A truly satisfying bite!
Ingredients
Instructions
-
In a large skillet, heat olive oil over medium heat. Add the diced onion and sauté until translucent, about 3 minutes. Stir in the garlic and cook for another minute until fragrant.
-
Add the ground beef to the skillet and cook until browned, breaking it apart with a spoon, approximately 5-7 minutes. Drain any excess fat.
-
Season the beef mixture with chili powder, cumin, smoked paprika, salt, and pepper. Stir well to ensure the spices coat the meat evenly.
-
Add the cooked rice to the beef mixture and stir to combine thoroughly. Let this mixture cook for another 2-3 minutes on low heat, allowing the flavors to meld together.
-
Warm the flour tortillas on a skillet or in the microwave to make them pliable.
-
Begin assembling the burrito: Lay a tortilla flat and spread a generous spoonful of sour cream in the center. Add a portion of the beef and rice mixture, followed by a layer of salsa and a sprinkle of cheddar cheese.
-
Fold in the sides of the tortilla, then roll it tightly from the bottom up to form the burrito. Repeat with the remaining tortillas and filling.
-
Heat a dry skillet over medium heat and place the rolled burritos seam-side down. Toast for 1-2 minutes per side or until golden brown.
-
Serve the burritos hot, garnished with fresh cilantro. Pair with extra salsa or sour cream on the side.
Note
- To add extra heat, consider including sliced jalapenos in the filling.
- You can substitute the ground beef with ground turkey or chicken for a leaner option.
- For a vegetarian alternative, replace the beef with black beans or grilled vegetables.
- Customize the burrito with additional ingredients like sliced avocado, corn, or black olives.
- This recipe is ideal for meal prep; store individually wrapped burritos in the freezer for a quick meal option.

