

The cooler days of autumn bring out the best in seasonal baking, and these Bakery-Style Pumpkin Scones are here to steal the show. There’s something truly comforting about pulling a tray of golden, flaky scones from the oven—each one infused with warm spices and a hint of pumpkin that balances sweetness with a cozy earthiness. As you slice into the tender biscuit-like edges, you’ll appreciate the contrast between the slightly crisp exterior and the pillowy interior that practically melts in your mouth. Whether you’re serving them for breakfast, packing them for a midday snack, or simply craving a treat alongside your afternoon latte, these scones check all the boxes.
I can’t help but smile when I think back to the first batch I made on a blustery Sunday morning. Armed with my favorite mixing bowl and a steaming mug of coffee, I chopped cold cubes of butter into the flour and spice blend while reminiscing about brisk fall festivals and pumpkin patches. The kitchen filled with that nostalgic, cinnamon-tinged scent that instantly makes any space feel warm and inviting. By the time I drizzled on the sweet cinnamon glaze, I was ready to share the bounty with friends gathered around my table—because scones this good are best enjoyed together, wrapped in laughter and the glow of crisp autumn light.
KEY INGREDIENTS IN BAKERY-STYLE PUMPKIN SCONES
Before we dive into the whisking, cutting, and baking fun, let’s talk about what makes these scones so dreamy. Each component plays a crucial role—from building structure to delivering that irresistible hint of pumpkin spice. Gathering quality pantry staples and keeping your butter chilled are simple steps that set you up for flaky, bakery-worthy results.
- All-purpose flour
Provides the foundation for structure and texture, giving scones their signature crumb and lift.
- Granulated sugar
Adds just the right level of sweetness and helps tenderize the dough for a soft bite.
- Baking powder
Acts as a leavening agent to ensure your scones rise beautifully and develop a light, airy texture.
- Salt
Enhances the flavors of pumpkin and spices while balancing sweetness.
- Ground cinnamon
Brings a warm, familiar spice note that defines the fall feeling in every bite.
- Ground nutmeg
Adds a subtle earthy warmth and depth to complement the cinnamon.
- Ground cloves
Offers a hint of bold, aromatic spice to round out the pumpkin pie profile.
- Ground ginger
Injects a gentle heat and complexity, boosting the overall spiced character.
- Unsalted butter
When kept cold and cubed, creates those delightful pockets of flakiness as it melts in the oven.
- Canned pumpkin puree
Provides moist texture, vibrant color, and that unmistakable pumpkin essence without extra liquid.
- Heavy cream
Contributes richness and helps bind the dough, making each scone tender and moist.
- Egg
Acts as a binder and adds structure, ensuring your scones hold together while remaining soft.
- Vanilla extract
Enhances sweetness and adds a floral note that complements the spices.
- Powdered sugar
Forms the base of the smooth glaze, sweetening and finishing the scones with a silky sheen.
- Milk
Thins the glaze to the perfect drizzle consistency, ensuring it coats each scone evenly.
- Ground cinnamon (for glaze)
Sprinkled into the glaze itself for an extra layer of spice in each mouthful.
- Ground nutmeg (for glaze)
Infuses the finishing drizzle with another whisper of warmth and complexity.
HOW TO MAKE BAKERY-STYLE PUMPKIN SCONES
Ready to transform these ingredients into golden, tender scones? Follow these steps carefully, and you’ll be biting into flaky, spiced perfection in no time.
1. Preheat your oven to 400°F (200°C) and line a baking sheet with parchment paper to prevent sticking and promote even browning.
2. In a large mixing bowl, whisk together the flour, granulated sugar, baking powder, salt, ground cinnamon, ground nutmeg, ground cloves, and ground ginger until fully combined and uniform in color.
3. Add the chilled, cubed unsalted butter to the dry ingredients. Using a pastry cutter or your clean fingers, cut the butter in until the mixture resembles coarse crumbs, with pea-sized bits scattered throughout for flaky layering.
4. In a separate bowl, mix together the pumpkin puree, heavy cream, egg, and vanilla extract until the mixture is smooth and homogenous, ensuring every spoonful is evenly flavored.
5. Pour the wet ingredients into the dry ingredients and stir gently with a spatula or wooden spoon until a shaggy dough forms. Be careful not to overmix, as that can lead to dense scones rather than light and tender ones.
6. Turn the dough out onto a lightly floured surface. Knead gently just a couple of times to bring it together, then shape it into a disc about 1 inch thick to ensure even baking.
7. Use a sharp knife to cut the disc into 8 equal wedges. Transfer each wedge to the prepared baking sheet, spacing them at least 2 inches apart to allow room for rising.
8. Bake for 15 to 18 minutes, or until the scones are golden brown on top and just set in the center. Remove them from the oven and let them cool on a wire rack to prevent sogginess on the bottom.
9. To make the glaze, whisk together the powdered sugar, milk (start with 1 tablespoon and add more until you reach your desired consistency), ground cinnamon, and ground nutmeg until the mixture is smooth and drizzle-friendly.
10. Drizzle the glaze over the cooled scones using a spoon or piping bag, then allow it to set for a few minutes before serving so each scone wears its sweet icing like a delicate crown.
SERVING SUGGESTIONS FOR BAKERY-STYLE PUMPKIN SCONES
There’s an art to serving these scones in a way that highlights their flaky texture and warm spice notes. Whether you’re hosting a cozy brunch, gifting them to a neighbor, or simply indulging in a quiet moment with your favorite book, presentation and pairing can elevate the experience.
- Tea Time Pairing: Arrange scones on a tiered stand next to a pot of loose-leaf chai or Earl Grey. The spicy undertones of the tea bring out the cinnamon and nutmeg in the scones for a harmonious sip-and-bite rhythm.
- Coffee Lover’s Spread: Serve alongside a barista-style latte or cappuccino, garnished with a sprinkle of cinnamon on the foam. The creamy coffee pairs beautifully with the buttery, pumpkin-kissed dough.
- Fruit and Cream Ensemble: Plate with a dollop of whipped cream, fresh berries, or sliced apples. The tartness of the fruit balances the sweet glaze, while the whipped cream adds extra indulgence.
- Fall Brunch Platter: Surround the scones with roasted nuts, cheese cubes, and a small dish of homemade apple butter or pumpkin butter for dipping. Guests can mix and match for a festive, interactive fall feast.
HOW TO STORE BAKERY-STYLE PUMPKIN SCONES
Keeping your scones fresh and flaky doesn’t have to be a mystery. With the right approach, you can maintain their tender crumb and sweet glaze for days, or even freeze them for later enjoyment.
- Room Temperature Airtight Storage
Once completely cooled and glazed, place scones in a single layer in an airtight container. Store at room temperature for up to 2 days to preserve their crisp edges without drying them out.
- Refrigeration for Extra Moisture
For a slightly moister scone, arrange them in a container lined with a paper towel and store in the refrigerator for up to 5 days. The towel wicks away excess moisture, preventing sogginess.
- Freezing for Long-Term Keeping
Flash-freeze scones on a baking sheet for 1 hour, then transfer them to a zip-top freezer bag. Label with the date, and freeze for up to 3 months. Thaw at room temperature or warm in a low oven before serving.
- Separate Glaze Storage
If you prefer freshly glazed scones each time, store scones and glaze separately. Keep glaze in a sealed jar in the fridge for up to a week. Drizzle over thawed or warmed scones right before enjoying.
CONCLUSION
Bringing bakery-style pumpkin scones into your home kitchen is like capturing the essence of fall in each buttery, spice-laced bite. From gathering your chilled butter and aromatic spices to the satisfying snap of dividing the dough and the gentle drizzle of cinnamon-tinged glaze, this recipe is designed to make you feel confident and cozy at every step. Whether you’re a beginner baker or someone who already loves experimenting with dough, these scones strike the perfect balance between simplicity and show-stopping flavor. Feel free to reduce the sugar for a less sweet version, toss in some chocolate chips or chopped nuts, or serve alongside your favorite seasonal spreads. The possibilities for personalization are as delightful as the scones themselves.
I hope you find this article easy to follow and inspiring enough to bake up a batch this season. You can print and save it for future fall mornings, holiday brunches, or anytime you crave a warm treat that tastes like comfort on a plate. And don’t forget—you can scroll down to the FAQ below to get answers to any lingering questions you might have. If you try this recipe, I’d love to hear how your scones turned out! Drop a comment with your experiences, ask any questions, or share your creative twists. Your feedback and stories always make my day and help other home bakers feel right at home in their own kitchens. Happy baking!
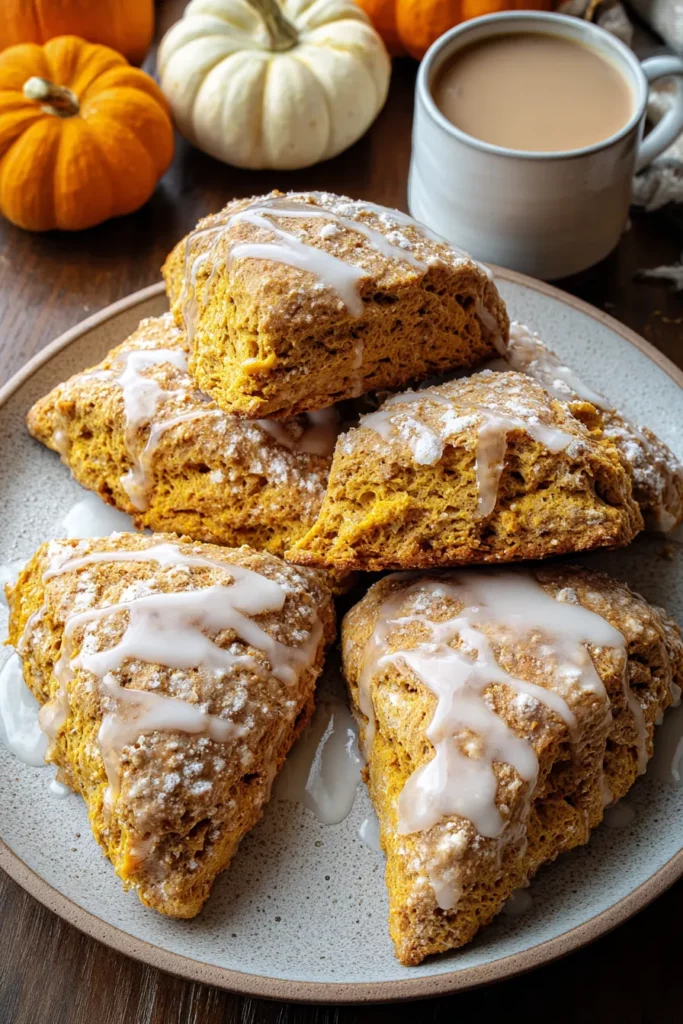

Bakery-Style Pumpkin Scones
Description
These scones are bursting with warm pumpkin spice flavors, are buttery and flaky, and finished off with a sweet cinnamon glaze. Perfect for morning coffee or an afternoon snack!
Ingredients
Instructions
-
Preheat your oven to 400°F (200°C) and line a baking sheet with parchment paper.
-
In a large mixing bowl, whisk together the flour, sugar, baking powder, salt, cinnamon, nutmeg, cloves, and ginger.
-
Add the cubed butter to the dry ingredients. Using a pastry cutter or your fingers, cut the butter into the flour mixture until it resembles coarse crumbs.
-
In a separate bowl, mix together the pumpkin puree, heavy cream, egg, and vanilla extract until well combined.
-
Pour the wet ingredients into the dry ingredients and stir until a dough forms. Be careful not to overmix.
-
Turn the dough out onto a lightly floured surface. Knead gently to bring the dough together, then shape it into a disc about 1 inch thick.
-
Cut the disc into 8 wedges and transfer them to the prepared baking sheet, spacing them slightly apart.
-
Bake for 15 to 18 minutes or until the scones are golden brown. Remove them from the oven and let them cool on a wire rack.
-
To make the glaze, whisk together the powdered sugar, milk (starting with 1 tablespoon and adding more to reach desired consistency), cinnamon, and nutmeg until smooth.
-
Drizzle the glaze over the cooled scones and allow it to set before serving.
Note
- For a less sweet scone, you can reduce the sugar amount to your taste.
- Chilling the butter ensures the scones are flaky and light, so maintain the butter's cold temperature.
- You can add mix-ins like chocolate chips or nuts for variations.
- These scones pair beautifully with a hot cup of tea or coffee, making them perfect for breakfast or tea time.

