

Every bite of Air Fryer Cheesy Garlic Bread is a tiny celebration in your mouth, as the golden edges crackle beneath your teeth and the rich, gooey cheese stretches invitingly with each pull. This delightful blend of creamy mozzarella and nutty Parmesan clings to a perfectly crisped loaf of French bread, while fragrant notes of garlic and fresh parsley dance across your taste buds. I remember the first time I made this, standing in my cozy kitchen on a rainy afternoon, feeling the warmth of the air fryer hum in the background as the cheesy magic unfolded. The whole process, from whisking butter with garlic to that final sprinkle of Parmesan, felt therapeutic—almost like painting a masterpiece that melts in your mouth. As I sliced into the loaf, steam rose and teased my senses, promising that something truly special was waiting inside. Before I knew it, family members were crowding the counter, forks in hand, ready to snag their share of this crispy, melty delight. It’s the kind of recipe that transforms an ordinary afternoon into a cozy gathering, uniting everyone around its irresistible golden crust and ooey-gooey center. Whether you’re feeding a crowd, impressing guests, or simply indulging a craving, this cheesy garlic bread makes every moment feel like a celebration.
Using an air fryer to craft this dish brings the best of both worlds: the crunch of traditional oven-baked garlic bread and the speed and simplicity of modern cooking technology. In just 10 minutes of prep, you’ll whisk together softened butter, pungent garlic, and bright parsley, then load your half-sliced baguette into a preheated basket. Eight minutes later, it emerges hot, bubbly, and golden, ready to rest for a brief five minutes before slicing—making the total time from pantry to plate under a half-hour. At roughly 320 calories per serving, it’s a satisfying snack or appetizer that doesn’t require a culinary degree to pull off. Whether you’re a seasoned home chef or a beginner eager to expand your repertoire, this recipe shines thanks to its forgiving steps and flexible flavor options. Feel free to swap in cheddar for mozzarella, crank up the garlic for a more intense hit, or toss in red pepper flakes for a playful kick. Regardless of your variations, expect consistent results: a crusty exterior that crackles as you bite in, giving way to rich, molten cheese and aromatic garlic. Perfect as a starter for a dinner party or as the hero of a cozy night in, this recipe proves that simplicity and flavor can go hand in hand.
KEY INGREDIENTS IN AIR FRYER CHEESY GARLIC BREAD
Before we dive into the cooking steps, let’s explore the key ingredients that make this Air Fryer Cheesy Garlic Bread shine. Each element plays a vital role in delivering that perfect balance of crunch, creaminess, and flavor.
- French bread or baguette: Provides a sturdy, crusty exterior and a soft, absorbent interior that soaks up the garlic butter and holds all that cheesy goodness.
- Unsalted butter: Acts as the rich, creamy base for the garlic spread, allowing you to control the salt level and achieve a perfectly balanced flavor.
- Garlic cloves: Infuse every bite with pungent, aromatic depth—mincing them finely ensures an even distribution of garlicky goodness.
- Fresh parsley: Adds a burst of color and a hint of herbal brightness that cuts through the richness of the cheese and butter.
- Shredded mozzarella cheese: Melts into stretchy, creamy layers that promise satisfying cheese pulls with each serving.
- Grated Parmesan cheese: Brings a sharp, tangy edge and enhances overall savory complexity.
- Salt: Enhances all the flavors, from the butter to the cheese, without overpowering the delicate garlic notes.
- Black pepper: Provides a subtle heat and a touch of earthiness to round out the seasoning.
- Red pepper flakes (optional): Sprinkle in for a playful kick of spice and extra visual appeal.
HOW TO MAKE AIR FRYER CHEESY GARLIC BREAD
Now that we have our ingredients lined up, let’s walk through the simple steps to transform them into a sizzling loaf of Air Fryer Cheesy Garlic Bread. With straightforward instructions and minimal cleanup, you’ll have a show-stopping appetizer ready in no time.
1. Preheat the air fryer to 350°F (175°C). Ensuring the basket is hot before adding the bread helps achieve that signature crispiness.
2. Slice the loaf of French bread in half lengthwise, creating two even ‘boats’ to hold all your delicious toppings.
3. Mix the softened butter, minced garlic, chopped parsley, salt, and black pepper in a small bowl until well combined into a smooth garlic butter.
4. Spread the garlic butter mixture evenly over both halves of the bread, making sure to cover every nook and cranny.
5. Sprinkle the shredded mozzarella cheese evenly on top of the buttered sides, then follow with the grated Parmesan cheese for extra flavor depth.
6. Add a pinch of red pepper flakes if you’d like a touch of heat and visual contrast.
7. Place the bread halves in the air fryer basket—cut them into smaller portions if necessary to fit without overlapping.
8. Air fry at 350°F (175°C) for about 6–8 minutes, or until the cheese is melted and bubbly, and the edges of the bread are golden and crisp.
9. Carefully remove the cheesy garlic bread from the air fryer and let it rest for a few minutes so the cheese sets slightly and the flavors meld.
10. Slice into pieces and serve warm, savoring each crispy, cheesy, garlicky bite.
SERVING SUGGESTIONS FOR AIR FRYER CHEESY GARLIC BREAD
When it comes to presenting your Air Fryer Cheesy Garlic Bread, there are endless ways to elevate the experience. Whether you’re hosting a casual get-together or enjoying a quiet night in, these serving suggestions will help you turn a simple appetizer into a memorable treat. Consider arranging your slices on a rustic wooden board with vibrant garnishes for contrast and ask guests to grab a slice as they mingle. You can keep the vibe cozy by placing the board next to a steaming pot of soup—every dunk becomes a flavor adventure. If you’re serving this at a party, stack the slices upright in a basket lined with parchment paper so they stay crispy and easy to grab. Don’t forget to sprinkle a little extra chopped parsley on top right before serving—it adds a fresh pop of color and brightness. No matter how you choose to plate it, these ideas will ensure your cheesy garlic bread feels as special as it tastes.
- Serve with marinara sauce in a small dipping bowl, letting guests swirl each slice into the tangy tomato goodness for a classic Italian pairing.
- Pair alongside a crisp green salad tossed with lemon vinaigrette to balance the richness with refreshing acidity and crunch.
- Garnish with extra fresh parsley and red pepper flakes just before serving for a pop of color and a hint of heat that catches the eye.
- Arrange on a charcuterie board with cured meats, olives, and roasted peppers—your Air Fryer Cheesy Garlic Bread will stand out as the perfect cheesy companion.
HOW TO STORE AIR FRYER CHEESY GARLIC BREAD
Keeping your leftover Air Fryer Cheesy Garlic Bread tasting fresh is all about proper storage. With the right techniques, you can preserve its crunch and melty cheese so it still feels indulgent on Day Two (or even later!). Start by letting any extras cool completely at room temperature—trapping warm bread in a container creates steam and sogginess. Once cooled, choose your preferred storage method, and follow these tips to maintain that crispy-on-the-outside, tender-on-the-inside texture. When you’re ready to enjoy leftovers, opt for a quick reheat in the air fryer or a toaster oven to revive the original magic. With just a bit of care, you’ll find that your cheesy garlic bread is almost as good on the second round as it was fresh from the air fryer.
- Room Temperature: Cover loosely with aluminum foil or place in a bread bag for up to 2 hours, perfect if you plan to snack again soon.
- Refrigeration: Wrap individual slices in plastic wrap or store in an airtight container for up to 3 days—this slows bacterial growth while preserving moisture.
- Freezing: Lay slices flat on a baking sheet, freeze until solid, then transfer to a resealable freezer bag. Store for up to 1 month and thaw in the fridge before reheating.
- Reheating: Pop refrigerated or thawed slices back into the air fryer at 350°F (175°C) for 3–4 minutes, or heat in a toaster oven until the cheese bubbles and the crust regains its crisp.
CONCLUSION
This Air Fryer Cheesy Garlic Bread recipe brings together the irresistibly crunchy texture of perfectly crisped French bread and the creamy, melty allure of mozzarella and Parmesan, all kissed with garlic and parsley. From gathering your key ingredients to following ten straightforward steps, you’ve unlocked a simple path to snack-time greatness. The dish shines as a quick appetizer—requiring just 10 minutes of prep, 8 minutes of cooking, and a brief 5-minute rest—yet feels indulgent enough for any occasion. Whether you’re serving it alongside a vibrant salad, dipping it in warm marinara, or stacking it on a colorful charcuterie board, this versatile recipe adapts to your mood and menu. And thanks to smart storage tips—ranging from simple room-temperature holds to freezer-friendly prep—you can extend the joy of cheesy garlic bread far beyond one sitting.
Feel free to print and save this article for your recipe collection, and remember that you can find a FAQ below to answer any lingering questions. I’d love to hear how your Air Fryer Cheesy Garlic Bread turns out, so please leave a comment if you try the recipe, have questions, or want to share your own delicious twists. Your feedback helps me keep the kitchen conversation going and inspires new ideas for tasty, approachable dishes. Happy cooking and happy munching!
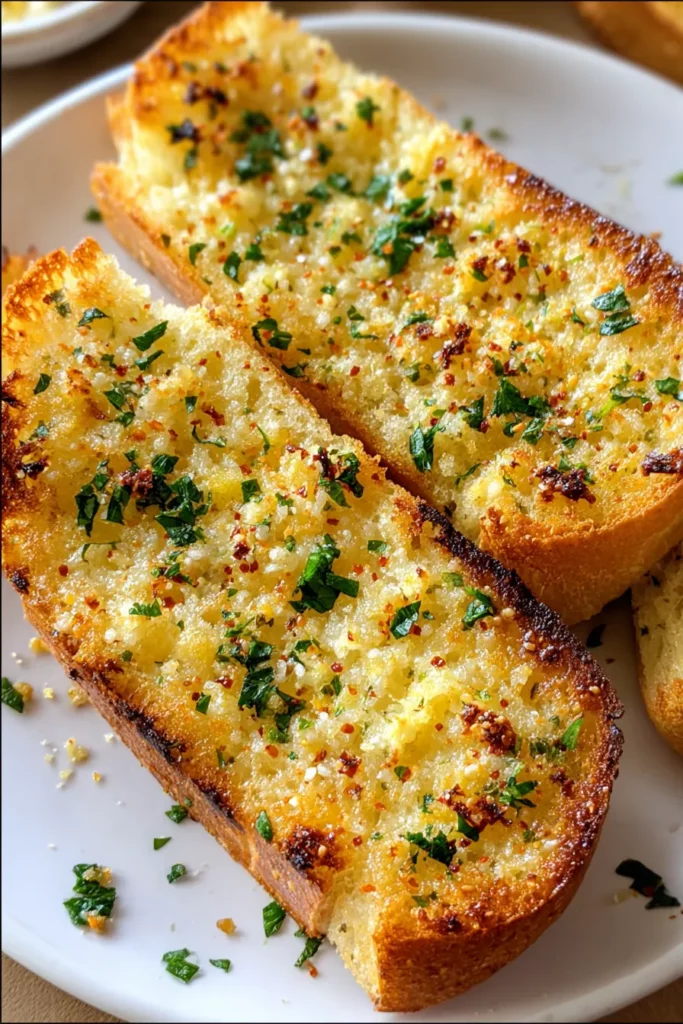

Air Fryer Cheesy Garlic Bread
Description
This cheesy garlic bread bursts with flavor thanks to creamy mozzarella, zesty garlic, and fragrant parsley. Perfect as a snack or appetizer, it's simply irresistible!
Ingredients
Instructions
-
Preheat the air fryer to 350°F (175°C).
-
Slice the loaf of French bread in half lengthwise.
-
In a small bowl, mix together the softened butter, minced garlic, chopped parsley, salt, and black pepper until well combined.
-
Spread the garlic butter mixture evenly over both halves of the bread.
-
Sprinkle the shredded mozzarella cheese evenly on top of the buttered sides, followed by the grated Parmesan cheese.
-
If desired, sprinkle a pinch of red pepper flakes for a touch of heat.
-
Place the bread halves in the air fryer basket, cutting them in half if necessary to fit.
-
Air fry the bread at 350°F (175°C) for about 6-8 minutes, or until the cheese is melted and bubbly, and the edges are golden and crisp.
-
Carefully remove the cheesy garlic bread from the air fryer and let it cool slightly.
-
Slice into pieces and serve warm.
Note
- This recipe can be easily doubled for larger gatherings, just adjust the air fryer time if needed.
- You can substitute the mozzarella with cheddar cheese for a different flavor profile.
- To make it extra garlicky, add an extra clove of garlic.
- This bread pairs great with a side of marinara sauce for dipping.
- Experiment with using different herbs like oregano or basil for a unique taste.
- For a vegan version, use dairy-free butter and cheese alternatives.

