
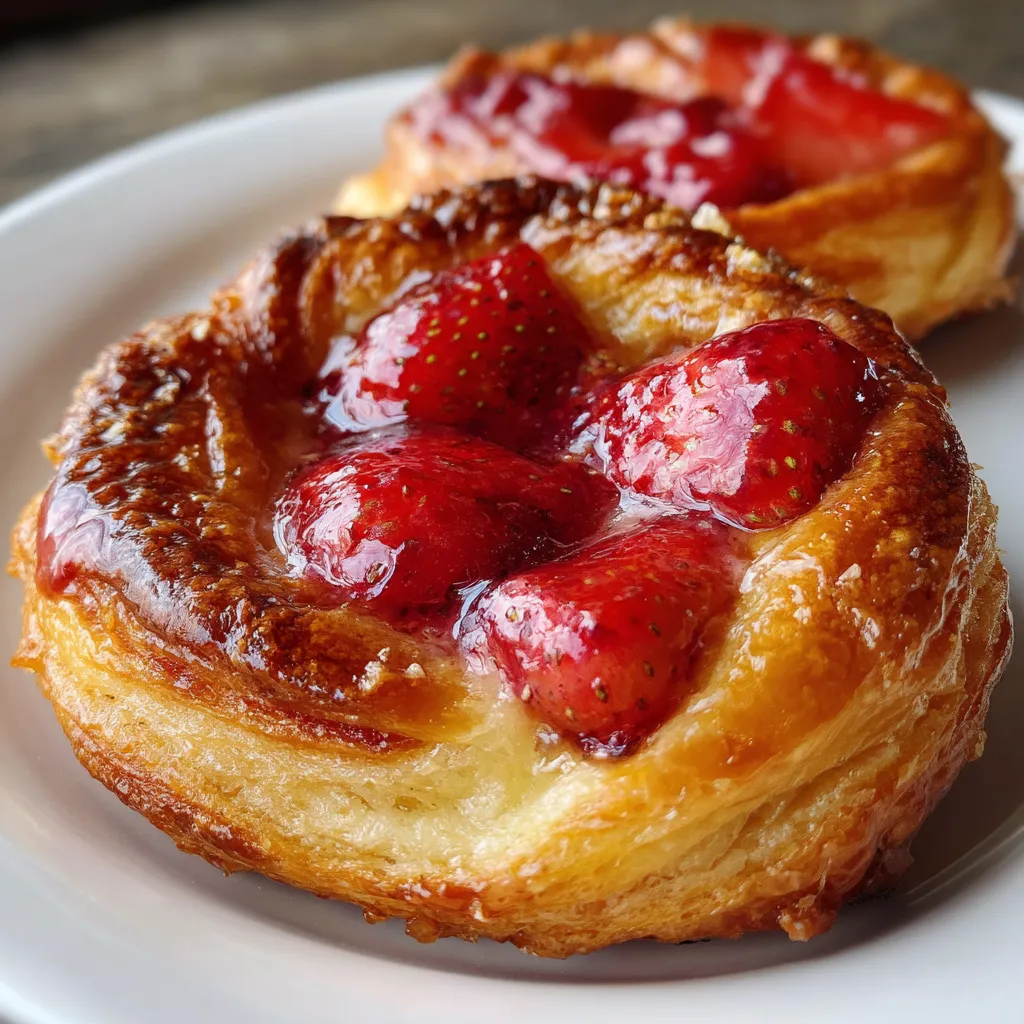
Sweet Buttery Flaky Strawberry Danish is your ticket to breakfast bliss, with flaky layers of buttery pastry hugging a sweet strawberry filling brightened by a hint of lemon. Whether you’re hosting a special brunch or simply treating yourself on a cozy weekend morning, this homemade Danish delivers that bakery-quality taste in your own kitchen. With a tender crumb and glossy golden finish, you’ll fall in love at first bite—and so will anyone lucky enough to share!
Gathering the right ingredients is essential for those signature flaky layers and vibrant strawberry pockets. Here’s what you need:
Turning simple ingredients into luxurious, flaky Danish requires patience and precise layering. You’ll proof the yeast, mix and knead a tender dough, then laminate it with generous slabs of cold butter through a series of rolls and folds. After shaping and filling, a final egg wash—or in this case, a milk brush—ensures a golden, glossy finish. Follow these detailed steps for bakery-worthy results at home:
1. In a small bowl, dissolve yeast in 1/4 cup warm water (105–115°F) and let stand for 5 minutes until foamy, indicating active yeast.
2. In a large bowl, whisk together 1 cup warm milk (105–115°F), 1/4 cup granulated sugar, 1 tsp salt, 1 tsp vanilla extract, and 1 egg until smooth and fully combined.
3. Stir in the foamy yeast mixture and 2 1/2 cups all-purpose flour until a shaggy dough forms, ensuring all flour is hydrated.
4. Knead the dough on a lightly floured surface for 5 minutes until smooth, then shape into a rectangle, wrap in plastic, and chill for 30 minutes to relax the gluten.
5. While dough chills, place 1 cup cold unsalted butter between parchment paper and pound with a rolling pin into a 6-inch square.
6. Roll the chilled dough into a 12×6-inch rectangle, place the butter block on one half, fold the other half over to enclose the butter, and seal the edges.
7. Roll the dough into a 12×8-inch rectangle, fold into thirds like a letter, wrap, and chill for 20 minutes to firm the butter and relax the dough.
8. Repeat the rolling and folding process two more times—each time rolling to size, folding into thirds, and chilling for 20 minutes—to build flaky layers.
9. Roll the final dough to 1/4-inch thickness, cut into six 5-inch squares, and mix 1 cup strawberry preserves with 1 tbsp lemon juice and 1 tbsp cornstarch until smooth.
10. Place a tablespoon of filling in the center of each square, fold corners into the center, and press gently to seal each Danish.
11. Preheat oven to 375°F (190°C), brush each Danish with 1 tbsp milk for shine, and bake for 15–20 minutes until puffed and golden.
12. Cool on a wire rack for 10 minutes before serving to let layers set and filling settle.
Once your danishes come out of the oven golden and puffed, it’s time to make them shine on the table. Whether you’re serving brunch guests or enjoying a quiet morning alone, these ideas add extra flair:
Mastering laminated dough can feel intimidating, but with a few friendly pointers, you’ll be creating perfect layers in no time. Keep everything cold, work efficiently, and don't skip those chill times—that’s the secret to bakery-style flakiness. Now, here are a few extra tips to ensure every fold and bite is flawless:
To keep your Strawberry Danish fresh and flaky, proper storage is key. Whether you plan to enjoy leftovers the next day or save some for later, follow these methods:
Got some burning questions about making this danish? Here are the answers:
It takes about 2 hours including chilling time and baking. This includes 5 minutes for yeast activation, 30 minutes of initial dough chill, three 20-minute chills between folds, 15–20 minutes baking, plus a few minutes for rolling, shaping, and cooling.
Chilling solidifies the butter layers so they stay intact during rolling, which creates many distinct flaky layers. It also relaxes the gluten so the dough is easier to roll without springing back.
Yes, you can use instant yeast at the same measurement and mix it directly with flour instead of proofing. Skip the 5-minute proofing step, but proceed with the recipe as written, ensuring warm milk and water temperatures stay between 105–115°F.
If the butter melts into the dough you will lose the flaky layers and get a more uniform texture. To prevent this, keep the butter cold, work quickly, chill the dough whenever it feels too warm, and use a lightly floured surface.
Brushing each folded and filled square with milk before baking creates a golden brown crust with a slight shine. Make sure your oven is fully preheated to 375°F for even browning.
Yes, you can wrap the formed dough or cut squares in plastic and freeze for up to one month. When ready, thaw overnight in the refrigerator, shape if necessary, then proceed with filling, proofing briefly at room temperature, and bake as directed.
You can swap the strawberry preserves mixture for fresh macerated strawberries tossed with a little sugar and cornstarch or use other fruit preserves. Be sure to adjust the thickening agent so the filling doesn’t run.
This Sweet Buttery Flaky Strawberry Danish stands out because of its meticulous lamination and that bright lemon-kissed jam, delivering bakery quality right at home. The cold butter layers, long chill times, and simple yet rich filling combine for a tender, melt-in-your-mouth experience that’s hard to resist. Go ahead, print out this recipe, save it for your next brunch, and don’t forget to drop a comment or question below—your feedback makes my day, and I’d love to hear how your danishes turn out!
Golden, melt-in-your-mouth layers cradle a vibrant strawberry jam center with a bright lemon zing, offering a rich, tender bite that’s both sweet and tangy.

Hi, I'm Matthew Roberts, founder of Food Recipes USA! As a culinary historian and fourth-generation restaurateur, I've dedicated my life to preserving, celebrating, and evolving the rich tapestry of American cuisine.