
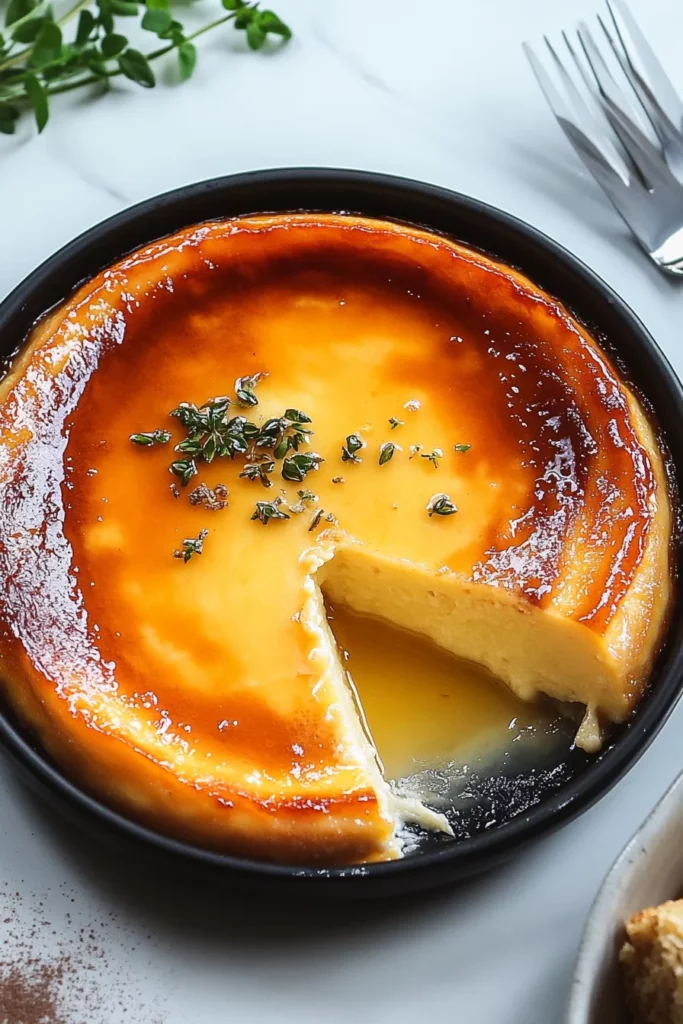
There’s something irresistibly sumptuous about a dessert that marries the velvety smoothness of custard with the deep, golden hues of homemade caramel. Spanish Flan isn’t just any sweet finale—it’s a celebration in a dish, a centuries-old classic that conjures warm memories of family gatherings and lively conversations. With each spoonful, you experience that perfect tension between creamy, melt-in-your-mouth goodness and the slight bitterness of amber-hued caramel. This duality is what makes flan so enchantingly balanced: the custard so tender it almost dissolves on the tongue, and the caramel coating that provides just enough bite to keep every mouthful exciting.
What I absolutely adore about Spanish Flan is how accessible it is for home cooks, even those who might be intimidated by “fancy” desserts. All you need are pantry staples—eggs, milk, sugar, a little vanilla—and you’re well on your way to baking a masterpiece. The real magic happens in your kitchen as you whisk, caramelize, and bake your way to that signature jiggle. It’s a comforting ritual, especially when you share stories or sneak a taste of warm caramel during prep (no judgment here!). Whether you’re hosting a dinner party or simply craving a sweet indulgence, this flan recipe promises to deliver both flavor and flair in one glorious slice.
Before diving into the method, let’s talk about what makes this flan so unforgettable. Each component plays a vital role in texture, taste, and balance, so gathering top-quality ingredients will set you up for success.
This sugar transforms into a luscious amber caramel that coats the flan mold. Its sweet-bitter depth is the crown jewel of the dessert, providing that signature golden sheen and delicate crunch at the first bite.
A small amount of water helps the sugar dissolve evenly before caramelizing. It ensures a smooth melt-down process and prevents crystallization, giving you a uniform liquid caramel.
With its thick, syrupy consistency and intense sweetness, condensed milk creates a rich, custardy base. It also adds body and velvety texture that makes each slice irresistibly creamy.
Evaporated milk brings a subtle creaminess without overpowering the sweetness. It lightens the condensed milk just enough for a custard that holds its shape while remaining silky.
Eggs are the structural backbone of the custard. Their proteins set gently during baking, resulting in that iconic jiggle and smooth finish you dream of in a classic flan.
A splash of vanilla introduces floral, aromatic notes that elevate the milk and egg flavors. It’s the secret whisper of warmth that turns good flan into unforgettable flan.
A bit of extra sugar in the custard mixture enhances sweetness and helps achieve a velvety mouthfeel. It balances the richness of the milk and eggs for a harmonious dessert.
Just a pinch of salt sharpens the sweet components and deepens the overall flavor profile. It’s the unsung hero that ensures your flan isn’t cloying but perfectly balanced.
This method will guide you through each step of creating a picture-perfect flan, from silky caramel to that tender custard layer. Follow along carefully, and you’ll soon be slicing into golden bliss.
1. Preheat your oven to 350°F (175°C). Ensuring the oven reaches the right temperature before you begin is key for even baking and avoiding watery centers.
2. Begin by preparing the caramel. In a medium saucepan over medium heat, combine the granulated sugar and water. Stir gently until the sugar fully dissolves, then resist the urge to stir further. Allow the mixture to cook undisturbed until it reaches a golden amber color, which usually takes about eight to ten minutes.
3. Once the caramel has reached that gorgeous amber hue, quickly pour it into a round 9-inch baking dish or flan mold. Tilt the dish to coat the bottom evenly, taking care not to burn yourself on the hot caramel.
4. Set the dish aside and let the caramel fully cool and harden. This creates the shiny top of your flan once it’s inverted.
5. In a separate mixing bowl, whisk together the eggs, granulated sugar (for custard), and a pinch of salt until the mixture is smooth and homogeneous.
6. Add the sweetened condensed milk, evaporated milk, and vanilla extract to the egg mixture. Whisk until everything is fully incorporated and you have a silky custard base.
7. For a flawless texture, strain the custard through a fine-mesh sieve before pouring it over the hardened caramel in the baking dish. This step helps remove any stray egg bits or bubbles.
8. Position the flan mold inside a larger baking pan. Carefully fill the outer pan with hot water until it reaches about halfway up the sides of the flan dish, creating a water bath (bain-marie). This gentle cooking method ensures an evenly set custard.
9. Bake for 50–60 minutes, or until a knife or toothpick inserted into the center comes out clean. The flan should be firm around the edges but still slightly jiggly in the middle.
10. Once baked, remove the flan from the oven and allow it to cool to room temperature while still in the water bath. After it cools, refrigerate for at least four hours or, even better, overnight.
11. To serve, run a knife along the edges of the flan to loosen it from the mold. Place a plate over the top, then carefully flip the dish so that the flan slides out, revealing its glossy caramel top.
Presenting your Spanish Flan is almost as delightful as eating it. Whether you’re hosting a dinner party or enjoying a cozy dessert at home, these serving ideas will make your flan shine and taste even more exquisite.
Proper storage is essential to keeping your Spanish Flan fresh, moist, and full of flavor. With the right techniques, you can prepare it ahead of time or save leftovers without compromising that signature silky texture.
Refrigeration is your flan’s best friend. After it has fully set in the fridge, keep the flan covered tightly with plastic wrap or in an airtight container. This prevents the custard from absorbing refrigerator odors and maintains a moisture-controlled environment. Stored this way, flan will stay fresh and delicious for up to four days.
If you need to prepare flan in advance, make the entire dessert and refrigerate it overnight. When you’re ready to serve, just flip it out of the mold and add any last-minute garnishes. This approach eliminates any last-minute kitchen stress, ensuring the flan tastes as though you’ve just baked it.
For short-term transport—perhaps you’re bringing flan to a potluck—place the flan mold inside a shallow, lidded container or wrap the entire mold in foil. Secure it carefully to avoid spills, and carry it flat in a cooler bag with an ice pack if the journey is lengthy.
Avoid freezing Spanish Flan, as ice crystals can disrupt that delicate custard structure. The best practice is to make it fresh or rely on chilled storage for perfect texture and flavor every time.
Spanish Flan stands as a shining testament to how a few humble ingredients—eggs, milk, sugar, and vanilla—can transform into something truly sublime. We’ve journeyed through every step: mastering the silky custard, coaxing the perfect amber caramel, and learning insider tips on presentation and storage. This dessert bridges tradition and simplicity, bringing a touch of Spanish warmth to your table with minimal fuss and maximum reward. As you whisk, pour, and bake, you’re not just following a recipe—you’re crafting memories and perfecting a timeless favorite that’ll delight both family and friends. Feel free to print this article or save it for later; Spanish Flan is a recipe you’ll return to again and again.
Below you’ll find a FAQ section to troubleshoot common questions and solve any baking quandaries. In the meantime, if you try this flan, I’d love to hear about your experience! Leave a comment sharing your flavor tweaks, topping ideas, or any challenges you faced. Questions? Feedback? Drop them below, and let’s chat about all things creamy, dreamy, and caramel-kissed.
Spanish flan features a silky texture with a melt-in-your-mouth richness, complemented by a luscious caramel topping that strikes a perfect balance of sweetness and slight bitterness.

Hi, I'm Matthew Roberts, founder of Food Recipes USA! As a culinary historian and fourth-generation restaurateur, I've dedicated my life to preserving, celebrating, and evolving the rich tapestry of American cuisine.