
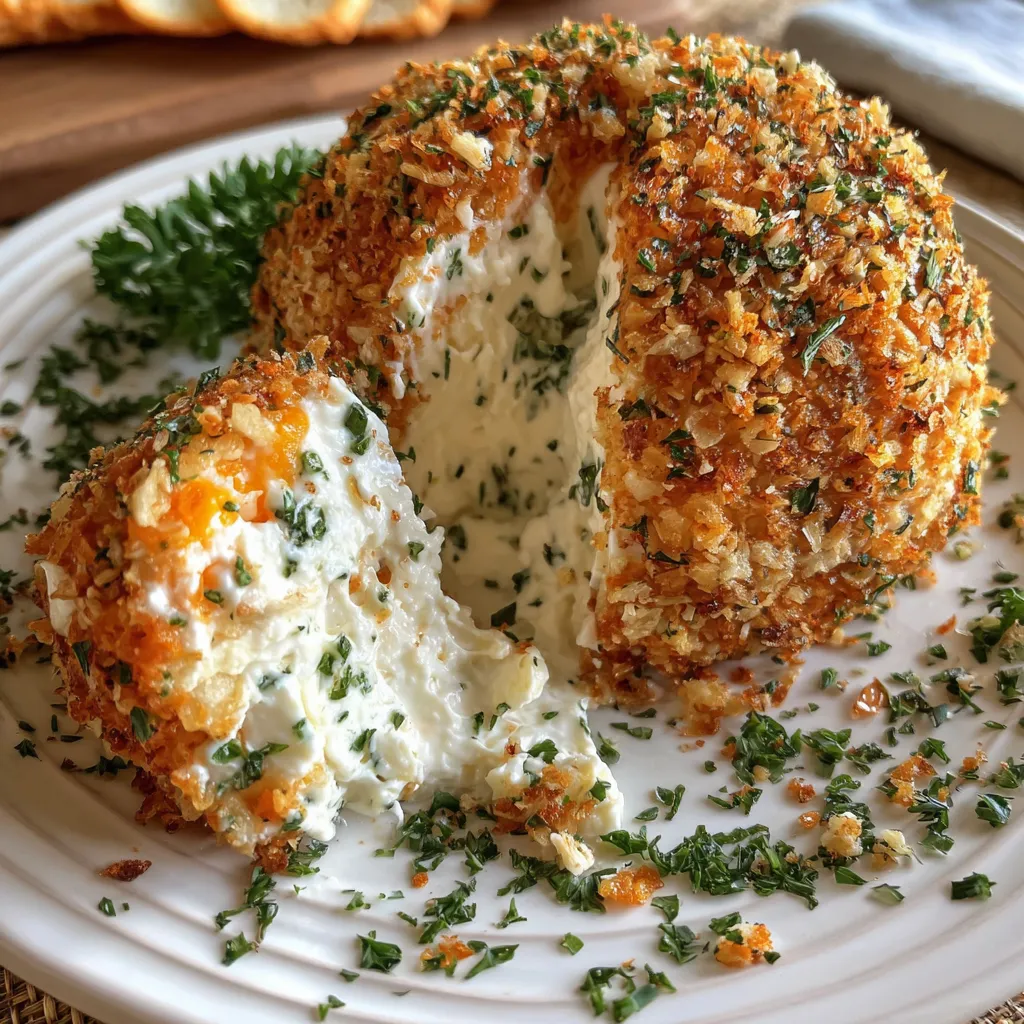
Craving a party appetizer that’s equal parts creamy, crunchy, and herbaceous? This Savory Herb-Crusted Cheese Ball with Creamy Garlic Dip combines silky cream cheese, sharp cheddar, and tangy blue cheese swirled with fresh green onions and herbs, then rolled in crunchy mixed nuts. Chill it to perfection, whip up a garlicky dip, and you’ve got an irresistible centerpiece that’s perfect for gatherings, game nights, or cozy weekend snacking. Ready to impress your friends (and taste buds)? Let’s dive in!
Before you get rolling, here’s what you’ll need to pull off this flavor-packed cheese ball and its creamy garlic dip.
For the Creamy Garlic Dip:
Let’s walk through the simple steps to bring this crowd-pleaser to life. From mixing cheeses to chilling the nut-crusted ball and whisking up the tangy dip, every phase is easy for cooks of any level—just follow along and you’ll have an impressive appetizer ready in no time.
1. In a large mixing bowl, combine softened cream cheese, shredded sharp cheddar, crumbled blue cheese, green onions, fresh herbs, garlic powder, onion powder, black pepper, and salt. Use a sturdy spoon or electric mixer on low speed to blend everything until the mixture is smooth and evenly combined.
2. With slightly moist hands, shape the cheese mixture into a tight ball, smoothing the surface as you go. If it sticks too much, briefly wet your hands or chill the mixture for a few minutes.
3. Spread the chopped mixed nuts in a shallow dish. Gently roll the cheese ball around, pressing so the nuts adhere evenly and form a crunchy outer layer.
4. Drizzle olive oil over the coated cheese ball, working it in gently to secure the nuts and boost flavor. Wrap tightly in plastic wrap and refrigerate for at least 2 hours, allowing it to firm up.
5. While the cheese ball chills, prepare the dip: in a medium bowl, stir together sour cream, mayonnaise, minced garlic, and lemon juice until smooth and creamy.
6. Season the dip with salt and pepper to taste, adjusting to your liking. Garnish with additional fresh herbs if desired for a burst of color.
7. Remove the cheese ball from the fridge, unwrap, and place on a serving platter alongside the creamy garlic dip. Serve immediately with crackers, vegetables, or bread.
Once your cheese ball is ready, it’s all about presentation and pairing. Here are some fun ideas to elevate your spread and make every bite memorable.
Trust me, once you nail this cheese ball, it’ll become your go-to appetizer. A couple of insider tips make the process smoother and let you personalize the flavors to match your mood or the season.
Prep smart by assembling everything a day ahead—your cheese ball will firm up beautifully, and you’ll be stress-free on party day. Feel free to swap in different nuts or herbs: toasted pistachios or fresh basil add unique twists. Serve with a colorful variety of dippers—crackers, crisp veggies, or warm bread all work wonders. For an extra flavor punch, try blending in a flavored cream cheese like sun-dried tomato or chive & onion.
After the party, you’ll want to keep any leftovers fresh and flavorful. Proper storage ensures your cheese ball and dip stay creamy and ready for snacking days later.
Got questions? Here are answers to the most common queries about this cheese ball and dip.
Active hands-on time is about 25 to 30 minutes, including mixing cheeses, chopping nuts and herbs, shaping the ball, and whisking together the dip. You’ll then need to refrigerate the cheese ball for at least 2 hours to firm up before serving.
Yes. Swap sharp cheddar for mild or pepper jack for extra kick, omit or replace blue cheese with feta or goat cheese if you prefer milder or tangier flavors, and use any fresh herbs you like such as basil, tarragon, or cilantro. Mixed nuts can be substituted with sunflower seeds, almonds, or pistachios to suit dietary needs or taste preferences.
Ensure your cream cheese is softened only to room temperature—over-softened cheese can be too loose. If it’s sticky, chill the mixture for 10 to 15 minutes before shaping. Wet your hands slightly or lightly oil them with olive oil to make shaping smoother, and if it’s still too soft, add a little more shredded cheese or chopped nuts to absorb excess moisture.
Absolutely. The cheese ball can be assembled up to a day in advance and kept tightly wrapped in plastic in the refrigerator. After serving, wrap any leftovers and store in the fridge for up to 3 days. Give it a quick stir or reshape before serving again if it softens.
You can freeze the cheese ball wrapped in plastic and placed in an airtight container for up to 1 month, though the texture may become slightly crumbly. Thaw overnight in the refrigerator before serving. The creamy garlic dip can also be frozen in a sealed container for up to 2 weeks; stir well after thawing to recombine any separated liquids.
For a milder cheese ball, reduce or omit the blue cheese and garlic powder, and use a mild cheddar or mozzarella. To spice it up, add finely chopped jalapeños, a pinch of cayenne pepper, or swap some of the herbs for cilantro and a squeeze of lime. You can also mix in a spoonful of hot sauce into the dip for extra heat.
Serve the cheese ball with a selection of crackers, toasted baguette slices, pita chips, or fresh vegetable crudités such as carrots, celery, and bell peppers. It also pairs beautifully with cured meats, olives, and a crisp white wine like Sauvignon Blanc or a light-bodied red such as Pinot Noir.
This Savory Herb-Crusted Cheese Ball with Creamy Garlic Dip stands out because you get the ultimate trifecta: creamy cheese layers, garden-fresh herbs, and a satisfyingly crunchy nut crust, all balanced by a tangy garlic dip. It’s beginner-friendly, make-aheadable, and endlessly customizable—plus, it doubles as party décor! Go ahead, print this recipe, save it for later, and don’t forget to drop a comment if you whip it up or have any questions. Enjoy every delicious bite!
Cream cheese, cheddar, and blue cheese mingle with fresh herbs and green onions, then get a nutty crust. Serve chilled alongside a garlicky, creamy dip for a flavor-packed appetizer.

Hi, I'm Matthew Roberts, founder of Food Recipes USA! As a culinary historian and fourth-generation restaurateur, I've dedicated my life to preserving, celebrating, and evolving the rich tapestry of American cuisine.