
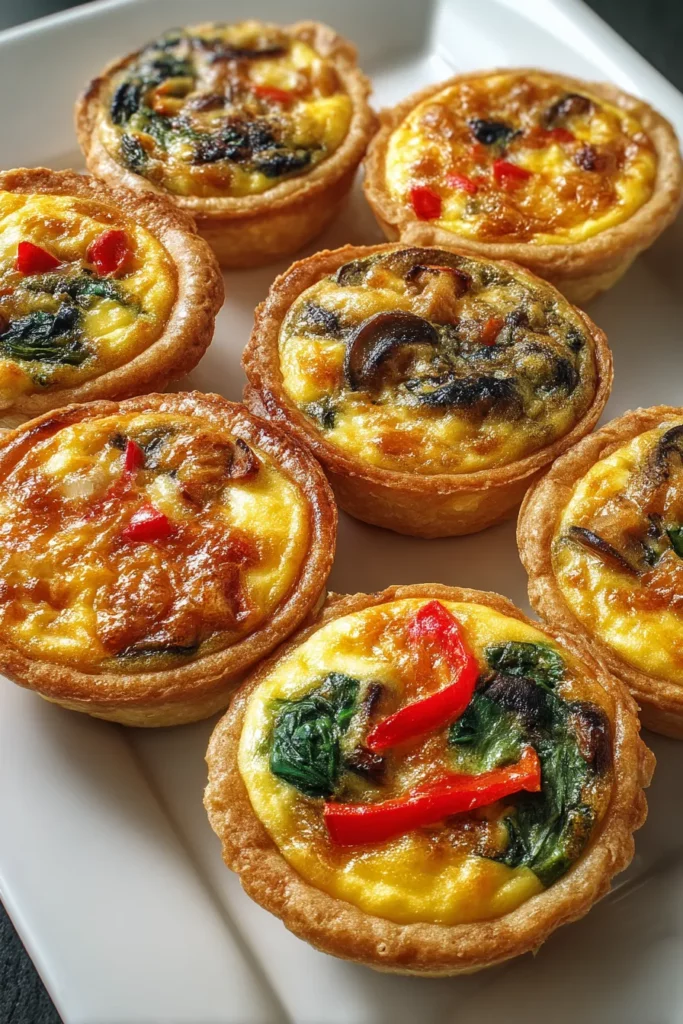
I still remember the first time I tucked into these Savory Baked Mini Quiches with Flaky Crust straight from the oven—each bite seemed to melt into a buttery hug. Crisp little cups of pastry cradle a golden, custardy heart that is brimming with rich, tangy cheese and pops of sweetness from red bell pepper. Every nibble is an explosion of textures, from the delicate flakiness of the crust to the gentle snap of a perfectly set filling. The interplay of cheddar cheese, spinach, and a hint of smoky bacon (or ham, if you fancy) turns these bite-sized gems into little treasures on any table. With roughly 55 minutes of prep time, a quick 25-minute bake, and 30 minutes of restful chilling, you’ll find these quiches slot effortlessly into weekend brunch plans or impromptu gatherings with friends. They’re impressive enough to be the star of an appetizer spread yet cozy enough to feel like a homemade treat passed around between close pals. I’ll admit, I might have overestimated my crowd’s appetite at first, but these mini wonders—ticking in at about 470 calories per batch depending on how many you devour—truly fly off the platter. Whether you’re hosting a lazy Saturday brunch, planning a light lunch, or scouting new appetizer ideas, these miniature quiches offer a playful and homemade pastry experience. Plus, they freeze beautifully, meaning you can batch-make them on a calm afternoon and have breakfast or party bites on standby. Trust me, that ability to whip out a tray of perfectly golden quiches at a moment’s notice turns anyone into instant brunch hero status.
Over time, I’ve played around with different vegetable combos and cheese varieties, swapping cheddar for gruyère, tossing in sun-dried tomatoes, or stirring in fresh basil for a herb-forward twist. One memorable brunch featured these quiches alongside a crisp arugula salad dressed in lemon vinaigrette, and the contrast of bright greens with the warm, cheesy centers had everyone reaching for seconds. I also discovered that adding a pinch of nutmeg to the filling deepens the flavor, creating just the right balance between sweet spice and savory richness. If you’re feeling adventurous, try a dash of smoked paprika or a swirl of pesto for an extra layer of complexity. And don’t let the word “intermediate” daunt you—this recipe walks you through every stage of crafting a simple flaky dough and mixing up a silky egg custard that holds all those tasty inclusions together. Because after a 30-minute chill and a 25-minute bake, you’re rewarded with individual bites that feel like a warm hug on a plate, ready to be shared at brunch, lunch, or as charming appetizers for any gathering.
Before we start rolling and whisking, let’s meet the cast of ingredients that make these mini quiches so irresistible. Each component plays its part, whether it’s building that flaky shell or lending layers of creamy, savory goodness to the filling.
Now that we’ve gathered all our ingredients, it’s time to roll up our sleeves and transform them into adorable, mouthwatering mini quiches. Follow these detailed steps to master both the crust and the filling.
1. Preheat your oven to 375°F (190°C).
Position a rack in the center of the oven so heat circulates evenly, ensuring your mini quiches bake to a perfect golden brown without any burnt edges.
2. In a mixing bowl, combine the all-purpose flour and 1/2 teaspoon salt. Add the chilled, diced butter.
Use a sturdy bowl for mixing, and be sure your butter stays cold—it’s the key to flaky layers.
3. Using a pastry blender or fork, cut the butter into the flour until the mixture resembles coarse crumbs.
Work swiftly so the butter remains in pea-sized pieces, which puff up during baking to create that irresistible flakiness.
4. Gradually add the ice water, one tablespoon at a time, mixing until the dough begins to come together. Do not overwork the dough.
Add just enough water for the dough to hold form; overmixing can lead to a tough crust instead of a tender one.
5. Form the dough into a ball, wrap it in plastic wrap, and refrigerate for at least 30 minutes.
Chilling relaxes the gluten and firms up the butter again, which helps the crust stay tender and flaky.
6. While the dough chills, prepare the filling by whisking together the eggs, heavy cream, black pepper, 1/2 teaspoon salt, and nutmeg in a medium bowl.
Whisk vigorously until the mixture is smooth and slightly frothy; this aeration helps the custard bake up light.
7. Stir in the grated cheddar cheese, diced red bell pepper, chopped spinach, cooked bacon or ham (if using), and sliced mushrooms.
Fold gently to distribute the ingredients evenly without deflating the eggs.
8. Roll out the chilled dough on a lightly floured surface to about 1/8-inch thickness. Cut the dough into circles to fit mini muffin tins.
Aim for circles slightly larger than each cup so you have enough dough to press up the sides.
9. Gently press the dough circles into the muffin tins, making sure to cover the bottom and sides.
Take care not to stretch the dough too thin—keep it even for uniform baking.
10. Pour the egg mixture evenly into each mini crust, filling just below the rim.
This ensures the filling sets nicely without spilling over as it puffs up.
11. Bake in the preheated oven for 20–25 minutes or until the tops are golden brown and the filling is set.
Rotate the pan halfway through if your oven has hot spots, for an even color.
12. Carefully remove the mini quiches from the muffin tins and allow them to cool slightly on a wire rack before serving.
A brief rest time helps them finish setting and makes them easier to remove without cracking.
Once your mini quiches have cooled just enough to handle, it’s time to think about presentation. These bite-sized delights are as versatile as they are tasty, fitting seamlessly into casual brunches or elegant cocktail parties. Whether you’re layering them on a tiered stand or arranging them on a wooden board with rustic flair, these suggestions will help you highlight their texture and flavors, making your guests feel like they’re devouring gourmet treats without all the fuss.
These mini quiches are just as convenient as they are delicious—you can whip up a batch in advance and store them without losing their charm. Proper storage techniques ensure the crust remains flaky and the filling retains its creamy consistency. Whether you’re planning for a busy workweek breakfast or stocking up for unexpected guests, here’s how to keep your quiches tasting fresh.
We’ve journeyed through every aspect of crafting these Savory Baked Mini Quiches with Flaky Crust—from stirring together that delicate pastry dough to whisking up a rich, custardy filling dotted with vibrant veggies and melty cheddar. Along the way, we’ve uncovered tips for achieving the perfect texture, ideas for personalizing your mix-ins, and tricks to keep your quiches tasting just-baked days later. Whether you’re a seasoned home cook or you’ve never tackled pastry before, this recipe serves as a delightful introduction to intermediate baking techniques, all while delivering truly scrumptious bites that disappear in record time. Feel free to print out this article and tuck it into your recipe binder for future brunches, lunch gatherings, or anytime you need an impressive yet approachable appetizer. You can even reference the FAQ below if you have any questions about ingredient swaps or troubleshooting flaky crusts.
Don’t forget, the kitchen is more fun when we share our successes and adventures—so let me know how your mini quiche experiments turn out! Did you discover a new favorite cheese combination? Have questions about chilling times or oven temperatures? Drop a comment, ask anything, or share your feedback. I’m always here to help you perfect your homemade pastry skills and celebrate every golden, savory bite together. Happy baking!
These bite-sized quiches boast an incredibly flaky, buttery crust. Each savory morsel is customizable with cheese and your favorite veggies. Simply irresistible!

Hi, I'm Matthew Roberts, founder of Food Recipes USA! As a culinary historian and fourth-generation restaurateur, I've dedicated my life to preserving, celebrating, and evolving the rich tapestry of American cuisine.