
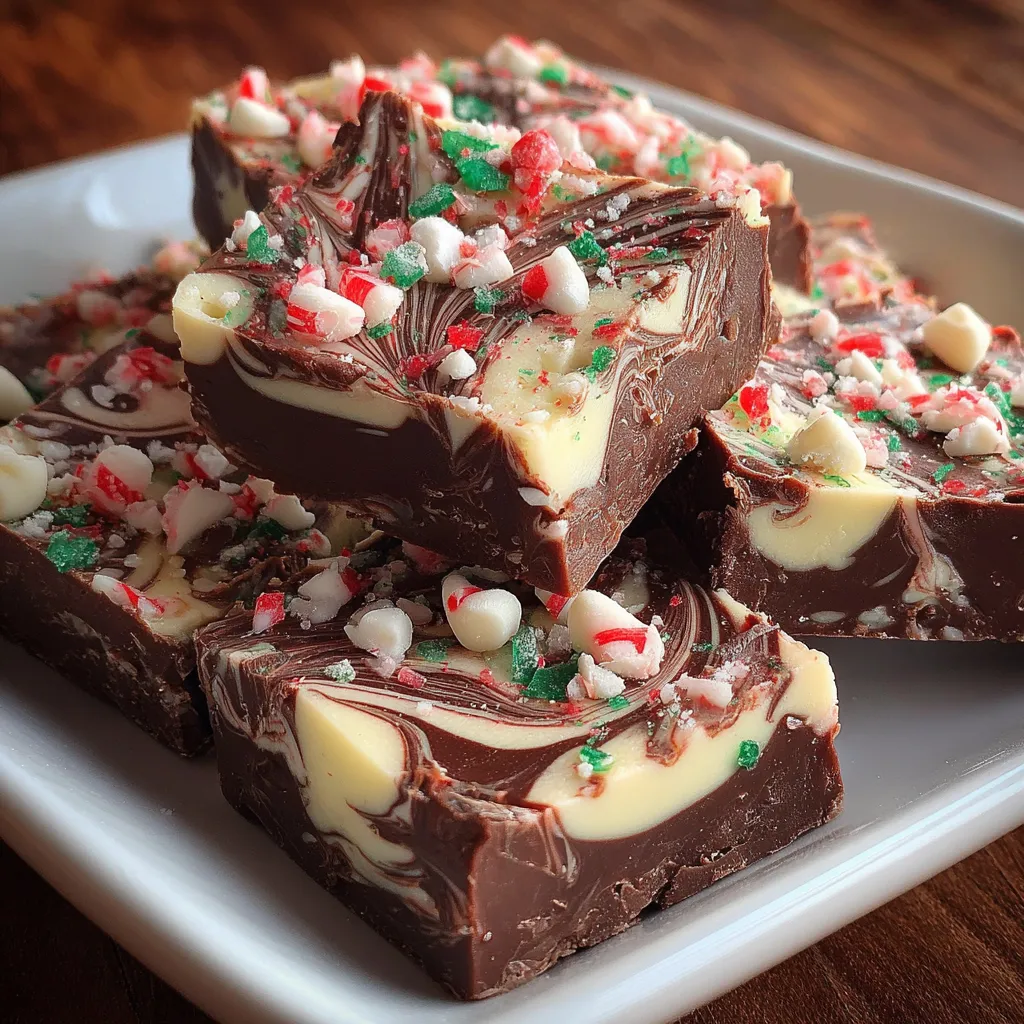
Every bite of Peppermint Swirl Fudge is like a festive dance of velvety chocolate and cooling mint, all wrapped up in bright red and green swirls. Crisp candy cane bits add a playful crunch to the smooth, creamy texture that melts in your mouth. Whether you’re gifting these colorful squares or sneaking one (or three) for yourself, this beginner-friendly recipe is guaranteed to bring holiday smiles. Ready to whip up some cheer?
Gathering these simple ingredients is all you need to create your own festive fudge masterpiece. From rich chocolate to refreshing mint, each component plays a special role.
Making Peppermint Swirl Fudge is easier than you might think, and it’s perfect for home cooks at any skill level. You’ll melt, flavor, layer, and swirl to achieve that classic two-tone look, then chill until set. Pay attention to temperature and gentle swirling techniques to get sharp, colorful edges. Gather your pans and spatulas, and let’s transform simple ingredients into creamy, minty squares that are as fun to make as they are to eat!
1. Prepare the baking dish by lining an 8×8-inch pan with parchment paper, leaving excess overhang for easy removal.
2. In a medium saucepan over low heat, combine semi-sweet chocolate chips, sweetened condensed milk, and salt. Stir continuously until the chocolate melts and the mixture is smooth. Remove from heat and stir in 1 teaspoon of peppermint extract, then set aside to cool slightly.
3. In another medium saucepan, repeat the melting process with white chocolate chips and 1/2 cup of sweetened condensed milk, stirring until smooth. Remove from heat, stir in the remaining 1 teaspoon of peppermint extract, and add a few drops of red and green food coloring if desired.
4. Pour half of the semi-sweet chocolate mixture into the prepared dish, using a spatula to spread it evenly into all corners.
5. Pour half of the white chocolate mixture on top of the semi-sweet layer, then use a toothpick to gently drag through both layers and create decorative swirls.
6. Repeat steps 4 and 5 with the remaining chocolate mixtures to build additional layers and swirl patterns. Once finished, sprinkle the top with crushed peppermint candies or candy cane pieces for extra crunch and holiday flair.
7. Refrigerate the fudge for at least 2 hours, or until completely set. When set, lift the fudge out of the pan using the parchment overhang and cut it into squares with a sharp knife.
8. Store your Peppermint Swirl Fudge in an airtight container at room temperature for up to one week, or in the refrigerator for longer freshness.
Serving these colorful fudge squares is half the fun, whether you're decking out a dessert table, wrapping individual treats, or pairing them with drinks. The minty-sweet bites look gorgeous on holiday platters, and the contrasting colors pop against plain backdrops. You can dress up your presentation for parties or send them as edible gifts to friends and neighbors. Try creative ways to display and enjoy each square, turning a simple dessert into a festive highlight.
Tweaking small details can make your fudge even more spectacular. From flavor twists to storage hacks, these insider tips will help you get that silky texture, perfect swirl, and gift-worthy presentation every time. Read on for easy ways to adapt the recipe to dietary needs or fun shapes, and ensure your fudge is the talk of the holiday season.
Proper storage is key to preserving the creamy texture and minty freshness of your Peppermint Swirl Fudge. Whether you’re tucking squares into gift boxes or keeping extras for later, follow these guidelines to maintain ideal flavor and bite. Choose between room-temperature storage for easy nibbling or chilled conditions for longer shelf life.
Here are answers to the most common queries to guide you through every step of making and enjoying your fudge:
Active prep and cooking time is about 20–25 minutes, including melting the chocolates, stirring in extracts, and creating the swirl. After assembly, the fudge needs to chill in the refrigerator for at least 2 hours (up to 4 hours) to fully set before slicing.
Yes. You can swap peppermint extract for vanilla, almond, or orange extract—use 1–2 teaspoons depending on the strength of the flavor. If you want colored swirls, add 2–3 drops of gel food coloring to the white chocolate mixture. Stir gently to avoid overmixing, which can mute the swirl effect.
Graininess often comes from overheating or crystallization of the sugar. Melt chocolate chips and sweetened condensed milk over low heat, stirring constantly. Remove from heat as soon as the mixture is smooth—do not let it boil. Using a heavy-bottomed saucepan also helps regulate temperature and prevents burning.
Pour each chocolate layer slowly and evenly, spreading with an offset spatula or the back of a spoon. Drop alternating dollops of semi‐sweet and white chocolate mixtures, then use a toothpick or skewer to drag through both layers in a gentle figure‐eight or zigzag motion. Avoid over‐swirling to keep the colors well defined.
Store fudge in an airtight container at room temperature for up to one week. For longer freshness (up to 2–3 weeks), keep it in the refrigerator. If refrigerated, let the fudge sit at room temperature for 10–15 minutes before cutting or serving to soften slightly.
Yes. Wrap individual squares tightly in plastic wrap, then place them in a freezer-safe container or bag. Freeze for up to 3 months. Thaw in the refrigerator overnight or at room temperature for 30–60 minutes before serving to maintain the best texture.
For gluten-free, use certified gluten-free chocolate chips and peppermint candies. To make vegan fudge, substitute sweetened condensed coconut milk for dairy condensed milk, and use vegan semi-sweet and white chocolate chips. Note that vegan versions may require gentle warming to achieve smooth melting and might set more firmly, so adjust chilling time as needed.
This Peppermint Swirl Fudge brings together creamy chocolate, cool mint, and festive color in every bite, making it a standout treat for any holiday gathering. The dual layers and delicate swirls not only look impressive, but also deliver a delightful contrast of flavors and textures with minimal effort. Whether you’re a fudge newbie or seasoned pro, the simple steps ensure success and allow you to add personal touches. Feel free to print and save this recipe to revisit each season, and let me know in the comments how your fudge turned out or if you have any questions!
Creamy chocolate and mint mingle in each fudgy bite, with crisp candy cane crunch and colorful swirls that shine through the smooth, velvety texture.

Hi, I'm Matthew Roberts, founder of Food Recipes USA! As a culinary historian and fourth-generation restaurateur, I've dedicated my life to preserving, celebrating, and evolving the rich tapestry of American cuisine.