
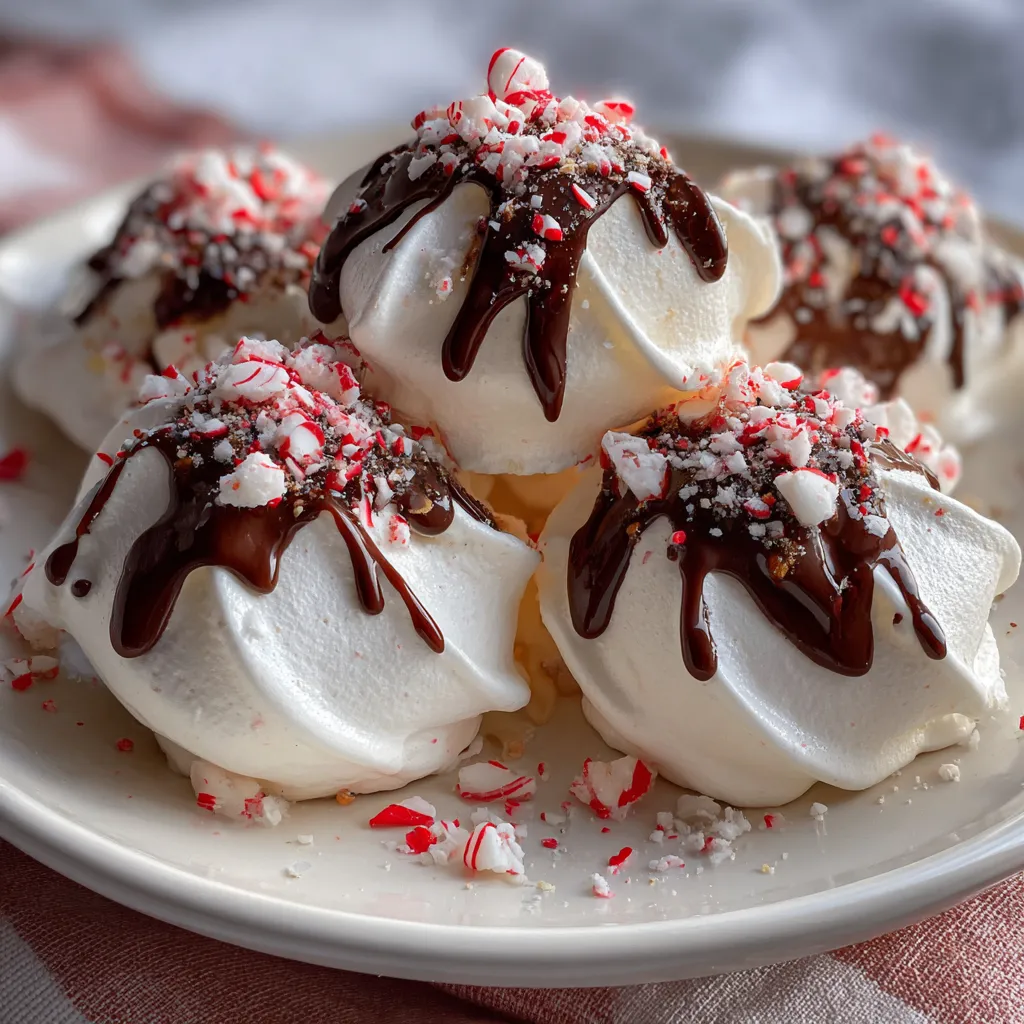
Craving a festive treat that’s light enough to melt on your tongue yet bold enough to pack a peppermint punch? These Peppermint Meringues Dipped in Chocolate bring fluffy, mint-scented kisses under a glossy chocolate cloak, crowned by crunchy candy cane sprinkles. They’re perfect for holiday parties or an afternoon pick-me-up. Whether you’re a meringue maestro or dipping your toes into the world of whipped egg whites for the first time, you’ll love how simple ingredients become something simply magical. Let’s dive in!
Gather your simple, flavorful ingredients below to whip up these airy peppermint meringues. Each element plays a key role in creating crisp, minty shells that cradle a smooth chocolate dip.
Follow these steps to transform your ingredients into delicate, mint-kissed meringue kisses, then dress them in a sleek chocolate coating. The key is gentle whipping, slow baking, and patient cooling to achieve that perfect crisp-outside, tender-inside texture.
1. Preheat your oven to 200°F (93°C) and line a baking sheet with parchment paper.
2. In a clean, dry mixing bowl, add the egg whites and cream of tartar. Using an electric mixer, beat on medium speed until soft peaks form.
3. Gradually add the granulated sugar, one tablespoon at a time, continuing to beat on high speed until firm peaks form and the mixture is glossy, about 5–7 minutes.
4. Gently fold in the salt, peppermint extract, and vanilla extract just until combined, taking care not to deflate the meringue.
5. Transfer the meringue mixture into a piping bag fitted with a star tip. Pipe small meringue kisses onto the prepared baking sheet, leaving space between each one.
6. Place the baking sheet in the preheated oven and bake for 1 hour. After 60 minutes, turn off the oven and leave the meringues inside for at least another hour to cool completely and dry out.
7. Once cooled, melt the semi-sweet chocolate chips and vegetable oil together in a microwave-safe bowl. Heat in 30-second intervals, stirring between each, until the chocolate is smooth and well combined.
8. Dip the bottom of each meringue into the melted chocolate and place them back on the parchment. Sprinkle crushed candy canes on top of the chocolate before it sets for added decoration.
9. Allow the chocolate to set completely at room temperature, or speed up the process by chilling the tray in the refrigerator.
These meringues shine not just for their taste but also for their playful presentation. Here are a few ways to serve them that will wow your guests and make your holiday table extra special.
Creating picture-perfect meringues takes a little practice but is totally worth the effort. Keep these friendly pointers in mind to ensure your meringue kisses come out crisp, glossy, and utterly irresistible every time.
Proper storage is essential to maintain the crunch and flavor of these peppermint meringues. Follow these simple methods to keep them fresh until you’re ready to enjoy or gift them.
Here are answers to some common questions that help ensure your peppermint meringues turn out perfectly every time:
Cream of tartar helps stabilize the egg whites by lowering their pH, which allows them to hold more air and maintain volume. This results in firmer, glossier peaks and prevents the meringues from collapsing or weeping as they bake and cool.
Firm peaks will stand straight up when you lift the beaters out of the mixture, with the tip of the peak slightly drooping but the base remaining stable. The mixture should look glossy, not grainy, and should not slide off the beaters when the bowl is tilted.
Baking at 200°F (93°C) gently dries the meringues without browning them. Leaving them in the turned‐off oven for another hour allows them to cool slowly, ensuring they dry out fully inside and stay crisp rather than becoming chewy or sticky.
Yes. You can fold in a few drops of gel or liquid food coloring after adding the extracts to create festive red, green, or pastel meringues. You can also experiment with other extracts—such as almond or orange—or fold in finely grated citrus zest for flavor variations.
Heat in a microwave in 30-second intervals at 50% power, stirring thoroughly between each interval. Alternatively, use a double boiler by placing a heatproof bowl over gently simmering water, stirring until smooth. Mixing in a small amount of vegetable or coconut oil helps create a shinier, thinner coating for dipping.
Store cooled and fully set meringues in an airtight container at room temperature. Place parchment or wax paper between layers to prevent sticking. They will stay crisp and fresh for up to one week. Avoid storing in humid environments or in the refrigerator, as moisture can soften them.
Absolutely. You can bake and dry the meringues up to a week in advance, storing them airtight at room temperature. Melt and dip in chocolate just before serving to maintain the best texture and appearance.
These Peppermint Meringues Dipped in Chocolate capture winter in every bite with their crisp, airy shells, a refreshing peppermint heart, and indulgent chocolate coating. Simple pantry staples transform into something whimsical and festive, making this recipe a delightful project for bakers of all levels. Feel free to print it out and tuck it into your holiday binder—you’ll thank yourself later! If you try these minty kisses, leave a comment or question below; I’d love to hear how you sprinkle, dip, and enjoy yours.
These airy meringue kisses carry a cool peppermint zing under a glossy chocolate cloak. Crisp shells dissolve to tender centers as minty aroma mingles with silky chocolate and candy cane crunch.

Hi, I'm Matthew Roberts, founder of Food Recipes USA! As a culinary historian and fourth-generation restaurateur, I've dedicated my life to preserving, celebrating, and evolving the rich tapestry of American cuisine.