
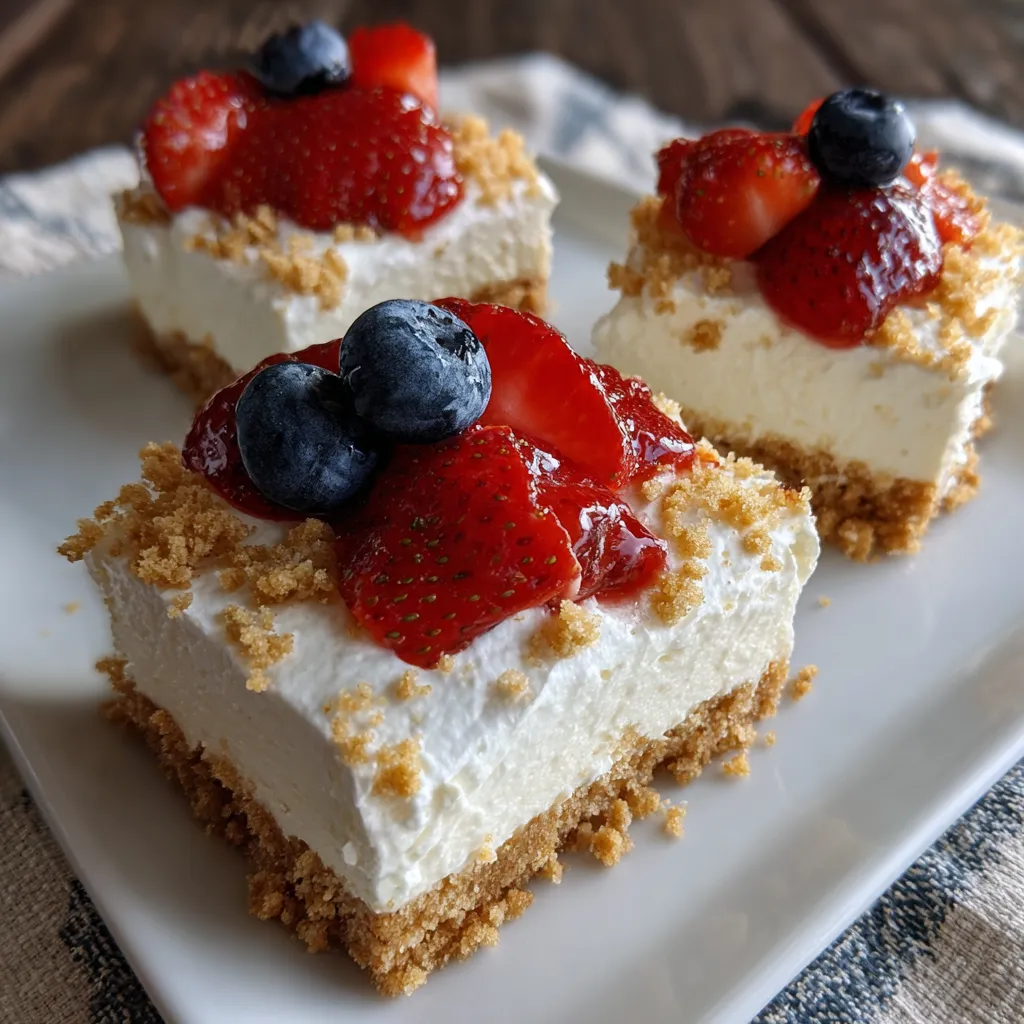
These Patriotic No-Bake Flag Cheesecake Bars are a summertime favorite that bring stars, stripes, and sweet flavors to your dessert table. With a creamy no-bake cheesecake spread over a buttery graham crust, bright strawberry stripes, and juicy blueberries, each bite feels like a celebration. Whether you’re headed to a Fourth of July cookout or just craving a festive treat, these bars are a breeze to assemble and impossible to resist. Dive in and discover why they’re the perfect showstopper for any gathering!
Before you get started, gather these simple ingredients to layer your festive bars:
Ready to transform those ingredients into a patriotic masterpiece? This no-bake recipe is all about simple steps—pressing a buttery crust, whipping up a silky cheesecake layer, and arranging vibrant fruit toppings to mimic the American flag. Follow along and you’ll have stunning dessert bars in no time!
1. Line an 8×8-inch pan with parchment paper, leaving extra overhang on the sides to lift the bars out easily, and set aside.
2. In a bowl, combine graham cracker crumbs, melted butter, and granulated sugar. Stir until the crumbs are evenly moistened and resemble wet sand.
3. Press the crumb mixture firmly into the bottom of the prepared pan using the back of a spoon or measuring cup, then chill for 10 minutes so the crust firms up.
4. In a separate bowl, beat cream cheese, powdered sugar, and vanilla extract until completely smooth. Gently fold in the whipped topping until no streaks remain.
5. Spread the cheesecake mixture evenly over the chilled crust, smoothing the top with an offset spatula. Refrigerate for at least 1 hour to let the filling set.
6. Remove the pan and spoon strawberry preserves into three evenly spaced horizontal stripes on the cheesecake, using a small offset spatula or the back of a teaspoon for precision.
7. Arrange fresh blueberries in the upper left corner to resemble the flag’s star field, pressing them lightly so they don’t roll away.
8. Return to the refrigerator until fully set (another 10–15 minutes), then lift out the bars using the parchment overhang and cut into squares before serving.
When it’s time to plate these bars, a few creative touches will have your guests oohing and ahhing:
Nailing the look and texture of these bars is easier than you think. Keep things fun and stress-free by following these insider hints—your layers will be crisp, clean, and utterly irresistible:
Maintaining that perfect creaminess and fruit freshness is all about proper storage. Whether you’re prepping ahead or saving leftovers, these methods will keep your bars at their best:
Here are answers to the most common questions about these festive cheesecake bars:
Total time is about 1 hour and 20 minutes active and inactive. You’ll spend roughly 10 minutes making and pressing the crust, 10 minutes mixing the cheesecake filling, then 10 minutes chilling the crust. After spreading the filling, refrigerate for at least 1 hour before adding the preserves and blueberries. Finally, return to the fridge for another 10–15 minutes until fully set, for a total time around 1 hour and 30 minutes.
While you can substitute low‐fat cream cheese, it will yield a looser, less creamy filling and may release more moisture. To improve texture, let the low‐fat cheese sit in a fine mesh strainer for 10–15 minutes to remove excess liquid. Using full‐fat cream cheese is recommended for the richest, firmest bars.
Chill the cheesecake layer thoroughly (at least 1 hour) so it’s firm. Warm the preserves slightly—10 to 15 seconds in the microwave—so they’re spreadable but not runny. Use a small offset spatula or the back of a teaspoon to draw three evenly spaced horizontal lines, letting each stripe settle before adding the next. Return to the refrigerator immediately to set.
Ensure the butter is fully melted and warm but not hot. If the crumbs remain dry, add 1 teaspoon of melted butter at a time until the mixture holds together when pressed between your fingers. If you over‐butter, add a tablespoon more graham cracker crumbs to balance the moisture.
Yes, you can assemble the bars up to 2 days in advance. Cover the pan tightly with plastic wrap or an airtight lid and keep it in the refrigerator. They maintain peak texture for up to three days. For longer storage, freeze the cut bars in a single layer on a baking sheet, then transfer to a freezer-safe container for up to one month. Thaw in the refrigerator for 1–2 hours before serving.
Gently warm the preserves by placing the jar (lid off) in a bowl of hot water for 2–3 minutes or microwave a few tablespoons in a small dish for 10–15 seconds. Stir until smooth, adding a teaspoon of warm water at a time if needed, until it reaches a spreadable consistency without being runny.
Absolutely. Swap strawberry preserves for raspberry or cherry to match your color scheme. Blueberries can be replaced with blackberries for a different look. For extra flavor, zest a quarter of a lemon into the cheesecake mixture or swirl in a tablespoon of lemon curd before refrigerating to give the bars a bright citrus twist.
From the buttery graham crust to the silky cheesecake layer, vibrant strawberry stripes, and jewel-like blueberries, these bars pack flavor and festive flair into every bite. This no-bake wonder works because it balances creamy and crunchy textures with sweet-tart fruit, making dessert prep a breeze and clean-up a snap. Whether you’re hosting a summer BBQ or just craving a patriotic treat, you’ll love how fun and foolproof these bars are. Feel free to print this page and tuck it into your recipe binder, then drop a comment below if you have questions or want to share your berry-bright masterpiece!
Creamy no-bake cheesecake spreads over a buttery graham crust, then gets topped with sweet strawberry ribbons and fresh blueberries for a cool, colorful treat that wows every crowd.

Hi, I'm Matthew Roberts, founder of Food Recipes USA! As a culinary historian and fourth-generation restaurateur, I've dedicated my life to preserving, celebrating, and evolving the rich tapestry of American cuisine.