
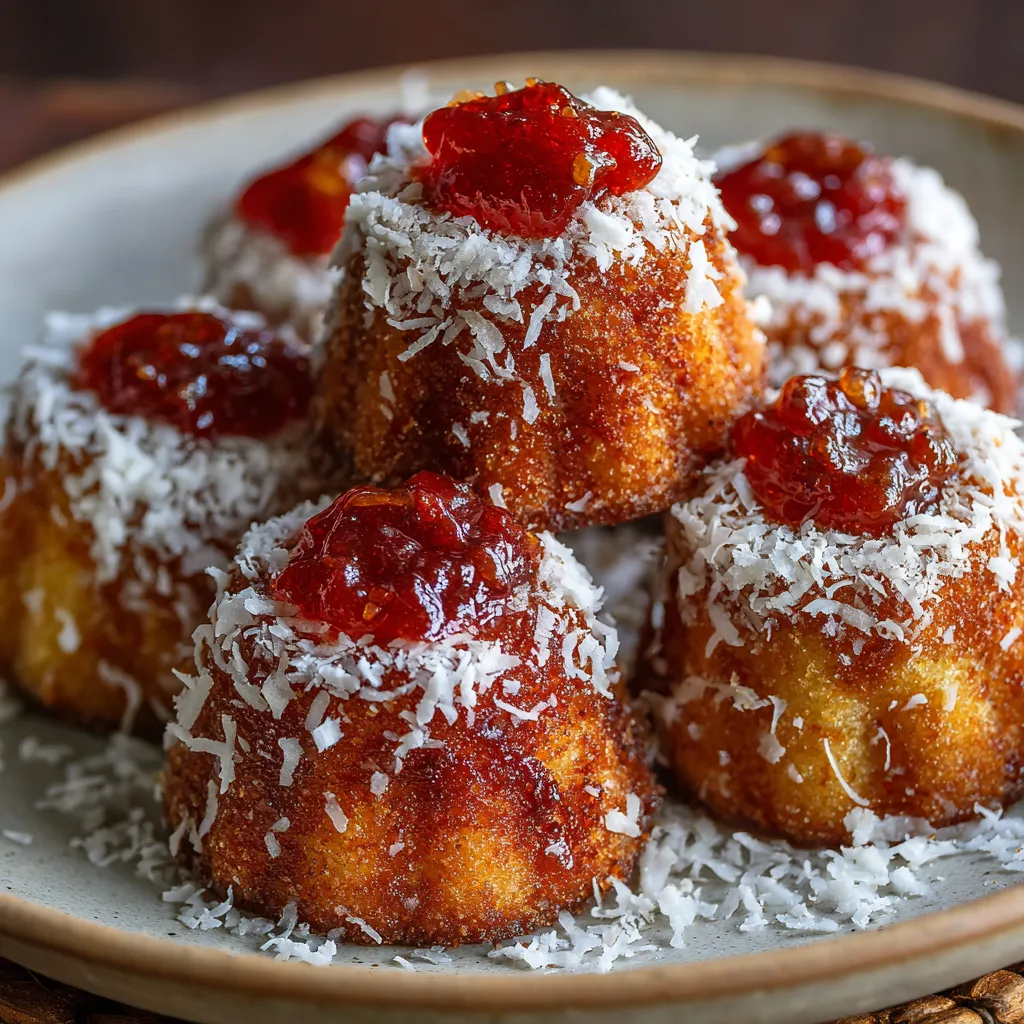
These Mini Hawaiian Guava Cakes bring a slice of island life right to your countertop. These bite-sized treats deliver a soft, tender crumb infused with sweet guava paste and crowned with toasty coconut flakes—perfect for teatime or a tropical party spread. With just a few simple steps, you’ll have golden, moist morsels that taste like Hawaiian sunshine. Give them a whirl and see how easy it is to brighten your day with a bit of guava magic!
To whip up these tropical mini delights, you only need pantry staples plus a splash of island flavor. Each ingredient plays its part in creating the perfect crumb, sweetness, and guava punch.
Baking these mini guava cakes is both simple and fun. From whisking dry ingredients to folding in tropical guava paste, each step builds a tender, flavorful batter. With just a little mixing, you’ll have a batch of perfectly portioned cakes ready to pop into the oven. Follow the steps below—each one is key to that dreamy texture and guava burst.
1. Preheat your oven to 180°C and grease mini bundt pans or a muffin tin with butter or nonstick spray to ensure easy release.
2. In a medium bowl, whisk together the cake flour, granulated sugar, baking powder, and salt until evenly combined and aerated.
3. In a separate bowl, beat the eggs, then whisk in the milk, melted butter, and vanilla extract until the mixture is smooth and uniform.
4. Pour the wet ingredients into the dry ingredients and gently stir with a spatula just until no streaks of flour remain—avoid overmixing to keep cakes tender.
5. Fold in the chopped guava paste, using a gentle motion to distribute the fruity chunks evenly throughout the batter.
6. Spoon the batter into the prepared pans, filling each cavity about three-quarters full, then sprinkle shredded coconut on top for a toasty finish.
7. Bake for 15 to 18 minutes, or until a toothpick inserted into the center comes out clean or with a few moist crumbs attached.
8. Allow the cakes to cool in the pans for 5 minutes, then transfer them to a wire rack to cool completely before serving.
These mini guava cakes shine in so many settings! Whether you’re hosting a backyard luau or craving a solo sweet snack, here are a few ways to present them that will wow anyone you share with.
Nailing these mini guava cakes is all about simple tweaks that bring out the best texture and flavor. From choosing the right pan to customizing sweetness levels, these friendly pointers will have you baking like a pro. Follow them to ensure each bite is a moist, guava-filled delight.
Keeping these mini cakes fresh is a breeze—just choose the method that fits your timeline, whether you plan to enjoy them within a couple of days or stock up for later. Here’s how to hold onto that soft crumb and guava goodness:
Here are answers to some common queries about these mini guava cakes:
Make sure to thoroughly grease your mini bundt pans or muffin tin with butter or nonstick spray, and if desired, dust lightly with flour. Allow the cakes to rest in the pan for about 5 minutes after baking before gently running a small, thin spatula around the edges to release them.
Yes. Replace the 100 g of chopped guava paste with roughly 120 g of fresh guava puree. Because puree adds extra moisture, reduce the milk by about 20 ml and drain any excess liquid from the puree. You may also add a tablespoon of granulated sugar if the guava isn’t very sweet.
Store cooled cakes in an airtight container at room temperature for up to two days. For longer storage, individually wrap each cake in plastic wrap and freeze for up to one month. Thaw overnight in the refrigerator before serving.
Toasting the coconut before baking yields more uniform color and crunch. Spread the shredded coconut on a baking sheet and toast in the preheating oven for 3 to 5 minutes, stirring once. Let it cool, then sprinkle on the batter. This prevents overbrowning in spots.
You can substitute a 1:1 gluten-free baking flour blend for the cake flour. Ensure the blend contains xanthan gum or add ¼ tsp xanthan gum to help with structure. Bake as directed, but check for doneness a minute or two earlier, since gluten-free blends can brown faster.
Insert a toothpick into the center of a cake. If it comes out clean or with just a few moist crumbs clinging (no wet batter), the cakes are done. Also look for golden edges and a slight spring back when gently pressed.
To reduce sweetness, lower the granulated sugar to 125 g and the guava paste to 80 g. For a tropical twist, fold in a teaspoon of finely grated lime zest or replace half the milk with coconut milk for extra richness and flavor.
These Mini Hawaiian Guava Cakes are a sweet little miracle—tiny in size but bursting with guava flavor and a hint of coconut crunch. The magic lies in the simple batter that transforms guava paste into juicy pockets, all wrapped in a soft, tender crumb. They’re so charming you’ll want to print this article and pop it in your recipe binder for instant island vibes. Give them a try, then drop a comment below with your tweaks, questions, or feedback—I’m here to help you perfect every mini bake!
These bite-sized guava cakes deliver soft, tender crumb infused with sweet guava paste and topped with toasty coconut flakes, bringing a hint of Hawaiian sunshine to your teatime or party spread.

Hi, I'm Matthew Roberts, founder of Food Recipes USA! As a culinary historian and fourth-generation restaurateur, I've dedicated my life to preserving, celebrating, and evolving the rich tapestry of American cuisine.