
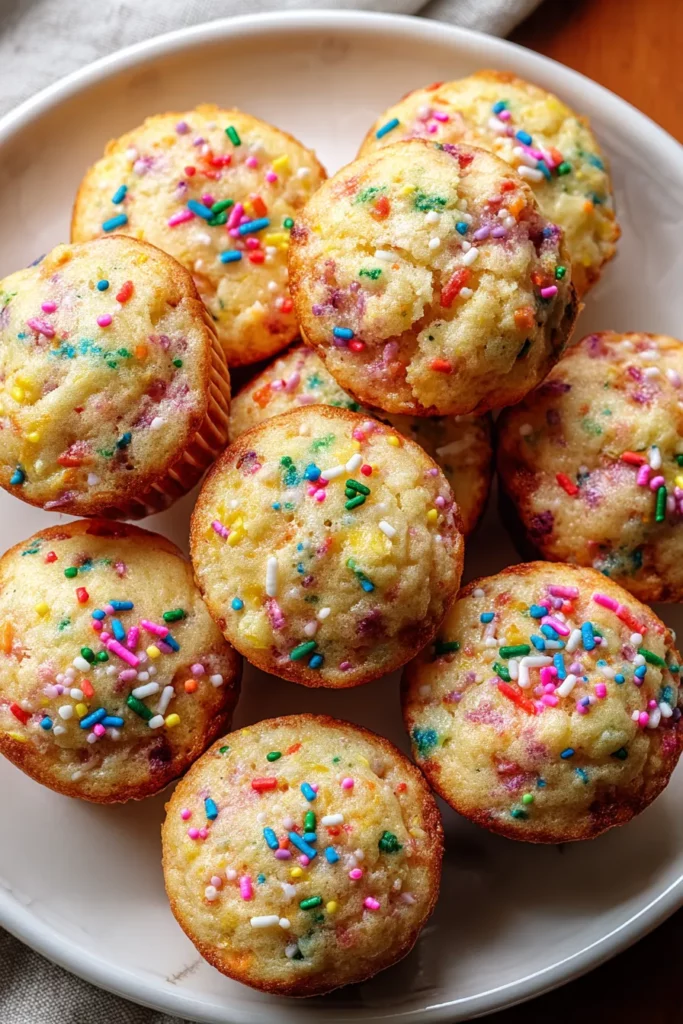
These delightful Mini Funfetti Muffins are like a burst of celebration in every bite, blending soft, pillowy cake with pops of rainbow color that dance across your tongue. They arrive in miniature form, making them the perfect little pick-me-up for an afternoon snack or a cute addition to any dessert table. The texture is moist and tender, with just the right amount of crumb that falls apart gently when you take that first bite. You’ll love how the sweet vanilla base complements the playful crunch of sprinkles, each morsel sending you back to childhood birthday parties and giggly mornings in the kitchen. The beauty of these muffins lies both in their simplicity and their festive flair, turning an ordinary moment into something truly special.
As a passionate home cook, I’ve found that these tiny treats suit so many occasions—Sunday brunch with friends, school lunches, or even late-night movie marathons when all you need is a quick, cheerful nibble. They’re beginner-friendly, too, with a straightforward recipe requiring just under 30 minutes from start to finish, including rest time. That means in less than half an hour, you can create dozens of these cute, bite-sized wonders. Whether you’re baking solo or involving the kids in a fun kitchen project, the process is as rewarding as the result. Watching the mini tins fill up with colorful batter and transform into golden, sprinkle-speckled domes is almost magical. So grab your bowl, your whisk, and a generous handful of rainbow sprinkles, and let’s dive into the world of Mini Funfetti Muffins!
Every ingredient in this recipe plays a starring role, coming together to create those soft, moist muffins dotted with cheerful color. Below are the main players that make these mini treats so irresistible:
Provides the structural foundation for the muffins, giving them just the right crumb and stability. It balances the liquid ingredients and ensures a tender bite without being too dense.
Adds sweetness and helps give the muffins a light, tender texture. It also aids in browning, creating a delicate golden crust on top.
Contributes a subtle molasses note and extra moisture, enhancing the depth of flavor and keeping the muffins soft, even days after baking.
Acts as a leavening agent, producing lift and helping the muffins rise into light, fluffy domes.
Works in tandem with baking powder to provide additional lift and a finer crumb, while also helping to balance the acidity of the buttermilk.
Enhances and balances the sweetness, while rounding out the overall flavor profile.
Adds richness and a velvety texture. Melting and cooling the butter ensures it incorporates smoothly into the batter.
Delivers a gentle tang and extra tenderness, reacting with the leavening agents to boost rise and give a moist crumb.
Binds ingredients together and helps trap air during mixing, contributing to structure and lift.
Infuses the muffins with sweet, aromatic warmth, heightening the overall flavor.
The star of the show, these add playful color, a hint of crunch, and a nostalgic celebration vibe to every bite.
Let’s transform these simple ingredients into tiny bites of joy. Follow the steps below to whip up a batch of rainbow-speckled goodness in no time!
1. Preheat your oven to 350°F (175°C). Line a mini muffin tin with paper liners or lightly grease each well to ensure easy release and even baking.
2. In a large mixing bowl, whisk together the flour, granulated sugar, light brown sugar, baking powder, baking soda, and salt until everything is evenly distributed and light pockets of air form throughout the mixture.
3. In another bowl, combine the melted and cooled butter, buttermilk, large egg, and vanilla extract. Use a whisk to blend until the mixture is smooth, with no streaks of egg or butter.
4. Pour the wet mixture into the bowl with the dry ingredients. Using a rubber spatula, gently stir until just combined—overmixing can lead to tougher muffins.
5. Carefully fold in the rainbow sprinkles, using a gentle motion to avoid melting or bleeding the colors into the batter. You want those vibrant flecks to remain distinct!
6. Using a small spoon or cookie scoop, fill each muffin cup about ¾ full. This ensures a perfect little dome on each mini muffin.
7. Bake for 10–12 minutes, rotating the tin halfway through if your oven has hot spots. The muffins are done when a toothpick inserted into the center comes out clean or with just a few moist crumbs.
8. Remove the tin from the oven and let the muffins cool for a few minutes in the tin. Then transfer them to a wire rack to cool completely, allowing the bottoms to firm up and the tops to maintain their delicate texture.
Once you’ve whipped up these charming little muffins, the fun really begins! Whether you’re planning a casual gathering or a special celebration, these serving ideas will elevate your Mini Funfetti Muffins to the next level:
Arrange the muffins on a tiered serving stand or decorative platter, spacing them out so their colorful speckles really pop. Add fresh fruit or edible flowers around the edges for an extra festive effect.
Slice a cooled mini muffin in half, then fill the center with a small scoop of vanilla or strawberry ice cream. Press the halves together gently for a sweet, creamy delight that’s perfect for warm afternoons.
Incorporate these miniature treats into a breakfast charcuterie board alongside yogurt cups, fresh berries, granola clusters, and mini pancakes. The contrast between textures and flavors makes each bite exciting.
Tuck two or three muffins into an insulated lunchbox with a reusable ice pack. Pair with a small container of fruit dip or nut butter for a balanced, fun-packed meal that kids will adore.
Proper storage is key to keeping your Mini Funfetti Muffins fresh, moist, and full of flavor for days. Follow these tips to maintain their delightful texture and prevent them from drying out:
Place cooled muffins in an airtight container lined with a paper towel to absorb any excess moisture. They’ll stay soft and tasty for up to 3 days without refrigeration.
If you need to keep them longer, layer the muffins in a container, separating layers with parchment paper, and store in the fridge. They’ll remain fresh for up to 5 days, though you may want to bring them to room temperature before serving.
Wrap each cooled muffin in plastic wrap, then place them in a zip-top freezer bag, pressing out extra air. Freeze for up to 3 months. Thaw at room temperature or warm briefly in the microwave for a fresh-baked feel.
To revive refrigerated or frozen muffins, microwave a single muffin on a small plate for 10–15 seconds, or warm in a preheated oven at 300°F (150°C) for 5 minutes. This will restore that just-baked softness.
We’ve journeyed from the simple joy of colorful sprinkles to the warm satisfaction of tiny, tender muffins fresh out of the oven. This complete guide to Mini Funfetti Muffins covers everything a home cook needs: a flavorful introduction, an ingredient deep dive, step-by-step instructions, creative serving suggestions, and foolproof storage tips. Whether you’re a beginner baker or a seasoned pro looking for a quick celebration snack, these mini treats deliver on taste, texture, and visual charm. Feel free to print this article and save it to your recipe collection, so you can revisit this festive recipe whenever you need a dash of color in your day.
Don’t forget, there’s a FAQ section below with answers to common questions that might pop up as you bake these bite-sized delights. And of course, I’d love to hear how your muffins turned out! If you have any comments, questions, or feedback—maybe you added a twist or found a fun new sprinkle blend—drop a note and share your baking stories. Happy baking, and may your kitchen be filled with the sweet sound of tiny muffins cooling on the rack!
These delightful Mini Funfetti Muffins are soft, moist, and packed with rainbow sprinkles, making them a perfect sweet treat for parties or snacks!

Hi, I'm Matthew Roberts, founder of Food Recipes USA! As a culinary historian and fourth-generation restaurateur, I've dedicated my life to preserving, celebrating, and evolving the rich tapestry of American cuisine.