
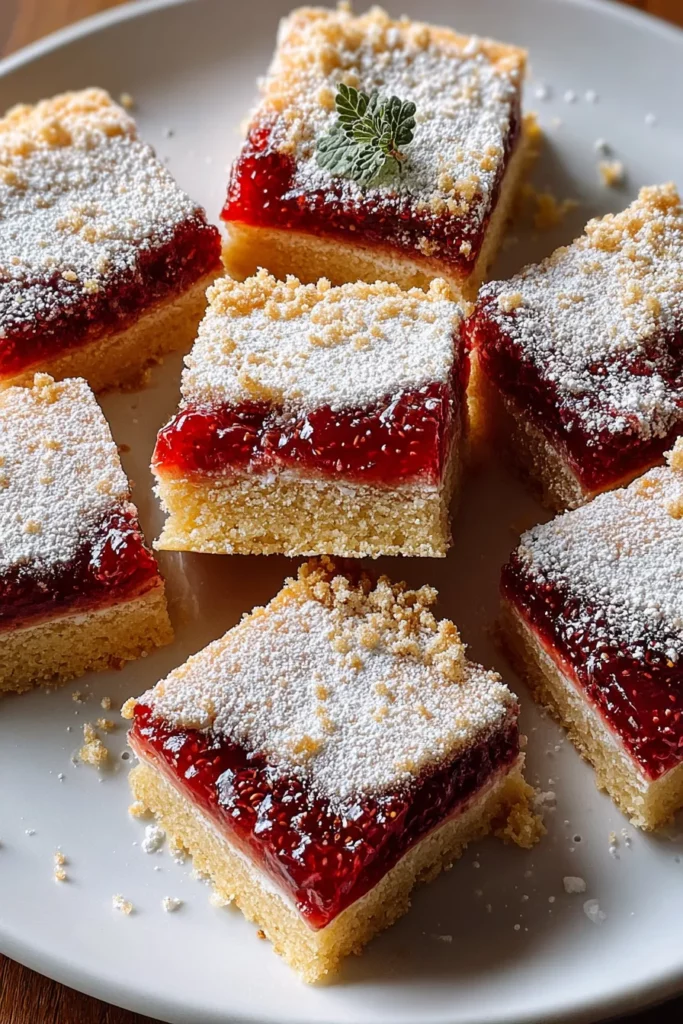
Sweet and buttery shortbread bars layered with luscious fruit jam for the perfect treat! There’s something truly magical about the way a crisp, crumbly shortbread meets a vibrant ribbon of jam, creating a bite that’s at once tender and bursting with fruity sweetness. Whether you’re a seasoned baker or just stepping into the world of home baking, these Jam Shortbread Bars are guaranteed to steal the spotlight. The dessert course has never been so approachable—each bar delivers that melt-in-your-mouth texture you crave, balanced by the zing of your favorite jam. One moment, you’re savoring rich, buttery crumbs; the next, you’re greeted by a wave of strawberry, raspberry, or apricot goodness. It’s a harmonious duet of flavor and texture that’s bound to become your go-to recipe for potlucks, afternoon tea, or simply treating yourself after a long day.
In my kitchen, these bars have become a crowd-pleaser, requested again and again by friends and family alike. With only seven key ingredients and straightforward steps, this beginner-friendly dessert combines the comfort of baking with the joy of customization—mix in almond extract for a nutty twist or swap jam flavors based on seasonal bounty. The total time investment is delightfully reasonable: 15 minutes to prepare, 30 minutes to bake, plus an hour of rest time for perfect slicing. At just 200 calories per bar (assuming 16 servings), they’re a sweet treat that feels indulgent yet manageable. So grab your mixing bowl, and let’s dive into the world of shortbread, jam bars, and all things sweet treats—your taste buds are in for a delightful ride!
Every exceptional recipe starts with quality ingredients. For these Jam Shortbread Bars, we’ll combine pantry staples with a jar of your favorite fruit jam to achieve that irresistible balance of buttery richness and fruity brightness. Here’s what you’ll need:
Softened to room temperature, this butter forms the foundation of our dough, ensuring a tender, melt-in-your-mouth texture without overpowering saltiness.
This classic sweetener crests the butter when creamed, incorporating air that yields a light, fluffy base and adds just the right hint of sweetness.
A splash of this fragrant extract elevates the flavor profile, lending warm, floral notes that complement both the shortbread and the chosen jam.
The main structural component, this flour binds the dough together, creating that signature shortbread crumb that holds up under the jam layer.
A pinch of salt brightens all the flavors, balancing sweetness and giving depth to the buttery crust.
The star of the show—strawberry, raspberry, apricot, or any other favorite—this jam layer provides a burst of fruity color and flavor in every bite.
A light dusting on top adds an elegant finish, offering a delicate contrast to the jam’s tang and a dusting of snowy sweetness.
Ready to bake your next favorite dessert? Follow these simple steps to create layers of buttery shortbread and fruity jam in one delectable bar.
1. Preheat your oven to 350°F (175°C). Line a 9x13-inch baking pan with parchment paper, leaving an overhang for easy removal once the bars have cooled.
2. In a large mixing bowl, cream the softened butter and granulated sugar together using an electric mixer on medium speed until the mixture becomes light, fluffy, and pale in color.
3. Add the vanilla extract to the creamed butter-sugar blend and continue mixing on low until the aroma is fully incorporated and the mixture is smooth.
4. Gradually introduce the all-purpose flour and salt into the bowl, mixing on low speed. Aim for a crumbly texture that begins to hold together when squeezed between your fingers.
5. Reserve roughly two-thirds of the dough, then firmly press that portion into the bottom of the prepared pan, creating a solid, even shortbread base.
6. Spoon the fruit jam over the crust, spreading it gently with a spatula and leaving a small border around the edges to prevent the jam from spilling or burning.
7. Take the remaining dough and crumble it evenly over the jam layer, allowing little pockets of jam to peek through the topping.
8. Place the pan in the preheated oven and bake for 25 to 30 minutes, or until the top turns golden brown and feels firm when lightly touched.
9. Remove the bars from the oven and set the pan on a wire rack to cool completely. This helps them set properly for clean slices.
10. Once fully cooled, lift the bars out of the pan using the parchment overhang, transfer them to a cutting board, and dust the top evenly with powdered sugar before slicing into bars.
When it comes to serving these luscious jam bars, creativity is your best friend. Whether you’re hosting a casual gathering or simply indulging in a cozy afternoon snack, these ideas will help you present your dessert in style and maximize flavor enjoyment. Feel free to mix and match serving options to suit the occasion, and watch as your guests marvel at the sweet display.
Maintaining the fresh flavor and perfect texture of your jam shortbread bars is simple when you follow these storage tips. Whether you’re planning to enjoy them over the next few days or stash extras for a rainy day, these methods will keep each bar tasting just as delightful as when it first emerged from the oven.
Place the cooled bars in an airtight container, separating layers with parchment or wax paper. Kept at room temperature, they’ll stay crisp yet tender for up to five days—perfect for everyday snacking.
If you live in a warm climate or your jam is particularly soft, store the bars in the fridge. Wrap them individually or layer inside a sealed container, and they’ll maintain their firmness and freshness for up to seven days. Let them sit at room temperature for 10 minutes before serving to bring back that melt-in-your-mouth texture.
For longer storage, freeze the bars in a single layer on a baking sheet until solid, then transfer them to a freezer-safe bag or container. They’ll keep beautifully for up to three months. Thaw overnight in the refrigerator or at room temperature for a few hours before dusting with powdered sugar and serving.
If you want to prepare multiple batches ahead of time, chill the sliced bars briefly before packaging. This helps set the jam layer and prevents the pieces from sticking together when stacked. Use parchment sheets between layers to preserve their shape.
These Jam Shortbread Bars embody everything we love about homemade desserts: simple ingredients, approachable techniques, and that sweet, buttery finish that feels like a hug in every bite. We’ve journeyed through the key ingredients, step-by-step instructions, creative serving ideas, and foolproof storage methods—all designed to help you succeed, whether you’re baking for a busy week or a special celebration. With just 15 minutes of prep time, 30 minutes of baking, and an hour of rest, you’ll have these gorgeous bars ready to slice, share, and savor. Feel free to print this article and save it in your recipe binder or digital collection so you can return to it whenever a craving strikes.
Below, you’ll also find a FAQ section covering common questions about jam choices, dough consistency, and more. I’d love to hear about your baking adventures—drop a comment to share your favorite jam pairing, ask any questions, or let me know if you added a personal twist like chopped nuts or a hint of almond extract. Your feedback helps me refine these recipes and inspires fellow home cooks to pick up their whisks with confidence. Happy baking, and I can’t wait to hear how your jam shortbread bars turn out!
Experience the melt-in-your-mouth texture of buttery shortbread blended with your favorite fruit jam, creating a delightful sweet bite that’s irresistible.

Hi, I'm Matthew Roberts, founder of Food Recipes USA! As a culinary historian and fourth-generation restaurateur, I've dedicated my life to preserving, celebrating, and evolving the rich tapestry of American cuisine.