
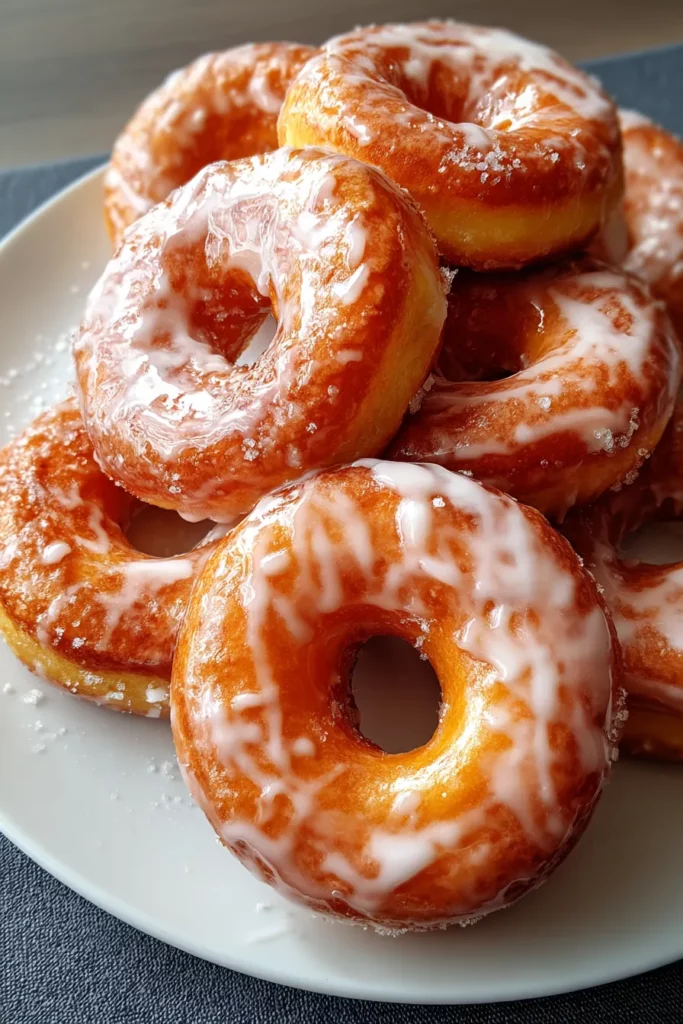
There’s nothing quite like waking up to the sweet promise of homemade doughnuts that are pillowy soft on the inside and glazed to a glossy shine on the outside. When you take that first bite, the dough practically melts in your mouth, revealing a subtle richness from the butter and eggs, a touch of sweetness from the sugar, and a delicate vanilla kiss in the glaze. Every loaf of bread, every rolled-out circle, and every careful fry is part of a little morning ritual that has become my quiet celebration of home baking. I love how this recipe bridges the gap between casual weekend baking and a slightly adventurous kitchen project—yes, it’s Intermediate level, but don’t let that scare you away! You’ll feel like a true pastry pro once you master the art of proofing yeast and rolling dough to the perfect thickness.
My own kitchen has seen countless experiments—from adding a hint of cinnamon to the dough to swirling in a bit of citrus zest in the glaze—but there’s something so comforting about sticking to this classic version. It takes about 30 minutes of hands-on prep, another 30 minutes of active cooking, and roughly 3 hours total rest time to let the dough rise to its fluffy best. The result? Twelve or so fresh doughnuts, each packing about 250 calories of pure joy. These are perfect for breakfast, brunch, or an indulgent snack any time of day. So grab your rolling pin, dust off a bit of flour, and let’s make your mornings a little sweeter with these homemade fluffy glazed doughnuts!
Before diving into the mixing bowls and frying pan, let’s get acquainted with the star players in this recipe. Each ingredient brings its own special magic, from building structure to adding moisture, flavor, and that irresistible shine on top. Understanding their roles will help you feel confident and creative as you transform simple pantry staples into golden, melt-in-your-mouth doughnuts.
Acts as both a tenderizer and a vehicle for activating the yeast. The gentle warmth (around 110°F/45°C) helps the yeast come alive, creating gas bubbles that make your doughnuts fluffy.
Our leavening agent that transforms sugars and starches into carbon dioxide, giving the dough its rise and airy texture. Always proof it until frothy to guarantee an energetic batch.
Provide richness, color, and additional structure. The proteins in the eggs help bind ingredients, while the fats contribute to that soft, tender crumb.
Adds luxurious flavor and tenderness. Melting it into the dough enriches every bite with a creamy, buttery note without making the dough too heavy.
Feeds the yeast and adds subtle sweetness to the dough itself, balancing the flavors and giving a light caramelization during frying.
Enhances the overall taste and controls yeast activity to ensure a consistent rise, preventing the dough from overproofing or tasting flat.
Forms the backbone of the dough. Its moderate protein content creates a balance between chew and tenderness, ideal for doughnuts that are neither too dense nor too fragile.
Typically vegetable or canola oil with a high smoke point, it ensures a crisp, golden exterior. Proper oil temperature is crucial for even browning without absorbing excess grease.
The base of our glaze, it dissolves easily into milk and vanilla to create a smooth, sweet coating that sets quickly on warm doughnuts.
Adds richness and smoothness to the glaze, helping it cling to each doughnut and form that irresistible, glossy finish.
Imparts a fragrant warmth and depth to the glaze, rounding out the sweetness with floral, aromatic notes.
Now that our ingredients are prepped and ready, it’s time to transform them into warm, homemade delights. Follow each step carefully to master techniques like proofing, kneading, and frying, and you’ll be rewarded with doughnuts that rival your favorite bakery.
1. In a medium bowl, combine the warm milk and sugar, then sprinkle the yeast on top. Let it sit for 5–10 minutes until frothy, indicating the yeast is active and ready to leaven your dough.
2. In a large bowl, blend the yeast mixture with the eggs, melted butter, and salt. Gradually add the flour, mixing until the dough begins to pull away from the sides of the bowl and form a cohesive mass.
3. Knead the dough on a lightly floured surface for about 5 minutes, or until it feels smooth and elastic. Alternatively, use a stand mixer fitted with a dough hook to reduce effort and ensure even kneading.
4. Place the dough in a lightly greased bowl, cover with a clean kitchen towel, and let it rise in a warm, draft-free spot for 1–2 hours, or until it has doubled in size and feels light to the touch.
5. Once risen, roll the dough out onto a floured surface to about ½-inch thickness. Using a doughnut cutter or two round cookie cutters, cut out doughnuts and holes. Gather any scraps, re-roll, and repeat until all dough is used.
6. Transfer the shaped doughnuts to parchment-lined baking sheets, cover lightly with a towel, and let them rise an additional 30 minutes to puff up even more.
7. In a deep frying pan or pot, heat oil to 350°F (180°C). Carefully lower a few doughnuts into the hot oil and fry for about 1 minute per side, or until each is golden brown. Use a slotted spoon to remove and drain on paper towels.
8. For the glaze, whisk together powdered sugar, whole milk, and vanilla extract until completely smooth. Adjust consistency with a splash more milk if needed.
9. While the doughnuts are still warm, dip each one into the glaze, letting the excess drip off, then place them on a wire rack to set. Enjoy them fresh for the best texture!
When it comes to serving these sweet, fluffy doughnuts, the possibilities are limited only by your imagination. Whether you’re planning a cozy family brunch or an indulgent afternoon treat, presenting them with care can elevate the experience. Here are some of my favorite ways to enjoy these golden beauties and make every bite memorable.
Keeping your doughnuts fresh and delicious requires a bit of strategy, especially when you can’t eat them all in one sitting (although I’ve tried!). The key is to preserve their tender crumb and glossy glaze without letting them go stale or gummy. Here’s how I maintain that just-fried magic for as long as possible:
Baking these homemade fluffy glazed doughnuts has been one of my favorite kitchen adventures, and I hope it becomes one of yours too. From proofing the yeast for that crucial rise to glazing each warm circle of dough with a glossy coating, every step in this recipe invites you to slow down, savor the process, and celebrate small victories. You can print this article and save it in your recipe binder or digital folder, so it’s always at your fingertips—ready for those weekend baking sessions or surprise brunch gatherings. Below, you’ll even find a helpful FAQ to troubleshoot any questions that pop up as you go along.
I’d love to hear how your doughnut-making journey unfolds! Did the glaze turn out extra glossy? Did you customize with a flavor twist? Drop your comments, questions, or feedback if you give this recipe a try or need a hand mastering any step. Sharing tips and stories is what makes cooking at home so rewarding, and I can’t wait to see (and hear) how your homemade fluffy glazed doughnuts turn out!
Perfectly fluffy and sweet, these homemade doughnuts are glazed to perfection, making them a delightful treat for breakfast or any time of the day.

Hi, I'm Matthew Roberts, founder of Food Recipes USA! As a culinary historian and fourth-generation restaurateur, I've dedicated my life to preserving, celebrating, and evolving the rich tapestry of American cuisine.