
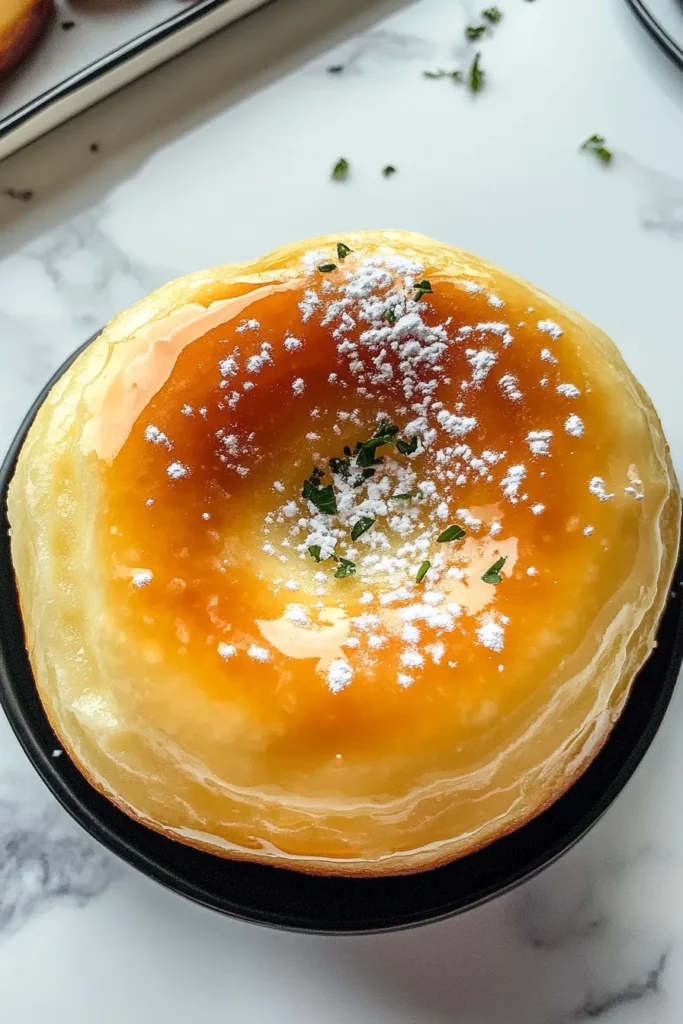
Every time I sink my teeth into a pillowy, freshly made doughnut, I’m instantly transported back to Saturday morning runs at my local Krispy Kreme. There’s just something about that sweet, vanilla-kissed glaze that crackles lightly with the first bite, giving way to the softest, fluffiest interior. After countless experiments in my home kitchen—tweaking yeast ratios, testing different frying temperatures, chasing that perfect glossy sheen—I finally nailed the ultimate copycat recipe. And let me tell you, these Homemade Copycat Krispy Kreme Doughnuts taste so close to the original that your friends will be begging for seconds (and the secret!).
In this guide, we’re diving into a hands-on adventure that’s as much about the journey as the destination. You’ll learn how to coax the yeast into a frothy bubble bath, how to handle your dough like a pro, and how to achieve that signature glaze that clings just right. While this recipe sits at an intermediate difficulty level—think of it as a fun weekend project—you’ll discover that the steps are straightforward and incredibly rewarding. Total prep takes about 30 minutes, cooking is another 15 minutes, and you’ll want to carve out roughly 2 hours and 15 minutes for rising and resting. That means in no time, your kitchen will be filled with the warm, sweet notes of homemade doughnuts, and you’ll have an impressive (and totally Instagram-worthy) tower of glazed delights ready to devour.
So grab your mixing bowls, roll up your sleeves, and get ready to bake and fry your very own soft, fluffy glazed doughnuts right at home. Whether you’re making these for a brunch gathering, a cozy dessert night, or simply because you deserve a sweet pick-me-up, this recipe will guide you every step of the way. And trust me, once you’ve tasted these little rings of joy, you’ll never look at a store-bought pack of doughnuts the same way again.
Before we get our hands delightfully messy, let’s take a moment to appreciate the magic behind each ingredient. Each component plays a crucial role in building the texture, flavor, and unmistakable charm of these doughnuts.
This is the little powerhouse that brings life to our dough, creating those signature air pockets that make each bite ultra-fluffy. Fresh, active yeast ensures a reliable rise.
At around 110°F, this water awakens the yeast without cooking it. It’s the cozy spa bath that gets the fermentation process going.
Warming the milk adds richness, tenderness, and a hint of sweetness. Its fat content contributes to a softer crumb and better browning.
Beyond sweetening, sugar feeds the yeast, helping the dough rise while balancing flavors and enhancing the golden color.
These bind the dough, add structure, and impart a delicate richness that makes each doughnut feel indulgent.
Softened butter enriches the dough, lending tenderness and a subtle buttery flavor that cuts through the sweetness.
The backbone of our dough, it provides the gluten structure that traps air and yields that signature chew and softness.
A pinch of salt balances sweetness and strengthens the gluten network for better texture.
A whisper of spice adds warmth and a classic doughnut shop vibe—subtle, aromatic, and totally nostalgic.
This essential flavor booster gives the dough its gentle vanilla undertones, setting the stage for the glaze.
A high smoke-point oil ensures we can fry the doughnuts evenly without burning, producing that perfect golden exterior.
The foundation of the glaze, it melts into a glossy, crackling coating that clings to every crevice.
A touch of creaminess to help the powdered sugar dissolve smoothly, creating that classic drippy finish.
A final flourish of flavor that ties everything together with sweet, aromatic notes.
Let’s roll up our sleeves and dive into the step-by-step process of turning these simple ingredients into irresistibly soft doughnuts. Follow each instruction carefully, and you’ll be savoring warm, glazed treats in no time.
1. In a small bowl, dissolve the yeast in the warm water. Give it about 5 minutes to become frothy and alive—this indicates your yeast is active and ready to work its magic.
2. In a large mixing bowl, combine the warm milk, sugar, and eggs. Whisk lightly until the mixture is smooth, then add the yeast mixture and stir until fully incorporated.
3. Gradually add in the softened butter, flour, salt, and nutmeg, stirring as you go. Keep mixing until the dough starts to hold together in a shaggy mass.
4. Transfer the dough to a lightly floured surface and knead for about 5–7 minutes. Your goal is a smooth, elastic dough that springs back when gently pressed.
5. Place the kneaded dough in a greased bowl, cover it with a clean kitchen towel, and let it rise in a warm spot for 1 to 1.5 hours, or until it has doubled in size.
6. Once puffed, punch down the dough to release air, then roll it out on a floured surface to about 1/2-inch thickness.
7. Using a doughnut cutter (or two round cutters—one large, one small), cut out doughnuts and doughnut holes. Gather any scraps, reroll, and cut until all dough is used.
8. Place the shaped doughnuts on a parchment-lined tray, cover with a towel, and let them rise again for 30–45 minutes until they’re puffy and light.
9. While the doughnuts proof, heat vegetable oil in a large pot or deep fryer to 350°F (175°C). Maintaining the right temperature is crucial for even frying.
10. Fry the doughnuts in batches, cooking each side for 1–2 minutes until golden brown. Use a slotted spoon to transfer them to paper towels and drain excess oil.
11. In a separate bowl, whisk together the powdered sugar, milk, and vanilla extract to create a smooth, pourable glaze.
12. While the doughnuts are still warm, dip them into the glaze, ensuring each one is fully coated. Let the excess drip off before transferring to a wire rack.
13. Allow the glaze to set for a few minutes, then serve immediately and enjoy the freshest homemade copycat Krispy Kremes you’ve ever tasted!
After all that love and labor, serving your doughnuts in a way that highlights their dreamy texture and sweet glaze is key. Whether you’re treating yourself or showing off at your next brunch, these ideas will make every bite feel extra special.
Serve these doughnuts alongside a steaming cup of strong coffee or espresso to balance the sweetness. Pour the coffee into a clear glass mug so the rich, dark hue pops against the bright glaze.
Complement the vanilla glaze with a side of fresh berries—like juicy strawberries, raspberries, or blueberries. The tartness cuts through the sweetness, creating a refreshing contrast.
Create a little dipping station with lightly sweetened whipped cream and a sprinkle of cinnamon. Guests can dunk their doughnuts for an extra layer of indulgence.
Arrange the doughnuts on a tiered stand or a rustic wooden board. Garnish with edible flowers or a drizzle of melted chocolate to elevate the presentation for special occasions.
Keeping your doughnuts at peak freshness ensures you can enjoy their soft, melt-in-your-mouth texture even a day or two later. Here are the best methods to store and preserve that just-made taste.
Place doughnuts in a single layer (or separated by parchment paper) inside an airtight container. Store at room temperature for up to 24 hours to maintain the glaze’s crackle and the dough’s softness.
If you need to keep doughnuts longer, seal them in an airtight container and refrigerate. Before serving, allow them to come back to room temperature or gently warm in the microwave for 10–15 seconds to restore pillowy softness.
For long-term storage, freeze unglazed doughnuts in a single layer on a baking sheet. Once solid, transfer to a freezer bag, removing excess air. Freeze for up to one month. Thaw at room temperature and apply glaze just before serving.
To revive stored doughnuts, preheat your oven to 300°F (150°C), place them on a wire rack over a baking sheet, and heat for 5–7 minutes. This gently re-crisps the exterior without drying out the interior.
Wrapping up this homemade Copycat Krispy Kreme journey, you’ve unlocked the secrets to creating soft, fluffy doughnuts crowned with a shiny vanilla glaze that crackles at first bite. We covered everything from activating your yeast and kneading your dough to mastering the perfect frying temperature and achieving that drool-worthy glaze. Along the way, you learned which ingredients are non-negotiable, how to serve these treats for maximum delight, and smart storage tips so you can enjoy that fresh-from-the-shop taste even days later. Feel free to print and save this article as your trusty kitchen companion—you’ll find that having these steps at your fingertips makes the process smooth and fun, especially when friends or family come calling for a sweet fix.
I’ve poured all my tried-and-true tips, those little tweaks that make the difference between a so-so doughnut and a mind-blowing one, right into this guide. Whether you’re an intermediate home baker looking to expand your repertoire or someone chasing the comfort of that iconic glazed doughnut, you now have the blueprint for success. Don’t forget, there’s an FAQ section waiting below that answers the most common questions—everything from yeast substitutions to troubleshooting glaze consistency. If you try this recipe, I’d love to hear how it turns out! Drop a comment, share your proudest doughnut photos, or let me know if you hit a snag along the way. Happy frying, and here’s to countless mornings filled with sweet, pillowy bliss!
Enjoy pillowy light doughnuts coated in a sweet vanilla glaze that crackles with every bite—just like the originals from Krispy Kreme, made fresh in your kitchen.

Hi, I'm Matthew Roberts, founder of Food Recipes USA! As a culinary historian and fourth-generation restaurateur, I've dedicated my life to preserving, celebrating, and evolving the rich tapestry of American cuisine.