
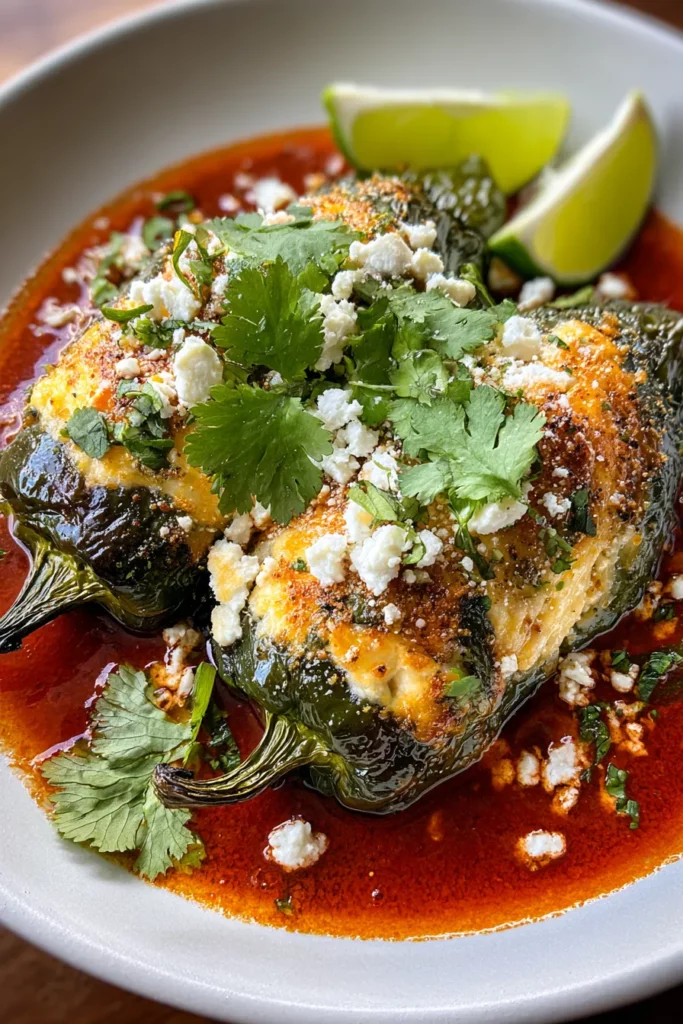
I’ve always believed that great food tells a story, and Hatch Chile Rellenos are a vibrant chapter in my culinary diary. This dish marries the smokiness of roasted Hatch chiles with the creamy meltiness of Monterey Jack and the delicate tang of queso fresco. From the first crackle of the peppers roasting over an open flame to the sizzle of the egg-battered shells hitting hot oil, every moment in the kitchen feels like a mini celebration. There’s something so satisfying about sliding a fork through that crispy golden coating into the tender pepper stuffed with flowing cheese. Whether you’re planning a festive dinner or craving comforting appetizers, these chile rellenos deliver on color, texture, and flavor—in one delicious bite.
More than just a recipe, Hatch Chile Rellenos are a lively invitation to gather friends and family around the table. I remember the first time I introduced them to my husband: we paired them with homemade Mexican rice, refried beans, and an ice-cold cerveza to balance the gentle heat. As we sat outdoors under twinkling lights, the rich enchilada sauce drizzled over the peppers became the perfect connector between every forkful of cheesy goodness and laughter-filled conversation. If you’ve ever wanted a dish that feels equal parts cozy comfort and fiesta, this is it. Ready for a hands-on cooking adventure that rewards you with dramatic flair and unforgettable flavor? Let’s dive in!
Before we get our hands messy with batter and oil, let’s talk about the stars of the show. Each ingredient in this recipe plays a special role—some bring heat, others creaminess, and a few ensure that iconic crispiness we all crave. Gathering quality components upfront means your rellenos will shine from the first bite to the last.
These roasted and peeled peppers are the backbone of the dish, offering a smoky, earthy flavor that ranges from mild to bold. Their sturdy flesh holds up beautifully when stuffed and fried, making them perfect for this recipe.
Known for its mild, buttery flavor and silky melt, this cheese creates that irresistible “cheese pull” when you slice into each chile relleno. It contributes rich creaminess without overpowering the chiles.
This light, crumbly cheese adds a fresh, slightly tangy contrast to the Monterey Jack’s smoothness. Scattered bits of queso fresco inside and atop the finished peppers create little pops of flavor.
By separating the yolks and whites, we achieve a fluffy, meringue-like batter that crisps up around the chiles. The yolks add richness, while the beaten whites deliver lift and structure.
Combined with baking powder and salt, this base coating helps the egg batter adhere to the chiles and promotes a golden-brown finish.
A small addition that makes a big difference: it keeps the batter airy and prevents it from getting too dense when frying.
Simple but essential—it brightens the flavors of eggs, cheese, and chiles, ensuring every taste is vivid and balanced.
Used for frying, the oil needs to be at just the right temperature to create a crisp exterior without burning the batter.
Drizzled warm over the finished rellenos, this sauce brings tangy, tomato-forward notes that complement the smoky peppers and creamy cheeses.
These bright, zesty accents add lift and freshness. A squeeze of lime and a sprinkle of cilantro transform each bite into a fiesta on your plate.
Let’s walk through turning those roasted Hatch chiles into golden, cheese-filled delights. The process moves you from stuffing to frying to saucing, and each stage brings you closer to that magical moment when cheese drips from a perfectly crisp exterior. With an intermediate difficulty level, this recipe takes about 30 minutes of prep, 20 minutes of cooking, and a 10-minute rest before serving. Gather your mise en place and get ready for some fun in the kitchen!
1. Carefully make a slit down one side of each roasted chile, remove all the seeds, and keep the stems attached for a charming presentation.
2. Mix the Monterey Jack and queso fresco together, then stuff each chile just enough so they hold their shape when fried. Close them gently and set aside.
3. In a medium bowl, whisk the egg whites with vigor until they reach stiff peaks, forming a glossy meringue.
4. In a separate bowl, whisk the egg yolks until smooth, then fold them gently into the beaten egg whites to maintain that airy texture.
5. In a shallow dish, whisk together the flour, baking powder, and salt to create the dry coating mixture.
6. Heat about an inch of vegetable oil in a large skillet over medium heat until it shimmers but doesn’t smoke.
7. Dredge each stuffed chile first in the flour mixture, then dip and coat fully in the egg batter, ensuring every nook is covered.
8. Carefully lower the chiles into the hot oil and fry, turning occasionally, until they turn a golden brown—roughly 2–3 minutes per side.
9. Transfer the cooked rellenos onto paper towels to drain any excess oil, preserving that crisp shell.
10. Warm the red enchilada sauce in a small saucepan over low heat, stirring occasionally to keep it silky.
11. Plate the chiles, drizzle them generously with warm sauce, garnish with fresh cilantro, and serve with lime wedges on the side.
After all that careful cooking, it’s time to dress up your Hatch Chile Rellenos for serving! These beauties look stunning on a large platter or individual plates, and they welcome an array of accompaniments that turn a simple dish into a memorable feast. Whether you’re hosting a casual taco night or a more formal dinner party, pairing and plating can elevate both flavor and presentation. I love stacking the rellenos next to colorful sides, adding extra sauce in a gravy boat, and letting everyone customize their bites. With 400 calories per serving and enough for about six rellenos, this can star as either an appetizer shareable among friends or the main event for a cozy family dinner.
Sometimes you’ll have leftovers—or you might want to prep chiles ahead of time. Proper storage is key to keeping that signature crunch and melty filling intact. My trick is to separate the components: store the rellenos in an airtight container, and keep the sauce in its own jar. When it’s time to reheat, using the oven or air fryer brings back the crisp exterior better than a microwave ever could. Below are a few storage ideas to maintain freshness, flavor, and texture, even a day or two later.
What a journey! We’ve roasted and peeled our Hatch chiles, coaxed a fluffy egg batter to perfection, and transformed simple ingredients into a sensational plate of Chile Rellenos. From mixing the cheeses to that satisfying sizzle in the skillet, every moment in this recipe reflects a little bit of flair and a whole lot of heart. Whether you’re an experienced home cook or out to tackle your first deep-fried masterpiece, these rellenos reward patience with a glorious contrast: crisp, golden exteriors yielding to pockets of gooey cheese and smoky pepper. And let’s not forget the final flourish—the warm, tangy red enchilada sauce, fresh cilantro, and lime wedges that tie it all together.
Feel free to print and save this article for future reference—keeping it in your recipe binder ensures you’ve always got a fiesta-ready dish at your fingertips. You’ll also find a handy FAQ below to tackle any questions about technique, ingredient swaps, or troubleshooting. If you give this recipe a whirl, I’d love to hear how it goes in your kitchen! Drop a comment, ask any cooking questions, or share your own twists on these Hatch Chile Rellenos. Your feedback not only helps me improve but also inspires fellow home cooks to get adventurous with their next meal. Happy cooking!
Experience the perfect blend of roasted Hatch chiles stuffed with melty cheese, all enveloped in a crispy egg batter. Topped with rich enchilada sauce, it's a fiesta on your plate!

Hi, I'm Matthew Roberts, founder of Food Recipes USA! As a culinary historian and fourth-generation restaurateur, I've dedicated my life to preserving, celebrating, and evolving the rich tapestry of American cuisine.