
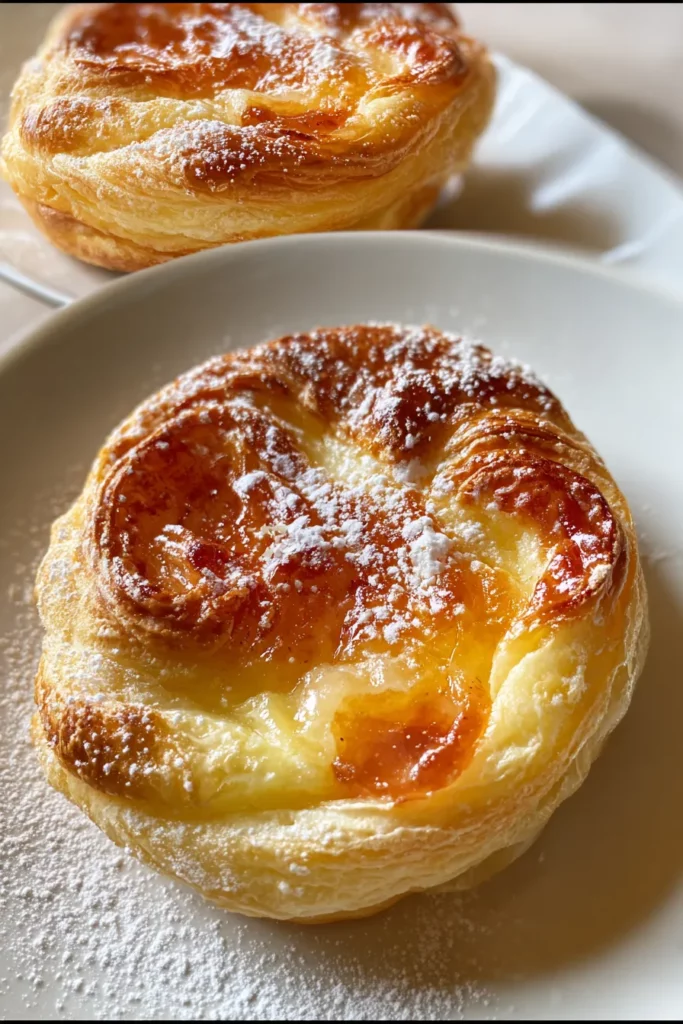
There’s something undeniably magical about biting into a golden, flaky pastry that practically melts on your tongue. These Flaky Baked Cream Cheese Danishes are just that—a perfect harmony of tender layers, silky cream cheese filling, and a burst of fruity sweetness from your favorite preserves. Soft clouds of puff pastry envelop a rich, vanilla-kissed cheese center, offering a delightful contrast of textures that will have your taste buds dancing with joy. Every mouthful feels like a warm hug, wrapping you in buttery goodness and just the right amount of sugary charm.
What makes these Danishes truly irresistible is how simple they are to prepare. With thawed puff pastry, pantry staples, and a handful of minutes, you’ll transform humble ingredients into bakery-worthy treats. Whether you’re hosting brunch for loved ones, craving a cozy breakfast with a cup of coffee, or simply treating yourself to a homemade dessert, these pastries shine in any setting. Beginner cooks will appreciate the straightforward steps, and busy households will love the quick prep time—just 20 minutes to assemble and another 20 to bake. Plus, they rest for a mere five minutes before you dust them with snow-like powdered sugar. At roughly 250 calories per Danish, you can indulge without guilt, savoring every bite of this delightful baked good.
Before we dive into the step-by-step guide, let’s get familiar with the stars of the show. Each ingredient plays a crucial role in delivering that tender, flaky texture and rich, creamy flavor you crave.
This is the backbone of your Danish. Its layers of butter and dough puff up beautifully in the oven, creating those signature flaky sheets that flake apart with every bite.
The creamy, tangy filling that gives these Danishes their luscious texture. Softened to room temperature, it whips easily into a velvety blend with sugar and vanilla.
Adds sweetness and helps the cream cheese mixture turn silky smooth. It balances the tang of the cheese and the tartness of the preserves.
A splash of vanilla brightens the filling, adding depth and a fragrant aroma that complements the fruit preserves perfectly.
Separated into yolk and white. The yolk enriches the cream cheese filling, while the beaten white mixed with water makes an egg wash that gives the pastry a glossy, golden finish.
Lightens the egg white for brushing, ensuring an even, golden-brown crust without pooling or over-browning.
Raspberry, strawberry, apricot—choose any you love. A dollop of jam in the center provides a sweet-tart pop of flavor that harmonizes with the creamy center.
A final dusting adds a delicate sweetness and a beautiful presentation, transforming these pastries into bakery-worthy delights.
Let’s walk through assembling these gorgeous Danishes. Follow these detailed steps, and you’ll have a warm tray of golden, flaky pastries ready to dazzle family and friends in no time.
1. Preheat your oven to 400°F (200°C). Line a baking sheet with parchment paper to prevent sticking and ensure easy cleanup.
2. In a medium-sized bowl, use a hand mixer to beat together the cream cheese, granulated sugar, vanilla extract, and egg yolk until the mixture is smooth and creamy. Set this luscious filling aside while you work with the pastry.
3. On a lightly floured surface, roll out the thawed puff pastry into a large rectangle, about 12x16 inches. Aim for an even thickness so the pastries bake uniformly.
4. With a sharp knife or pizza cutter, trim the edges for neatness and cut the rectangle into six equal squares. Precision here ensures each Danish looks polished.
5. Place a generous tablespoon of the cream cheese mixture in the center of each square. Top it with a teaspoon of your chosen fruit preserves, creating a sweet jewel in the center of each pastry.
6. Fold each square by bringing the opposite corners together over the filling. Gently press the seams to seal, forming a charming pinwheel or diamond shape that keeps the filling snug inside.
7. Transfer the assembled pastries to the prepared baking sheet. In a small bowl, beat the egg white with water to create your egg wash, then use a pastry brush to lightly coat the tops of each Danish—this gives them a beautiful golden glow.
8. Bake in the preheated oven for 15–20 minutes, or until each pastry is puffed and golden brown on top. The layers should separate slightly, revealing those irresistible flaky pockets.
9. Remove from the oven and let the Danishes cool slightly on a wire rack. Before serving, dust them generously with powdered sugar to add a final touch of sweetness and elegance.
Once your Danishes are baked to perfection, it’s time to think about presentation and pairings. Whether you’re setting up a brunch buffet, enjoying a solo coffee break, or hosting an afternoon tea, these serving ideas will elevate the experience. Take a moment to plate them thoughtfully, letting the powdered sugar dust the platter like morning frost. Invite guests to help themselves, or arrange them on a tiered stand for a charming display. A few sprigs of fresh mint or edible flowers can add a pop of color, while fresh fruit on the side highlights the fruity preserve inside. Don’t forget to offer warm beverages—coffee, tea, or even a frothy latte complement the sweet, tangy notes of the Danishes beautifully.
Storing these Danishes properly ensures that you can enjoy their flaky goodness even after the baking frenzy. The key is to protect the delicate layers from humidity and prevent the filling from drying out. If you plan to serve them later the same day, a simple airtight container at room temperature will do the trick. For longer storage, the fridge or freezer is your friend—just be sure to wrap each pastry individually to keep moisture at bay. When you’re ready to enjoy them again, a quick reheat will bring back that freshly baked charm. With the right method, you’ll have a stash of irresistible treats ready whenever the craving strikes.
That wraps up our journey through every flaky layer, creamy swirl, and fruity burst of these homemade Flaky Baked Cream Cheese Danishes. You’ve learned how to transform simple ingredients into bakery-style pastries that impress from the first glance to the very last bite. From thawing your puff pastry and whipping up the velvety cheese filling to folding each square into perfect pinwheels and baking them to a golden finish, every step is designed to be beginner-friendly yet delightfully rewarding. We also covered key serving tips—whether you’re pairing with hot coffee, fresh berries, or building a brunch board—and shared foolproof storage methods to keep your delights tasting just-baked for days. The prep time of 20 minutes, cooking time of another 20, and a brief 5-minute rest make this recipe as efficient as it is delicious. At around 250 calories per pastry, they’re a treat you can feel good about sharing.
Feel free to print this article and tuck it away in your recipe binder or bookmark it for easy reference. You’ll also find a handy FAQ section below to answer any lingering questions about variations, ingredient swaps, or troubleshooting tips. If you give these Danishes a whirl, please leave a comment or reach out with your thoughts—did you experiment with a new preserve flavor? How did your guests react? And if you run into any bumps while making them, drop your questions here and I’ll gladly help you troubleshoot. Your feedback and stories bring this recipe to life, so don’t be shy—let’s chat all things flaky, creamy, and fruity!
These flaky baked cream cheese Danishes are a delightful treat, featuring a rich cream cheese filling, a hint of sweetness from preserves, all enveloped in golden, flaky pastry. Perfect for any occasion!

Hi, I'm Matthew Roberts, founder of Food Recipes USA! As a culinary historian and fourth-generation restaurateur, I've dedicated my life to preserving, celebrating, and evolving the rich tapestry of American cuisine.