
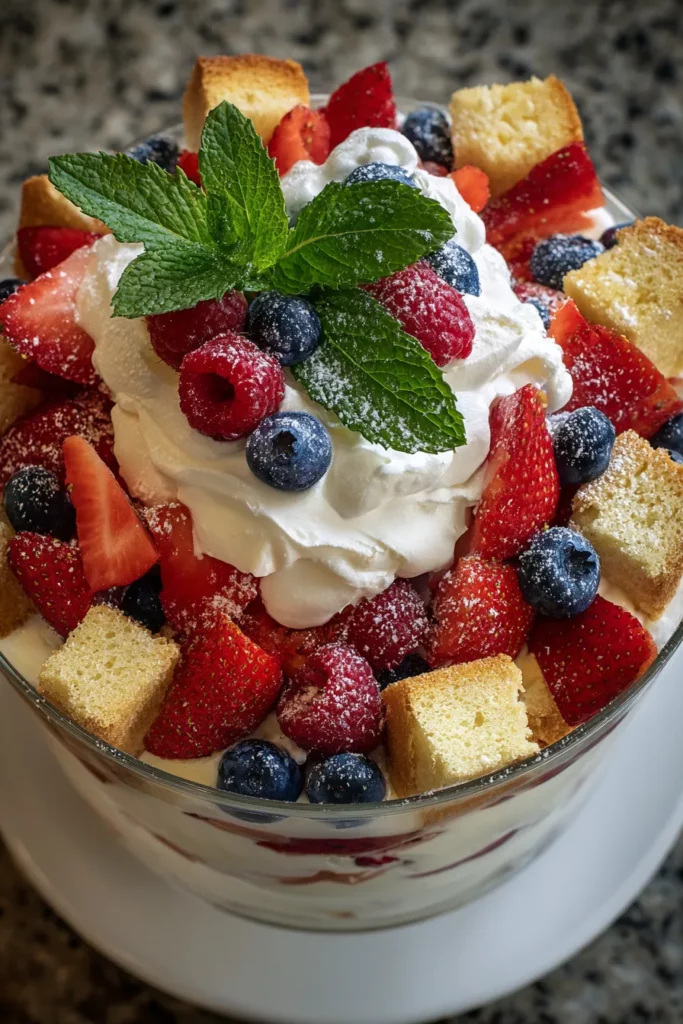
If you’ve ever craved a dessert that balances soft, pillowy cake with bright, sun-ripened berries and cloud-like cream, this Elegant Layered Berry Trifle might just become your new go-to showstopper. Every spoonful delivers a delightful contrast of textures: buttery cake cubes that give way to juicy fresh berries, all embraced by two layers of silky vanilla pudding and light-as-air whipped cream. As a home cook, I get giddy at the thought of arranging these colorful components in a clear glass bowl, watching the hues stack up like edible art that beckons guests to dig right in. One summer afternoon, I found myself coaxing perfect swirls of whipped cream between the layers, and I swear the whole neighborhood caught wind of that sweet vanilla whisper through my open kitchen window. It’s moments like these—gathering around the countertop with chatting friends and curious kiddos—that make this dessert more than a recipe; it’s a memory in the making.
Beyond its jewel-toned layers and creamy clouds, what I adore about this trifle is its versatility. You can tailor it to the seasons, swapping berries for stone fruits in late summer or folding in a swirl of mascarpone for extra richness. When I made my first batch at a family reunion, I drizzled a little raspberry coulis on top of each glass and watched grown-ups line up for seconds as if they were back in kindergarten waiting for mac and cheese. With just 30 minutes of hands-on prep and a brief one-hour chill, this beginner-friendly dessert lets you spend more time socializing and less time fussing. At around 350 calories per generous serving, you can even feel good about indulging. Whether you’re celebrating a milestone, feeding a crowd, or simply treating yourself to a sweet Sunday reprieve, this berry trifle is ready to shine.
Each component in this recipe plays its part in creating that eye-catching, flavor-packed experience. From the sturdy base that holds everything together to the finishing garnish that adds a final spark of freshness, these ingredients are the reason this trifle steals the show at any gathering.
A tender yet firm base that soaks up just enough pudding without turning soggy. Its buttery flavor provides a neutral canvas for the berries and cream.
These ruby-red beauties bring juicy sweetness and a pop of color. Their natural acidity brightens each bite.
Small bursts of sweet, deep-blue flavor that contrast wonderfully with the other berries and add visual interest.
Slightly tart and delicately textured, raspberries lend a refreshing zing and a vibrant splash of red.
The backbone of the whipped topping, contributing richness and a smooth, luscious mouthfeel.
A few drops of this aromatic extract elevate both the whipped cream and pudding with warm floral notes.
Finely powdered sweetness that helps stabilize the whipped cream for soft, dreamy peaks.
The quick and easy shortcut to a silky, creamy layer that binds the cake and berries together.
Essential for whisking up the pudding mixture, ensuring a perfectly smooth and creamy consistency.
A garnish that adds a refreshing herbal note and a pop of verdant green.
Layering a trifle is almost therapeutic—each tier adds more color, texture, and flavor to the bowl, and by the end you have a dessert that looks like it belongs in a bakery window. With simple tools and a clear dish, let’s walk through the steps to build this beauty.
1. Prepare the pudding: In a medium bowl, whisk together the instant vanilla pudding mix with cold milk until the mixture is smooth. Let it sit for about five minutes to thicken and reach that perfect creamy consistency.
2. Whip the cream: In a separate large bowl, combine heavy cream, vanilla extract, and confectioners’ sugar. Using an electric mixer on medium-high speed, beat until soft peaks form—about three to four minutes. You want the cream light and billowy but still able to hold its shape.
3. Layer the trifle: Place a single layer of pound cake cubes evenly across the bottom of a large trifle bowl or clear glass container. This solid foundation keeps everything stable as you add layers.
4. Add a mixture of berries: Scatter sliced strawberries, blueberries, and raspberries on top of the cake. Aim for a colorful, even distribution so every bite bursts with fruit.
5. Spread a layer of pudding: Spoon the prepared pudding over the berries and use a spatula to smooth the surface, ensuring the fruit is gently enveloped.
6. Repeat: Continue layering cake cubes, berries, and pudding until you reach the top of the bowl. On the final pass, finish with a generous layer of whipped cream, creating soft peaks.
7. Garnish: Decorate the top with extra berries and fresh mint leaves for a polished, garden-fresh look.
8. Chill: Refrigerate the assembled trifle for at least one hour. This rest time lets the layers meld, deepening the flavors and firming up the structure for a clean slice.
This trifle doesn’t just look pretty; it begs for the perfect presentation to match its vibrant layers. Whether you’re hosting an elegant dinner party, a casual family brunch, or an outdoor picnic, a few thoughtful serving touches can make each scoop feel like a celebration. Delicate glass trifle bowls exude sophistication, while individual stemless glasses add a modern twist. Keeping the dessert well-chilled until the last moment ensures crisp, neat servings—nothing dulls the impact of those jewel-toned berries faster than a warm, weeping pudding layer. For a brunch crowd, set up a self-serve station with spoons and small dessert plates, encouraging guests to help themselves and crowd around with laughter. When serving al fresco, tuck your dish into a cooler or ice-filled bowl to maintain that perfect chill. A final flourish of freshly picked mint leaves or a light dusting of confectioners’ sugar right before you bring the trifle to the table completes the picture, inviting everyone to dive into layers of pure delight.
This dessert is best enjoyed fresh, but life happens—and sometimes you need to prepare ahead or save a few servings for later. The key to maintaining that perfect texture and vibrant look lies in controlling moisture and temperature. Once assembled, the whipped cream will start to soften and the cake will absorb more moisture; timely refrigeration and proper covering are essential. If you plan to assemble the night before, consider waiting to add the whipped cream layer and mint garnish until serving day to preserve peak freshness. Always keep the trifle cold and shielded from strong odors in the fridge. For longer-term storage, it’s smarter to store components separately, as freezing the assembled dessert can lead to icy textures and watery fruit upon thawing. Below are a few tried-and-true methods to keep your trifle tasting as glorious as the moment you first plated it.
Thank you for joining me on this sweet journey through the layers of the Elegant Layered Berry Trifle. We’ve explored every facet of this stunning dessert—from the tender pound cake base to the bright trio of berries, through the silky vanilla pudding and fluffy whipped cream crowning each tower of goodness. With a total hands-on prep time of just 30 minutes and no cooking required, this beginner-friendly treat is perfect for celebrations, family dinners, or any moment that calls for a show-stopping finish. Don’t forget, once you’ve mastered this recipe, you can print and save this article for easy reference the next time you’re craving something spectacular. And when you get to the bottom of the bowl, you’ll see a handy FAQ section waiting just below to answer any lingering questions about substitutions, timing, or troubleshooting.
I’d love to hear how your trifle turned out—did you add a personal twist with seasonal fruits or a drizzle of coulis? Feel free to leave comments, questions, or feedback below. Whether you’re seeking advice on perfecting your whipped cream peaks or just want to share photos of your berry-bright creation, your thoughts help our home-cooking community grow. Happy layering, and here’s to many more delicious gatherings around the table!
Layers of fluffy pound cake, fresh berries, and creamy vanilla pudding come together to create a beautiful and delicious centerpiece dessert that everyone will love.

Hi, I'm Matthew Roberts, founder of Food Recipes USA! As a culinary historian and fourth-generation restaurateur, I've dedicated my life to preserving, celebrating, and evolving the rich tapestry of American cuisine.