
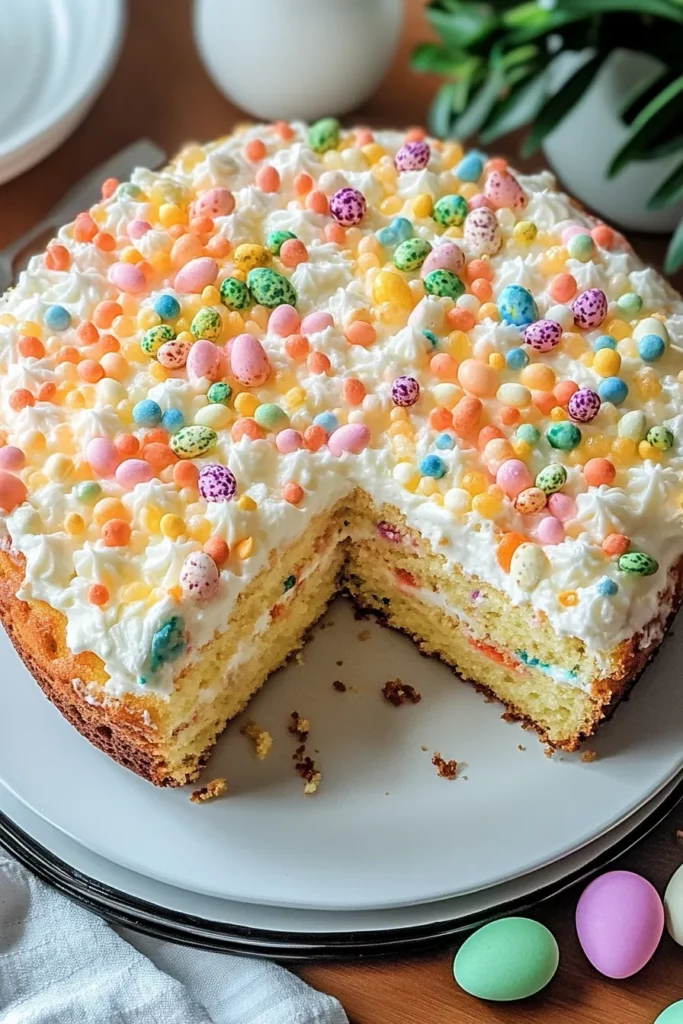
Spring has officially sprung, and with it comes the perfect opportunity to add a burst of pastel cheer to your dessert table. This Easter Poke Cake is exactly the kind of crowd-pleaser you need for family gatherings: it’s moist, airy, and filled to the brim with layers of creamy vanilla pudding and fluffy whipped cream. From the moment you slide that 9x13-inch pan into the oven, the kitchen transforms into a happy haven of golden-baked sweetness. As a beginner-friendly dessert, it brings together simple pantry staples—white cake mix, instant vanilla pudding, sweetened condensed milk, and a splash of cold milk—into something truly magical. You’ll find yourself smiling ear to ear as you pour the pudding mixture over the freshly poked holes, watching it seep into every nook and cranny for that signature poke cake effect. By the time you’ve whipped your cream to stiff peaks and dolloped on those pastel swirls, you’ll realize that this recipe is not just food—it’s an experience that invites laughter, nostalgia, and a touch of artistic flair.
Every bite of this Easter Poke Cake feels like a celebration in your mouth. The sweet vanilla undertones blend seamlessly with the rich, velvety condensed milk, while the pastel whipped cream adds that picture-perfect finish you’ll want to Instagram. And let’s not forget the mini marshmallows and Easter candies scattered on top—they bring just the right hint of whimsy and crunch. With only 350 calories per serving, it’s the kind of dessert that feels indulgent without tipping the scales too much, which makes it a guilt-free treat for springtime gatherings. You’ll love how easy it is to prepare: about 30 minutes of hands-on time, another 30 minutes baking, and then a leisurely 2-hour chill in the fridge to let all the flavors meld. Whether you’re a seasoned home cook or a newbie in the kitchen, this dessert promises to bring smiles, sweet memories, and rave reviews.
Before diving into the step-by-step process, let’s take a look at the star performers that make this Easter Poke Cake shine. Each ingredient plays a crucial role—from the foundation of a light, tender crumb to the lusciously creamy layers that soak into those signature poke holes. Having these items at the ready will help you breeze through the preparation, leaving more time for creativity and those decorative finishing touches.
A convenient shortcut that guarantees a soft, fluffy cake base. The included instructions for water, oil, and eggs ensure consistent results every time, making it perfect for bakers of all skill levels.
Adds a smooth, custardy layer that seeps delightfully into the cake’s pores. Its rich vanilla flavor deepens the overall taste and keeps each bite irresistibly moist.
Brings the pudding mix to life. Using chilled milk helps the pudding set quickly and meld seamlessly with the cake’s tender crumb.
Contributes luscious sweetness and a velvety texture. As it drizzles into the holes, it heightens the dessert’s creaminess and adds a dreamy, caramel-like undertone.
Whipped into stiff peaks, it forms the light-as-air topping that holds vibrant pastel swirls in place. Its richness balances the sweetness of the pudding layer.
Sweetens and stabilizes the whipped cream. It ensures the topping maintains its shape and sweetness without becoming runny.
Infuses both the whipped cream and cake layers with aromatic depth. A little goes a long way in enhancing the overall flavor profile.
Pastel shades of pink, blue, yellow, and green turn your whipped topping into an Easter masterpiece. They bring playful, festive vibes that delight kids and adults alike.
Optional garnish that provides a pillowy chew and extra pop of sweetness. They look adorable when clustered together atop the cake.
Jelly beans, mini chocolate eggs, or any colorful confections you love. These fun toppings add crunch and visual interest, making the cake irresistibly festive.
An extra dollop for serving, adding freshness and lightness to each slice. It’s the perfect finishing touch for an Easter celebration.
Ready to transform these simple ingredients into a dreamy dessert that will have everyone smiling? Follow these detailed steps to create your show-stopping Easter Poke Cake. From preheating the oven to that final chill in the fridge, every stage is important for building layers of flavor and texture that pop.
1. Preheat your oven according to the cake mix box instructions (usually 350°F/175°C). Ensuring the oven reaches the right temperature before you begin guarantees an even bake throughout the cake.
2. Prepare the white cake mix exactly as directed on the package, incorporating the eggs, oil, and water. Pour the batter into a greased 9x13-inch baking dish and bake for the time specified (typically around 30 minutes), or until a toothpick inserted into the center comes out clean. Allow the cake to cool in the pan for about 10 minutes so it’s firm enough to handle.
3. While the cake is cooling, use a fork to poke holes all over the top, spacing them about 1 inch apart. Aim for holes that reach nearly to the bottom but don’t break through, ensuring the pudding mixture sinks deeply without compromising the cake’s structure.
4. In a medium bowl, whisk together the instant vanilla pudding mix and cold milk for about 2 minutes until thickened. Stir in the sweetened condensed milk and continue whisking until the mixture is smooth and glossy.
5. Pour the pudding mixture evenly over the cooled cake, making sure it fills all the holes. Use a spatula to gently spread the pudding layer, guiding it into every crevice. Let the cake rest for about 10 minutes, allowing the pudding to fully absorb.
6. In another bowl, combine the heavy whipping cream, powdered sugar, and vanilla extract. Use an electric mixer to whip until stiff peaks form, creating a stable and fluffy topping.
7. Once the cake has absorbed the pudding fully, spread a generous layer of the whipped cream over the top, covering it edge to edge.
8. Divide the remaining whipped cream into separate bowls and add a few drops of each food coloring to achieve your pastel palette. Gently swirl the colors together for a soft, marbled effect that looks like Easter morning in full bloom.
9. Garnish with mini marshmallows and a scattering of Easter candy, arranging them in decorative clusters or sprinkling them randomly for playful charm.
10. Refrigerate the cake for at least 2 hours, allowing the flavors to meld, the layers to set, and the dessert to achieve that perfectly chilled bite.
Now that your Easter Poke Cake has been chilled to creamy perfection, it’s time to think about the moment of presentation. Serving this colorful confection is about more than just slicing—it’s about creating an experience that delights all the senses. Whether you’re hosting brunch, an afternoon tea, or a festive Easter dinner, these four ideas will help you showcase your masterpiece with flair.
Proper storage is key to preserving the delightful textures and flavors of your Easter Poke Cake. This section covers everything you need to know about keeping your dessert tasting fresh, whether you’re saving leftovers or preparing ahead of time. With these tips, you’ll maintain the cake’s moist crumb, creamy pudding layer, and magical pastel swirls without any compromise.
Creating this Easter Poke Cake has been such a joyful journey—from mixing that first batch of cake batter to swirling pastel whipped cream into a joyful mosaic on top. It’s a dessert that truly captures the spirit of spring, combining soft, moist cake layers with creamy vanilla pudding and airy whipped cream. The optional mini marshmallows and colorful Easter candies add a playful crunch and make each slice feel festive. As a beginner-friendly, crowd-pleasing dessert, it takes just 30 minutes of prep, a half-hour in the oven, and a restful two hours in the fridge to reach its full potential. At approximately 350 calories per slice, it’s a delightful treat that balances indulgence with lightness. Whether you’re serving it alongside hot coffee, fresh berries, or simply letting it shine on its own, this cake will become the highlight of your Easter table.
Feel free to print this article and save it for future gatherings—you can even tuck it into your recipe binder for effortless holiday planning. Below you’ll find a handy FAQ section to answer any questions you might have about substitutions, troubleshooting, or creative variations. If you decide to try this Easter Poke Cake (and I know you will!), please leave your comments, questions, or feedback. Let me know how your cake turned out, what decorations you chose, or any twists you added to make it uniquely yours. Happy baking, and here’s to the sweetest Easter yet!
This Easter Poke Cake is moist and airy with layers of vanilla pudding and whipped cream, all adorned with pastel colors and fun treats for a festive gathering.

Hi, I'm Matthew Roberts, founder of Food Recipes USA! As a culinary historian and fourth-generation restaurateur, I've dedicated my life to preserving, celebrating, and evolving the rich tapestry of American cuisine.