
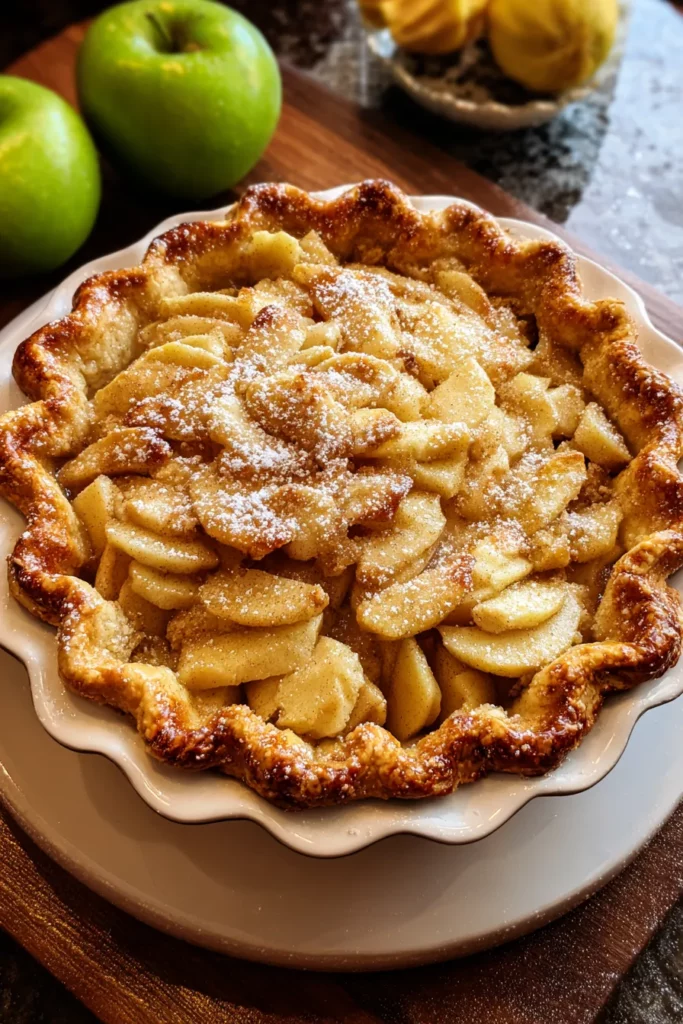
There’s something truly heartwarming about diving into a slice of homemade Dutch Apple Pie. This dessert is the epitome of cozy fall flavors, combining juicy, tart-sweet apples with a golden, buttery crumb topping that crunches just right. With minimal fuss—just 20 minutes of prep, an hour in the oven, and a one-hour rest—you’ll be rewarded with eight generous servings of pure comfort. Whether you’re gathering around the table for Thanksgiving, celebrating the first cool breezes of autumn, or simply craving a classic apple dessert, this traditional recipe delivers. The interplay between tender fruit and crisp streusel, kissed by cinnamon and nutmeg, makes every bite a little celebration.
I love that this Dutch Apple Pie is perfect for both baking beginners and seasoned home cooks. The unbaked pie crust provides a flakey foundation that practically melts in your mouth, while Granny Smith, Honeycrisp, or Golden Delicious apples bring their own character—tangy, sweet, or mellow, depending on your mix. A hint of lemon juice keeps the fruit lively, and vanilla adds depth to the filling. As soon as you slide it out of the oven and let it rest, the kitchen fills with warm spice notes and memories of grandma’s kitchen. Serve it warm, top it with a scoop of vanilla ice cream or a dollop of whipped cream, and watch it disappear. At around 400 calories per slice, this pie feels like a well-deserved treat that hits all the high notes of fall without any complicated steps.
Before we dive into the step-by-step, let’s talk about the star players of this homemade pie. Each ingredient has a special role in creating that perfect balance of sweet, tart, and buttery texture. Gather these essentials, and you’ll be all set to bake a Dutch Apple Pie that feels both comforting and elegant.
A sturdy yet flaky base that cradles the apple filling; its buttery layers provide structure and melt-in-your-mouth appeal.
Peeled and thinly sliced (we love Granny Smith for tang, Honeycrisp for sweetness, Golden Delicious for balance); they soften just enough and maintain a tender bite.
Brightens the filling and prevents the apples from browning, adding a subtle zing that keeps flavors fresh.
Sweetens the fruit mixture and helps draw out juices, creating a lightly syrupy filling that’s never cloying.
Thickens the juices released by the apples, ensuring the filling sets beautifully without becoming runny.
Infuses the pie with that quintessential warm spice, marrying the apples and sugars into one cozy bite.
Adds a hint of nutty warmth, giving depth to the spice profile without overpowering.
Balances sweetness and enhances all the other flavors, making every note pop.
Rounds out the filling with fragrant richness, elevating the simple apple mixture to something almost custardy.
Cut into the crumb topping, it creates tender, golden streusel that sings against the soft apple layers.
Brings a touch of molasses flavor to the crumb topping, delivering extra chew and caramel notes.
Time to roll up your sleeves and bring this apple dessert to life. Follow these detailed steps, and you’ll end up with a pie that’s golden on top, tender in the middle, and irresistible in every bite.
1. Preheat your oven to 425°F (220°C) so it’s blazing hot when your pie goes in, ensuring a crisp crust from the very start.
2. Place the unbaked pie crust into a 9-inch dish, trim any overhang, then crimp the edges with your fingers or a fork for a decorative finish.
3. In a large mixing bowl, toss the thinly sliced apples with lemon juice—this quick step prevents browning and adds a fresh tang.
4. Add granulated sugar, flour, cinnamon, nutmeg, salt, and vanilla extract to the apples. Stir thoroughly so every slice is coated in the spiced mixture.
5. Pour the apple mixture into your prepared crust, using a spatula to spread it out evenly and fill every corner.
6. For the crumb topping, combine flour, granulated sugar, light brown sugar, cinnamon, and nutmeg in a medium bowl. Stir until the dry ingredients are evenly mixed.
7. Using a pastry cutter or your fingertips, cut the chilled butter into the dry mix until it resembles coarse crumbs—those little pockets of butter will melt and bake into crunchy clusters.
8. Sprinkle the crumb topping generously over the apples, aiming for an even layer that covers the filling completely.
9. Bake at 425°F (220°C) for 15 minutes to set the crust, then reduce the temperature to 350°F (175°C) and continue baking for 40–50 minutes, or until the topping turns golden-brown and the apple filling is bubbling and tender.
10. If the edges of your crust or streusel start to brown too fast, cover the pie loosely with aluminum foil to prevent burning.
11. When baking is complete, allow the pie to cool on a wire rack for at least one hour. This resting time helps the filling set properly so your slices hold together beautifully.
Serving a Dutch Apple Pie is where the magic really happens. Whether you’re aiming for an elegant dessert or a casual sweet snack, these tips will make each slice shine. Present your pie with care, and your guests will feel the love baked into every bite of this beginner-friendly, fall-inspired classic.
Serve each slice piping hot with a generous scoop of creamy vanilla ice cream melting down the sides—contrast of temperatures enhances the sweet-tart apple filling.
Warm some buttery caramel sauce and gently pour it over the top for an extra layer of decadence and a shiny, sticky finish.
Add a cloud of lightly sweetened whipped cream, then sprinkle with a pinch of ground cinnamon for a festive touch that pairs perfectly with the crumb topping.
Offer mugs of warm apple cider spiced with cloves and star anise alongside your pie to echo those fall flavors and create a cozy dessert spread.
Keeping your Dutch Apple Pie fresh and delicious is easier than you might think. Whether you have leftovers or you’re planning ahead for a gathering, follow these storage tips to maintain that perfect crumbly topping and tender filling.
Cover the cooled pie loosely with plastic wrap or a pie saver and store on the countertop for up to 2 days—this preserves the crisp topping while keeping the filling moist.
For longer storage (up to 4 days), wrap the pie in foil or place it in an airtight container. Chilling strengthens flavors but may soften the crumb topping; a quick 5-minute reheat in a 350°F oven restores crunch.
To freeze individual slices, wrap them tightly in plastic wrap, then foil, and place in a zip-top bag. Freeze for up to 2 months. Reheat from frozen at 350°F for about 20–25 minutes until warmed through.
Always let the pie cool completely before covering or refrigerating—trapping steam while it’s hot will lead to a soggy crust and damp streusel.
This Dutch Apple Pie is more than just a dessert—it’s a celebration of fall flavors, a nod to traditional baking, and an invitation to create new memories around your table. In about 20 minutes of hands-on prep and a little over an hour of baking and resting, you’ve got a homemade pie that looks impressive but feels effortless. The crumb topping delivers that signature texture, while the apples sing with cinnamon, nutmeg, and vanilla. Whether you serve it on a crisp October afternoon or finish a hearty meal, this apple dessert hits all the right notes: sweet, tangy, buttery, and warmly spiced. You can easily print this article or save it for later—tuck it into your recipe binder, and it will be ready whenever you need that classic treat.
Feel free to explore different apple varieties, adjust spices to taste, or even experiment with a gluten-free crust if you like. Don’t forget to top your slices with ice cream, whipped cream, or a drizzle of caramel for a personal twist. If you try this pie or have questions while baking, drop a comment below—your feedback helps everyone else who wants to master this beginner-friendly recipe. And remember, there’s a handy FAQ section right below to address common questions. I can’t wait to hear about your pie adventures and any delicious variations you discover!
This Dutch Apple Pie features sweet, tender apples complemented by a rich, crumbly topping. The perfect treat for any occasion, a scoop of vanilla ice cream takes it to the next level!

Hi, I'm Matthew Roberts, founder of Food Recipes USA! As a culinary historian and fourth-generation restaurateur, I've dedicated my life to preserving, celebrating, and evolving the rich tapestry of American cuisine.