
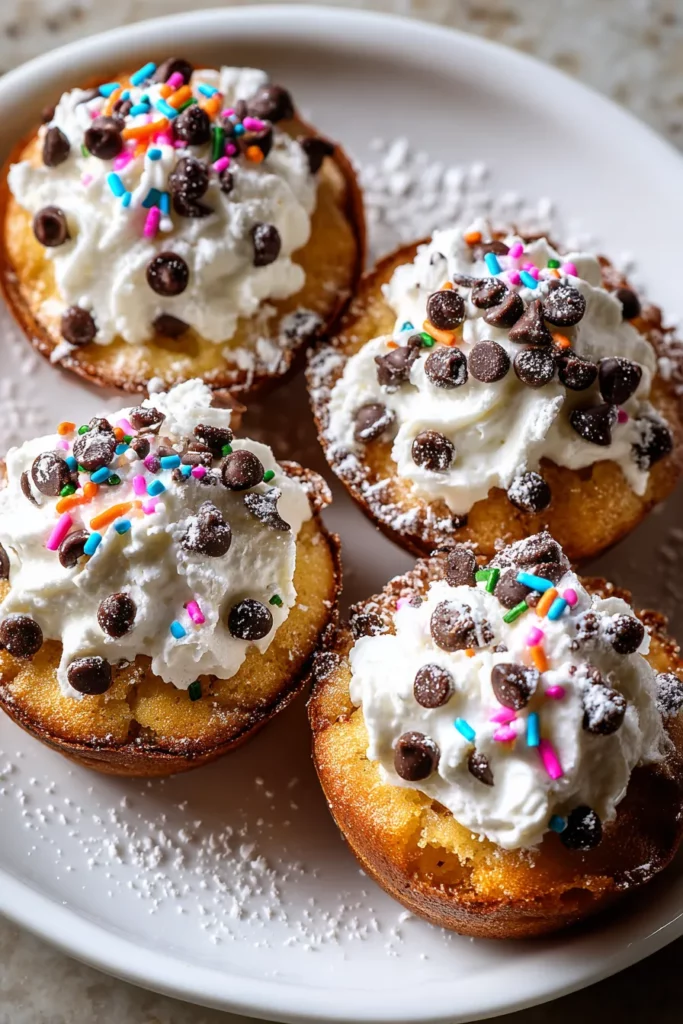
Your sweet tooth is about to embark on a joyous adventure with these Cutie Pie Mini Cakes! These tiny treats pack a punch of buttery sweetness and chocolatey delight that will steal the show at any gathering. With just 24 adorable cakes bursting with mini chocolate chips and topped with a silky vanilla frosting, every bite feels like a celebration. Whether you’re aiming to surprise your brunch guests or craving a personal snack that feels both indulgent and light, these dainty delights hit the sweet spot. As a self-proclaimed home-baking enthusiast, I can’t help but grin whenever I see those golden-baked tops peeking out of the mini muffin tin—each one is brimming with personality and the promise of a momentary escape into dessert bliss.
If you’re new to baking, fear not: this recipe is firmly in the beginner-friendly camp. In just 15 minutes of prep, 15 minutes of baking, and a quick 5 minutes of rest time, you’ll have 24 cakelets that clock in at only 120 calories apiece. I still remember the first time I whipped up this batch for a potluck—friends couldn’t believe something so simple could taste so epic! And with options to swap in lemon zest, almond extract, or even colorful sprinkles, you’ll soon discover just how customizable these mini cakes can be. So grab your whisk, preheat that oven, and let’s dive into a world of tiny treats with big flavor!
Before we start mixing and baking, let’s gather the ingredients that make these mini cakes so irresistibly soft, sweet, and fun. Each element plays its own star role—read on to see why nothing can be left out!
This pantry staple provides the structure and backbone of your mini cakes, creating a tender crumb that holds all the goodies together.
Sweetens the batter and helps with moisture retention. It also assists in creating a light, golden crust during baking.
Acts as the primary leavening agent, giving your mini cakes their delightful rise and fluffy demeanor.
Works alongside baking powder to ensure an even lift and a perfectly tender interior.
Balances the sweetness and enhances the overall flavor profile, making all the other ingredients pop.
Brings rich, creamy notes and contributes to the melt-in-your-mouth texture. Softening it just right is key for a smooth batter.
Bind ingredients together and provide structure, giving each mini cake stability while keeping them moist.
Infuses the batter with warm, sweet aroma and depth—one teaspoon goes a long way toward elevating flavor.
Adds a subtle tang and extra moisture, ensuring your cakes stay soft and tender long after baking.
Scatter little pockets of chocolate bliss throughout each bite. You can swap in nuts or dried fruit for a personalized twist.
The base for your dreamy vanilla icing, creating a smooth, sweet glaze that’s easy to spread or drizzle.
Thins the powdered sugar to the perfect consistency, helping you achieve a silky-smooth coating.
Mirrors the flavor in the cake, tying everything together with a hint of aromatic sweetness.
Adds pops of color and whimsy—perfect for celebrations or simply brightening up an ordinary day.
Ready to transform these ingredients into a batch of adorable mini cakes? Below you’ll find every step detailed so you bake with confidence and end up with perfectly tender, flavor-packed bites.
1. Preheat your oven to 350°F (175°C). Line a mini muffin tin with paper liners or lightly grease each cup with cooking spray to prevent sticking and ensure easy release.
2. In a large mixing bowl, whisk together the all-purpose flour, granulated sugar, baking powder, baking soda, and salt until the dry ingredients are evenly distributed and free of lumps.
3. In another bowl, cream the softened butter using a hand mixer or stand mixer until it’s light in color and fluffy in texture. Add the eggs one at a time, mixing well after each addition to maintain a smooth emulsion. Stir in the vanilla extract until fully incorporated.
4. Gradually add the dry ingredients to the butter mixture, alternating with the buttermilk. Start and end with the dry mix, stirring just until combined after each addition—overmixing can lead to denser cakes.
5. Gently fold in the mini chocolate chips (or your chosen add-ins) using a spatula, so they’re evenly scattered without deflating the batter.
6. Spoon the batter into the prepared mini muffin tin, filling each cup about two-thirds full. This ensures room for the cakes to rise without overflowing.
7. Bake in the preheated oven for 12–15 minutes, or until a toothpick inserted into the center of a cake comes out clean. Let the cakes cool in the pan for 5 minutes before transferring them to a wire rack to cool completely.
8. While the mini cakes are cooling, prepare the frosting by whisking together the powdered sugar, milk, and vanilla extract until smooth. Adjust the consistency with more milk if needed for a pourable or spreadable glaze.
9. Once the mini cakes are completely cooled, drizzle or spread the frosting on top of each cake. Add sprinkles if desired for a festive finish.
10. Serve and enjoy your delightful Cutie Pie Mini Cakes immediately, or store them for later (see storage tips below)!
Elevating these mini cakes from delightful bites to unforgettable party highlights is all about presentation and pairing. Whether you’re hosting a casual get-together, a cozy tea time, or a festive celebration, the right setting and accompaniments can take these bite-sized beauties to the next level.
Arrange your mini cakes on a tiered cake stand alongside fresh berries, mint sprigs, or edible flowers. The vertical layers draw the eye and create a focal point that invites guests to reach for a treat.
Serve the mini cakes on fine china alongside delicate teas like Earl Grey or chamomile. Offer lemon wedges or dollops of homemade fruit preserves on the side for a refined flavor contrast.
Set up a decorate-your-own frosting bar with colorful sprinkles, mini candies, and extra chocolate chips. Let guests personalize their mini cakes for a fun, interactive dessert experience.
Wrap individual cakes in clear cellophane bags tied with twine or ribbon. Add a handwritten tag with baking time and a sweet note—perfect for school treats, neighborly surprises, or edible party favors.
Maintaining freshness and flavor in your Cutie Pie Mini Cakes is easy with the right storage approach. These little cakes stay moist and tender when protected from air and humidity, so follow these methods to keep them tasting as if they just came out of the oven.
Place completely cooled cakes in a single layer or separate layers with parchment paper inside an airtight container. Stored at room temperature, they stay fresh for up to 3 days—perfect for making ahead without sogginess.
If you live in a warm or humid climate, pop frosted or unfrosted cakes into the refrigerator. Keep them in a sealed container; they should last up to 5 days. Bring them back to room temperature before serving for the best texture.
Flash-freeze cooled, unfrosted mini cakes on a baking sheet, then transfer to a freezer-safe bag. They’ll keep for up to 2 months. Thaw at room temperature, then frost and decorate just before serving.
Store leftover frosting in a small airtight jar in the fridge. Stir until smooth before using, and pipe or spread onto thawed mini cakes for that freshly iced look whenever you’re ready to indulge.
This roundup of Cutie Pie Mini Cakes has guided you from whisking together the key ingredients through decorating each perfectly bite-sized treat. With just 15 minutes of prep, 15 minutes in the oven, and a quick rest, you’ll end up with 24 gorgeous mini cakes that bring big flavor to any occasion—from casual weeknight desserts to elegant brunch spreads. The tender crumb, hint of tang from buttermilk, bursts of mini chocolate chips, and smooth vanilla glaze make these petite cakes feel both nostalgic and delightfully new. Don’t forget to print this article and save it for future baking adventures—you’ll want to revisit these tiny wonders again and again. You’ll also find a helpful FAQ section just below to address any questions you might have about substitutions, troubleshooting, or making ahead.
I’d love to hear how your Cutie Pie Mini Cakes turn out! If you give this recipe a whirl or have any tweaks of your own, drop a comment or send your feedback. Questions about ingredient swaps, baking times, or storage? Let me know! Your experiences help our baking community grow and inspire more home cooks to whip up these adorable desserts. Happy baking, and may your kitchen always smell of vanilla and sweetness!
These adorable mini cakes pack a punch of buttery sweetness and chocolatey delight. Perfectly sized for any gathering, they're sure to brighten up your day!

Hi, I'm Matthew Roberts, founder of Food Recipes USA! As a culinary historian and fourth-generation restaurateur, I've dedicated my life to preserving, celebrating, and evolving the rich tapestry of American cuisine.