
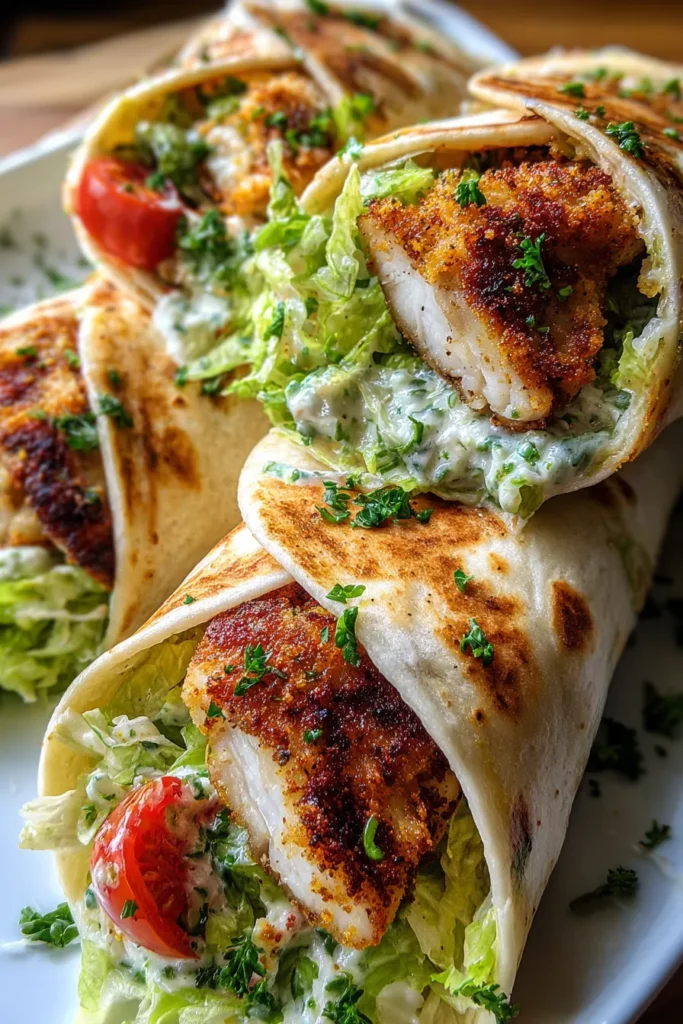
Every bite of these Crispy Chicken Caesar Wraps delivers a symphony of textures and flavors that will have you grinning from ear to ear. Crunchy, golden chicken strips nestle beneath a wave of velvety Caesar dressing, while juicy cherry tomato halves add pops of brightness and tang. It’s like wrapping up a gourmet salad in a soft tortilla blanket—everything stays neatly in place, so you get a perfect bite every time. Whether it’s a busy weeknight, a casual lunch with friends, or a sunny picnic in the park, these wraps are your go-to ticket to flavor town. There’s something undeniably comforting about taking a humble flour tortilla and transforming it into a vessel of bold, crunchy, savory goodness. With just over 45 minutes from start to finish, this recipe walks you through each step so you can unleash your inner chef without breaking a sweat.
I still remember the first time I rolled up these wraps for my family: the kitchen was filled with happy chatter as everyone marveled at how simple ingredients could taste so special. My little one insisted on helping me dredge each chicken strip, giggling when the breadcrumbs stuck to her fingers, and it turned meal prep into an afternoon of fun and laughter. Even if you’re a beginner in the kitchen, you’ll find this recipe to be a friendly companion—no complex techniques or exotic ingredients needed. You get familiar pantry staples, a straightforward breading and frying process, and a handful of fresh produce that ties everything together. With a prep time of 20 minutes, cooking time of 20 minutes, and a short 5-minute rest, you’ll have gorgeous, crispy wraps ready to devour in under an hour. At roughly 550 calories per wrap, they’re perfect for lunch or dinner, and you can easily customize them to suit your cravings or dietary needs.
To make these Caesar wraps shine, we rely on a handful of trusty ingredients that each play their own starring role. From the crisp coating on the chicken to the fresh crunch of greens, here’s what you’ll need and why they matter:
The foundation of our wraps—boneless and skinless for easy slicing into tender strips that cook evenly and soak up every bit of flavor.
Acts as the first coating layer, helping the egg adhere to the chicken and creating a dry surface for the breadcrumbs to cling to, resulting in that prized crispy crust.
Enhances all the flavors, ensuring the chicken and seasonings pop in every bite while keeping the overall taste balanced.
Provides a subtle kick and aromatic warmth, cutting through the richness of the dressing and cheese.
Brings a fragrant garlic essence without overpowering, adding depth and savoriness to each crispy morsel.
Lends a gentle sweetness and savory undertone that rounds out the spice blend and complements the parmesan.
Beaten to a smooth consistency, they act as a binding agent, creating the perfect sticky surface for the breadcrumbs to adhere.
Known for their extra-light texture, they yield a super-crunchy exterior that stays crisp even when wrapped in a tortilla.
Mixed into the breadcrumbs, it melts slightly as you fry, adding salty, nutty flavor directly into the chicken’s coating.
Provides a neutral frying medium that reaches the right temperature quickly, ensuring the chicken strips turn golden and irresistibly crispy.
Soft yet sturdy enough to hold all the fillings, folding easily without tearing, and delivering that classic wrap experience.
The creamy, tangy heart of the wrap that ties everything together, bringing rich umami and a hint of anchovy tang.
Adds fresh, crisp crunch and a mild, slightly bitter green note that balances the richness of the chicken and dressing.
Juicy bursts of sweetness and acidity that brighten each bite and add a vibrant pop of color.
A final sprinkle of salty, savory goodness that reinforces the Caesar flavor and adds extra cheesiness to every mouthful.
Now that you’ve gathered your ingredients, it’s time to turn them into glorious, handheld wraps. Follow these steps carefully, and get ready to wow your taste buds:
1. Prepare the chicken strips
Start by slicing each chicken breast into uniform thin strips. Consistent sizing ensures even cooking and a perfectly crispy exterior on every piece.
2. Mix the flour seasoning
In a shallow dish, whisk together the all-purpose flour, salt, black pepper, garlic powder, and onion powder until evenly combined. This seasoned flour sets the stage for the coating.
3. Beat the eggs
In a second shallow bowl, lightly beat the eggs until the yolks and whites fuse into a smooth, golden liquid. This creates a sticky surface for the crumbs to adhere.
4. Combine panko and cheese
In a third dish, stir the panko breadcrumbs and grated Parmesan cheese together. The cheese will melt slightly into the crumbs as the chicken fries, enhancing both flavor and texture.
5. Dredge and coat
Working one strip at a time, first dredge the chicken in the seasoned flour, shaking off any excess. Next, dip it into the beaten eggs, ensuring it’s fully coated. Finally, press it into the panko-Parmesan mixture, gently pressing so the crumbs adhere firmly.
6. Fry to golden perfection
Heat the vegetable oil in a large skillet over medium heat. Once shimmering, carefully add the coated chicken strips in a single layer. Fry for about 3–4 minutes per side, until each strip is golden and crispy. Transfer to a paper towel–lined plate to drain any excess oil.
7. Warm the tortillas
Briefly heat the flour tortillas in a microwave or a warm oven until they’re pliable and easy to roll without cracking.
8. Add the dressing
Lay each tortilla flat and spread about ¼ cup of Caesar dressing down its center, leaving room at the edges to fold later.
9. Layer the fillings
Over the dressing, layer chopped romaine lettuce, halved cherry tomatoes, shredded Parmesan cheese, and several of the crispy chicken strips.
10. Roll and slice
Fold in the sides of the tortilla, then roll up tightly from the bottom. Use a sharp knife to slice each wrap in half diagonally, showcasing the colorful, crunchy cross section.
When it comes to serving these wraps, you have plenty of fun options to elevate the experience. Whether you’re aiming for a casual lunch spread or a more refined picnic presentation, these suggestions will have your guests asking for seconds.
Storing these wraps properly ensures they stay as fresh and flavorful as the moment you made them. Here’s how to preserve their crunch and creaminess whether you’re prepping ahead or saving leftovers.
Store the chicken strips and fresh fillings in separate airtight containers. Keep the tortillas wrapped in foil or plastic wrap. Assemble just before serving to maintain maximum crispness in the coating and avoid soggy lettuce.
If you’ve already rolled your wraps, wrap each half tightly in plastic wrap or parchment paper, then place them in an airtight container in the fridge. Consume within 2 days for the best texture and flavor.
For meal prep, wrap each assembled wrap in plastic wrap, then foil. Label with the date and freeze up to 1 month. Thaw in the refrigerator overnight and warm briefly in a low oven to refresh the crust.
Store any leftover Caesar dressing and toppings like tomatoes or lettuce in their own sealed containers. Dress at the last minute to preserve the bright flavors and crisp textures of your veggies.
We’ve taken a simple set of ingredients—tender chicken breasts, pantry staples like flour and panko, fresh romaine and cherry tomatoes—and turned them into something truly special: handheld bites of creamy, crunchy, tangy delight. From the seasoned dredge to the golden pan-fry, every step works together to deliver a wrap that’s as easy to make as it is to devour. You can tailor these Crispy Chicken Caesar Wraps in endless ways—swap in whole wheat tortillas, sprinkle on extra toppings, or fire up the heat with a dash of cayenne powder in your flour mix. Whether you decide to serve them with sweet potato fries for a fun twist or pack them cold for lunch on the go, this recipe adapts to your schedule and tastes.
Feel free to print this article and save it in your recipe binder for quick reference next time you need a show-stopping lunch or dinner idea. You’ll also find a FAQ section below to help with any questions about ingredient swaps, cooking tips, or storage tricks. If you give these wraps a try, I’d love to hear how they turned out—did your kitchen transform into a happy, crunchy playground? Let me know in the comments if you have any feedback, questions, or fun stories from your own wrap-making adventures. Happy cooking, and here’s to many more delicious moments shared over a perfectly rolled wrap!
These Crispy Chicken Caesar Wraps combine golden, crunchy chicken with fresh romaine, tangy dressing, and cherry tomatoes, all neatly wrapped in a tortilla. Perfect for a quick lunch or picnic treat!

Hi, I'm Matthew Roberts, founder of Food Recipes USA! As a culinary historian and fourth-generation restaurateur, I've dedicated my life to preserving, celebrating, and evolving the rich tapestry of American cuisine.