
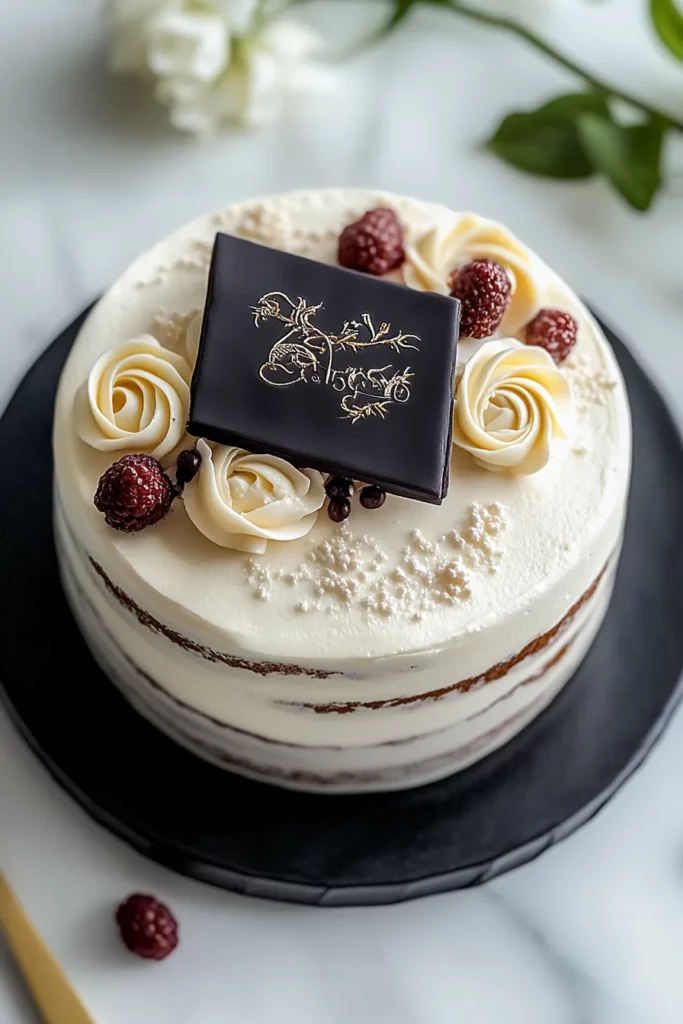
There’s something utterly exhilarating about celebrating milestones with cake—especially when it’s a graduation cake that’s been lovingly customized to honor a student’s hard work. From the moment you slice into that perfectly balanced, moist vanilla sponge, you’re greeted by pillowy layers of sweetness, and every bite feels like a confetti blast of joy. When school colors come alive in vibrant buttercream stripes or polka dots, and fondant diplomas and caps perch elegantly along the edges, you know you’ve created more than a dessert—you’ve crafted a memory that will sparkle in graduates’ hearts for years to come.
As someone who’s spent countless weekends in a flurry of flour and frosting, I can tell you that designing a graduation cake is as therapeutic as it is celebratory. It’s a chance to flex your creative muscles, experimenting with color palettes that perfectly match a school’s emblem or a grad’s favorite hues. And oh, the buttercream—a silky canvas that takes on every tint you dream up, offering the richest, creamiest backdrop for edible glitter accents. Whether it’s the proud grin on your graduate’s face as they spot their name piped in icing, or the gentle hum of conversation that fills the room once the cake appears, these moments are what make all the measuring and mixing truly worthwhile.
First things first: let’s talk about the building blocks of our show-stopping cake. Each component plays a vital role, from the sturdy crumb of the sponge to the silky layers of frosting that hold your custom designs in place.
Provides the essential structure for a tender yet sturdy cake. Its balanced protein content ensures your layers rise evenly without becoming tough.
Acts as a leavening agent, creating those light, fluffy pockets in the crumb that make each slice feel like a little cloud of celebration.
Enhances the sweetness of the cake by balancing flavors, preventing the sugar from overwhelming your palate.
Adds richness and depth to both the cake and the buttercream. Using softened butter helps achieve a smooth, creamy consistency.
Sweetens and tenderizes the crumb, contributing to the cake’s golden color and delightful mouthfeel.
Bind ingredients together, providing moisture and stability. They also help with leavening when beaten properly.
Infuses a warm, aromatic note that complements the sweet vanilla sponge and aromatic buttercream.
Introduces moisture and fat for a tender crumb, ensuring the cake doesn’t dry out during baking.
Lends tanginess and extra moisture, resulting in a cake that stays soft and delicious for days.
Keeps the crumb super moist and adds a gentle, silky texture that butter alone might not achieve.
(Made from softened butter, powdered sugar, heavy cream, vanilla extract, and a pinch of salt.) This lush, spreadable frosting is your palette for vibrant custom designs.
Transforms plain buttercream into bold school colors or delightful pastel accents, making your cake uniquely yours.
Provides a smooth, sculptable medium for creating graduation caps, diplomas, tassels, and other decorations.
Adds that extra sparkle and festive flair, perfect for capturing the celebratory spirit.
Serves as an adhesive to securely attach fondant pieces and edible decorations.
Mini diplomas, caps, or tassels that instantly convey graduation vibes and personalize your creation.
Ready to dive into the magic of baking and decorating? Here’s a detailed, step-by-step guide to turn humble ingredients into a masterpiece that steals the show at any graduation party.
1. Preheat your oven to 350°F (175°C). Grease and flour three 9-inch round cake pans, ensuring the batter won’t stick and your layers bake evenly.
2. In a medium bowl, whisk together the flour, baking powder, and salt to distribute the leavening agent and seasonings evenly. Set this dry mixture aside.
3. In a large bowl, cream together the softened butter and granulated sugar until the mixture is light and fluffy, about 3–5 minutes. This aeration step is crucial for a tender crumb.
4. Add the eggs one at a time, beating well after each addition to maintain an emulsion. Stir in the vanilla extract for a burst of flavor.
5. Gradually fold in the dry ingredients in three parts, alternating with the milk, sour cream, and vegetable oil. Start and finish with the dry ingredients, mixing just until combined to avoid overworking the batter.
6. Divide the batter evenly among the prepared pans, smoothing the tops for uniform layers.
7. Bake for 25–30 minutes, or until a toothpick inserted into the center comes out clean. Let the cakes cool in the pans for 10 minutes, then carefully transfer them to a wire rack to cool completely.
8. While the cakes cool, prepare the buttercream frosting. In a large bowl, beat the softened butter until smooth. Gradually add powdered sugar, heavy cream, vanilla extract, and salt, continuing to beat until the frosting is light and fluffy.
9. Once the cakes are completely cool, level each layer with a serrated knife if needed to ensure flat surfaces. Place the first layer on a cake board or plate, and spread a thin layer of buttercream on top.
10. Place the second cake layer on top and repeat the frosting process, finishing with the third layer.
11. Apply a crumb coat (a thin layer of frosting) over the entire cake and refrigerate for 20–30 minutes to set.
12. After the crumb coat has set, apply a final, thicker layer of frosting to cover the cake. Smooth the surface with a bench scraper or spatula for a polished finish.
13. Tint portions of the buttercream with food coloring to create custom designs—think school-color borders, stripes, or playful polka dots.
14. Roll out fondant and craft graduation-themed decorations like caps, diplomas, or tassels. Use piping gel or corn syrup to attach them securely to the cake.
15. For a glittering finish, sprinkle edible glitter over the top or use piping gel to paint on intricate accents that catch the light.
When your custom-designed cake finally takes center stage, how you present and serve it can elevate the celebration to the next level. Here are a few inspired ways to showcase your work of edible art:
Arrange dessert plates and forks in your graduate’s school colors around the cake table. A matching table runner or confetti in complementary shades ties the theme together beautifully.
Place the cake on a sturdy, tiered stand so guests can admire every angle before you slice. Elevating the cake draws the eye and creates a focal point for photos.
Surround the base of the cake with fresh blooms or greenery that echo the cake’s color scheme. Just ensure any flowers used are non-toxic and pesticide-free!
Print small, elegant name cards or tags featuring each guest’s name and a mini graduation motif. Distribute them as place settings to make everyone feel part of the celebration.
Proper storage is key to preserving both the visual impact and flavor of your custom graduation cake. Follow these tips to maintain that fresh-from-the-oven taste and picture-perfect appearance:
If you have leftover slices, wrap each piece tightly in plastic wrap and store in the fridge. When ready to enjoy, let them come to room temperature for about 30 minutes to restore their soft texture.
Place the entire cake under an airtight cake dome or in a large, clear storage container. This prevents the frosting from drying out and keeps decorations intact.
Store your cake in the coolest part of the refrigerator, away from the door. Direct light and frequent temperature shifts can cause the buttercream to soften or decorations to shift.
You can assemble and decorate the cake a day in advance, then cover it lightly and refrigerate. Before serving, let it sit at room temperature for about an hour to bring back that silky mouthfeel.
Graduation day deserves a dessert that’s as remarkable as the achievement it commemorates, and these Celebratory Graduation Cakes with Custom Designs deliver in every sense. From the moment you combine flour, sugar, and butter into a luscious batter to the final brush of edible glitter across fondant tassels, you’re not just baking—you’re crafting a centerpiece that encapsulates pride, joy, and festivity. This cake’s moist vanilla sponge layered with silky buttercream, kissed by vibrant school-color accents and topped with whimsical fondant caps and diplomas, will have your guests oohing and ahhing long before you cut the first slice. Plus, with detailed instructions on how to bake, frost, and decorate—along with savvy tips on serving and storage—you’re fully equipped to create a showstopper that stands up to scrutiny in both taste and design.
Feel free to print this article and tuck it into your recipe binder for easy reference next graduation season. You’ll also find a helpful FAQ below to answer any last-minute questions. And of course, I’d love to hear how your cake turns out! Drop a comment, share a photo, or pose any questions if you need more guidance. Here’s to making every graduation moment truly unforgettable—one delicious, custom-designed slice at a time!
Experience a moist vanilla sponge layered with silky buttercream, vibrant school-color accents, and fondant caps and diplomas. Sparkling edible glitter adds a festive touch for an unforgettable graduation celebration.

Hi, I'm Matthew Roberts, founder of Food Recipes USA! As a culinary historian and fourth-generation restaurateur, I've dedicated my life to preserving, celebrating, and evolving the rich tapestry of American cuisine.