
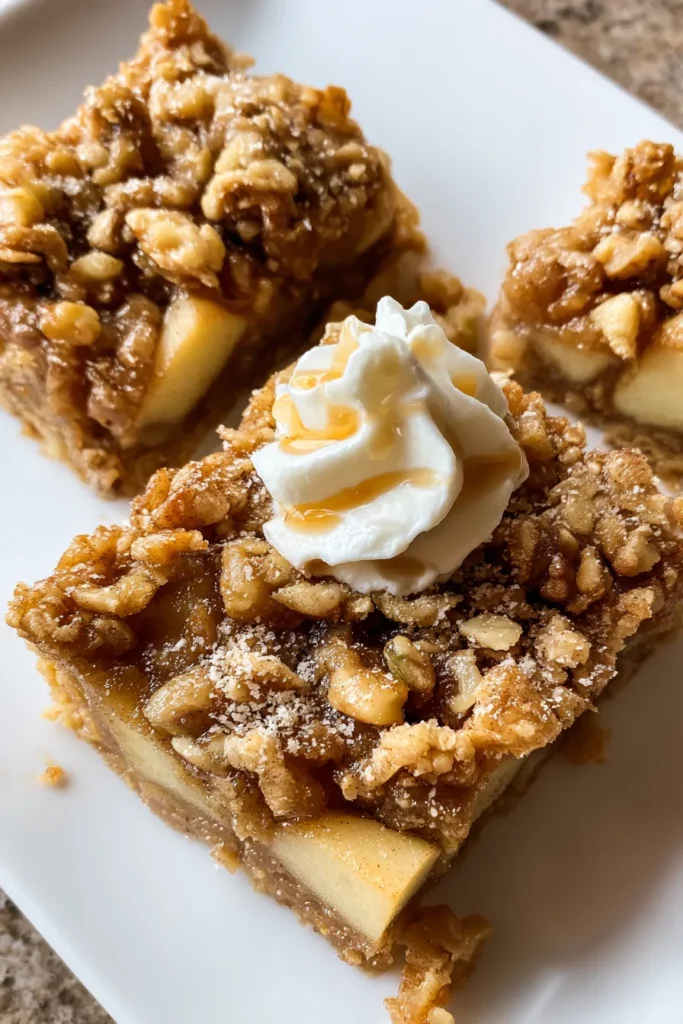
There’s something incredibly comforting about biting into a tender, sweet bar that captures the very best flavors of autumn in every mouthful. These Apple Crisp Bars are a brilliant way to bring that cozy feeling right into your kitchen—whether it’s the first chill of fall in the air or you simply crave a warm, spiced treat any time of year. Each bar boasts a layer of juicy, cinnamon-spiced apples nestled between a buttery oat crust and a crunchy crumb topping, creating a beautiful harmony of soft and crisp textures that will have everyone reaching for seconds.
Beyond their delicious taste, these bars are amazingly simple to whip up, even if you’re new to baking. From peeling and tossing the apples in zesty lemon juice to whisking dry ingredients into golden crumbs, every step feels like a fun kitchen project rather than a chore. And because they bake in a 9×9-inch pan to produce nine glorious squares, these bars are just the right size for sharing (or keeping all to yourself—no judgment here!). With just 15 minutes of prep, about 30 minutes in the oven, and a brief 20-minute rest, you’ll soon be savoring warm, cinnamon-filled squares that will fill your home with nostalgic good vibes.
Every fantastic recipe starts with the right lineup of ingredients. For these Apple Crisp Bars, each component plays a key role in delivering that perfect balance of sweetness, spice, and crunch. Let’s break down why these staples deserve a starring role in your pantry.
Provides the structure for both the crust and the crumble topping, ensuring everything holds together without becoming too dense.
Infuse a nutty flavor and hearty texture, giving the bars that signature oat-crisp bite and adding wholesome fiber.
Offers a deep, caramel-like sweetness that melds beautifully with the spices while helping the crumb topping turn golden.
Gives a subtle lift to the crust, keeping it light and tender rather than flat and heavy.
Enhances all the sweet and spiced flavors, rounding out the taste so each element shines.
When melted and mixed in, it binds the dry ingredients into coarse crumbs and enriches the bars with a lush, buttery mouthfeel.
The heart of the recipe—sweet and slightly tart when tossed with spices, they become soft, juicy pockets that pair perfectly with the crisp topping.
Adds a bright, tangy note that prevents the apples from browning and balances the overall sweetness.
Coats the apple pieces, helping them caramelize slightly as they bake and intensifying their natural flavor.
Infuses the filling with warm, aromatic spice that embodies the essence of apple desserts.
Provides a subtle, earthy warmth that layers nicely with the cinnamon for a more complex flavor profile.
Introduce an extra crunch and mild bitterness that contrasts delightfully with the sweet apple layers.
Bringing these bars to life is both satisfying and straightforward. You’ll move from mixing dry ingredients into buttery crumbs to tossing sweet-spiced apples, layering them, and baking until everything turns golden and irresistible.
1. Preheat your oven to 350°F (175°C). Grease a 9×9-inch baking pan and line it with parchment paper, leaving a generous overhang on two sides to help lift the finished bars out easily.
2. In a large bowl, whisk together the all-purpose flour, rolled oats, brown sugar, baking powder, and salt. Pour in the melted butter and stir until the mixture transforms into coarse crumbs.
3. Scoop out about ¾ cup of the crumb mixture and set it aside for the topping. Press the remaining crumbs firmly and evenly into the bottom of the prepared pan to create a sturdy crust.
4. In a separate bowl, combine the diced apples with lemon juice, granulated sugar, cinnamon, and nutmeg. Toss gently so every apple cube gets an even, spiced coating.
5. Spread the apple mixture in an even layer over the crust, making sure it reaches all corners.
6. Sprinkle the reserved crumb mixture over the apples, followed by the chopped walnuts if you’re using them, for an added layer of crunch.
7. Bake in the preheated oven for 30–35 minutes, or until the topping is golden brown and the apples are tender when pierced with a fork.
8. Remove the pan from the oven and let it cool for at least 20 minutes. Use the parchment overhang to lift the entire block of bars out onto a cutting board, then slice into squares and serve.
These bars taste amazing straight from the pan, but with a few simple finishing touches, you can elevate them into an unforgettable dessert experience. Whether you’re serving at a cozy family dinner or bringing treats to a potluck, these ideas will have everyone raving.
Preserving the soft apple filling and crunchy topping is easier than you might think. Proper storage not only maintains their delightful texture but also lets you enjoy these bars for days to come without compromising flavor or freshness.
Keeping your Apple Crisp Bars at their best relies on reducing air exposure and controlling temperature. Warm ingredients often steam up a container, which can soften the crumble topping. Let the bars cool completely on a wire rack so moisture evaporates. Once cooled, choose the storage method that suits how quickly you plan to enjoy them—and remember, each method aims to protect both the texture and the rich spiced flavors you love.
Store bars in a sealed container at room temperature if you plan to eat them within 1–2 days. Use parchment or wax paper between layers to prevent sticking.
Place the cooled bars in an airtight container or wrap tightly with plastic wrap, then refrigerate. They’ll stay fresh and maintain their slightly crisp topping for up to 3 days.
Wrap individual bars in plastic wrap, then tuck them into a freezer-safe bag removing as much air as possible. Freeze for up to 2 months. Thaw overnight in the fridge or reheat gently in the oven.
To regain that just-baked warmth and crispiness, pop bars in a 350°F oven for about 5–7 minutes or microwave briefly on low power, watching carefully to avoid sogginess.
Throughout this article, we’ve taken you step by step through crafting the perfect Apple Crisp Bars—from selecting your key ingredients and mixing that buttery oat crust to baking mouthwatering layers of spiced apples and crunchy topping. These bars truly shine whether you’re a baking beginner or a seasoned home cook, offering a dessert that’s both approachable and deeply satisfying. With just a handful of everyday pantry staples and less than an hour from start to finish (including rest time), you’ll find yourself returning to this recipe again and again, especially when the craving for that classic cinnamon-apple combination strikes.
Go ahead and print this article or save it in your recipe collection so you can easily refer back to it whenever you’re in the mood for a warm, comforting dessert. You’ll also notice a FAQ section below that answers common questions about ingredient swaps, flavor variations, and troubleshooting tips—keeping you fully equipped to bake with confidence. We’d love to hear how your Apple Crisp Bars turn out: share your successes, any twists you tried, or questions you encountered along the way. Your feedback helps us refine and grow, ensuring every baking adventure is even better than the last!
Experiment, have fun, and don’t hesitate to drop a comment if you need clarification or just want to brag about how much everyone adored these bars. Happy baking—and here’s to many delicious moments shared over gooey, cinnamon-kissed squares of homemade goodness!
These Apple Crisp Bars balance sweet, tender apples with a crunchy oat topping. Perfect for dessert, they're quick to make and a hit at any gathering!

Hi, I'm Matthew Roberts, founder of Food Recipes USA! As a culinary historian and fourth-generation restaurateur, I've dedicated my life to preserving, celebrating, and evolving the rich tapestry of American cuisine.